MSP360 + GDX Cloud Integration Guide
Quick setup for backing up your files to GDX Cloud using MSP360.
Prerequisites
- GDX Cloud account with S3 enabled
- Access Key ID and Secret Access Key (from GDX Cloud console)
- MSP360 application installed
Protect Your Credentials
Keep your GDX Cloud Access Key ID and Secret Access Key secure. Never share them or commit them to version control. These credentials provide full access to your bucket.Step 1: Start Backup
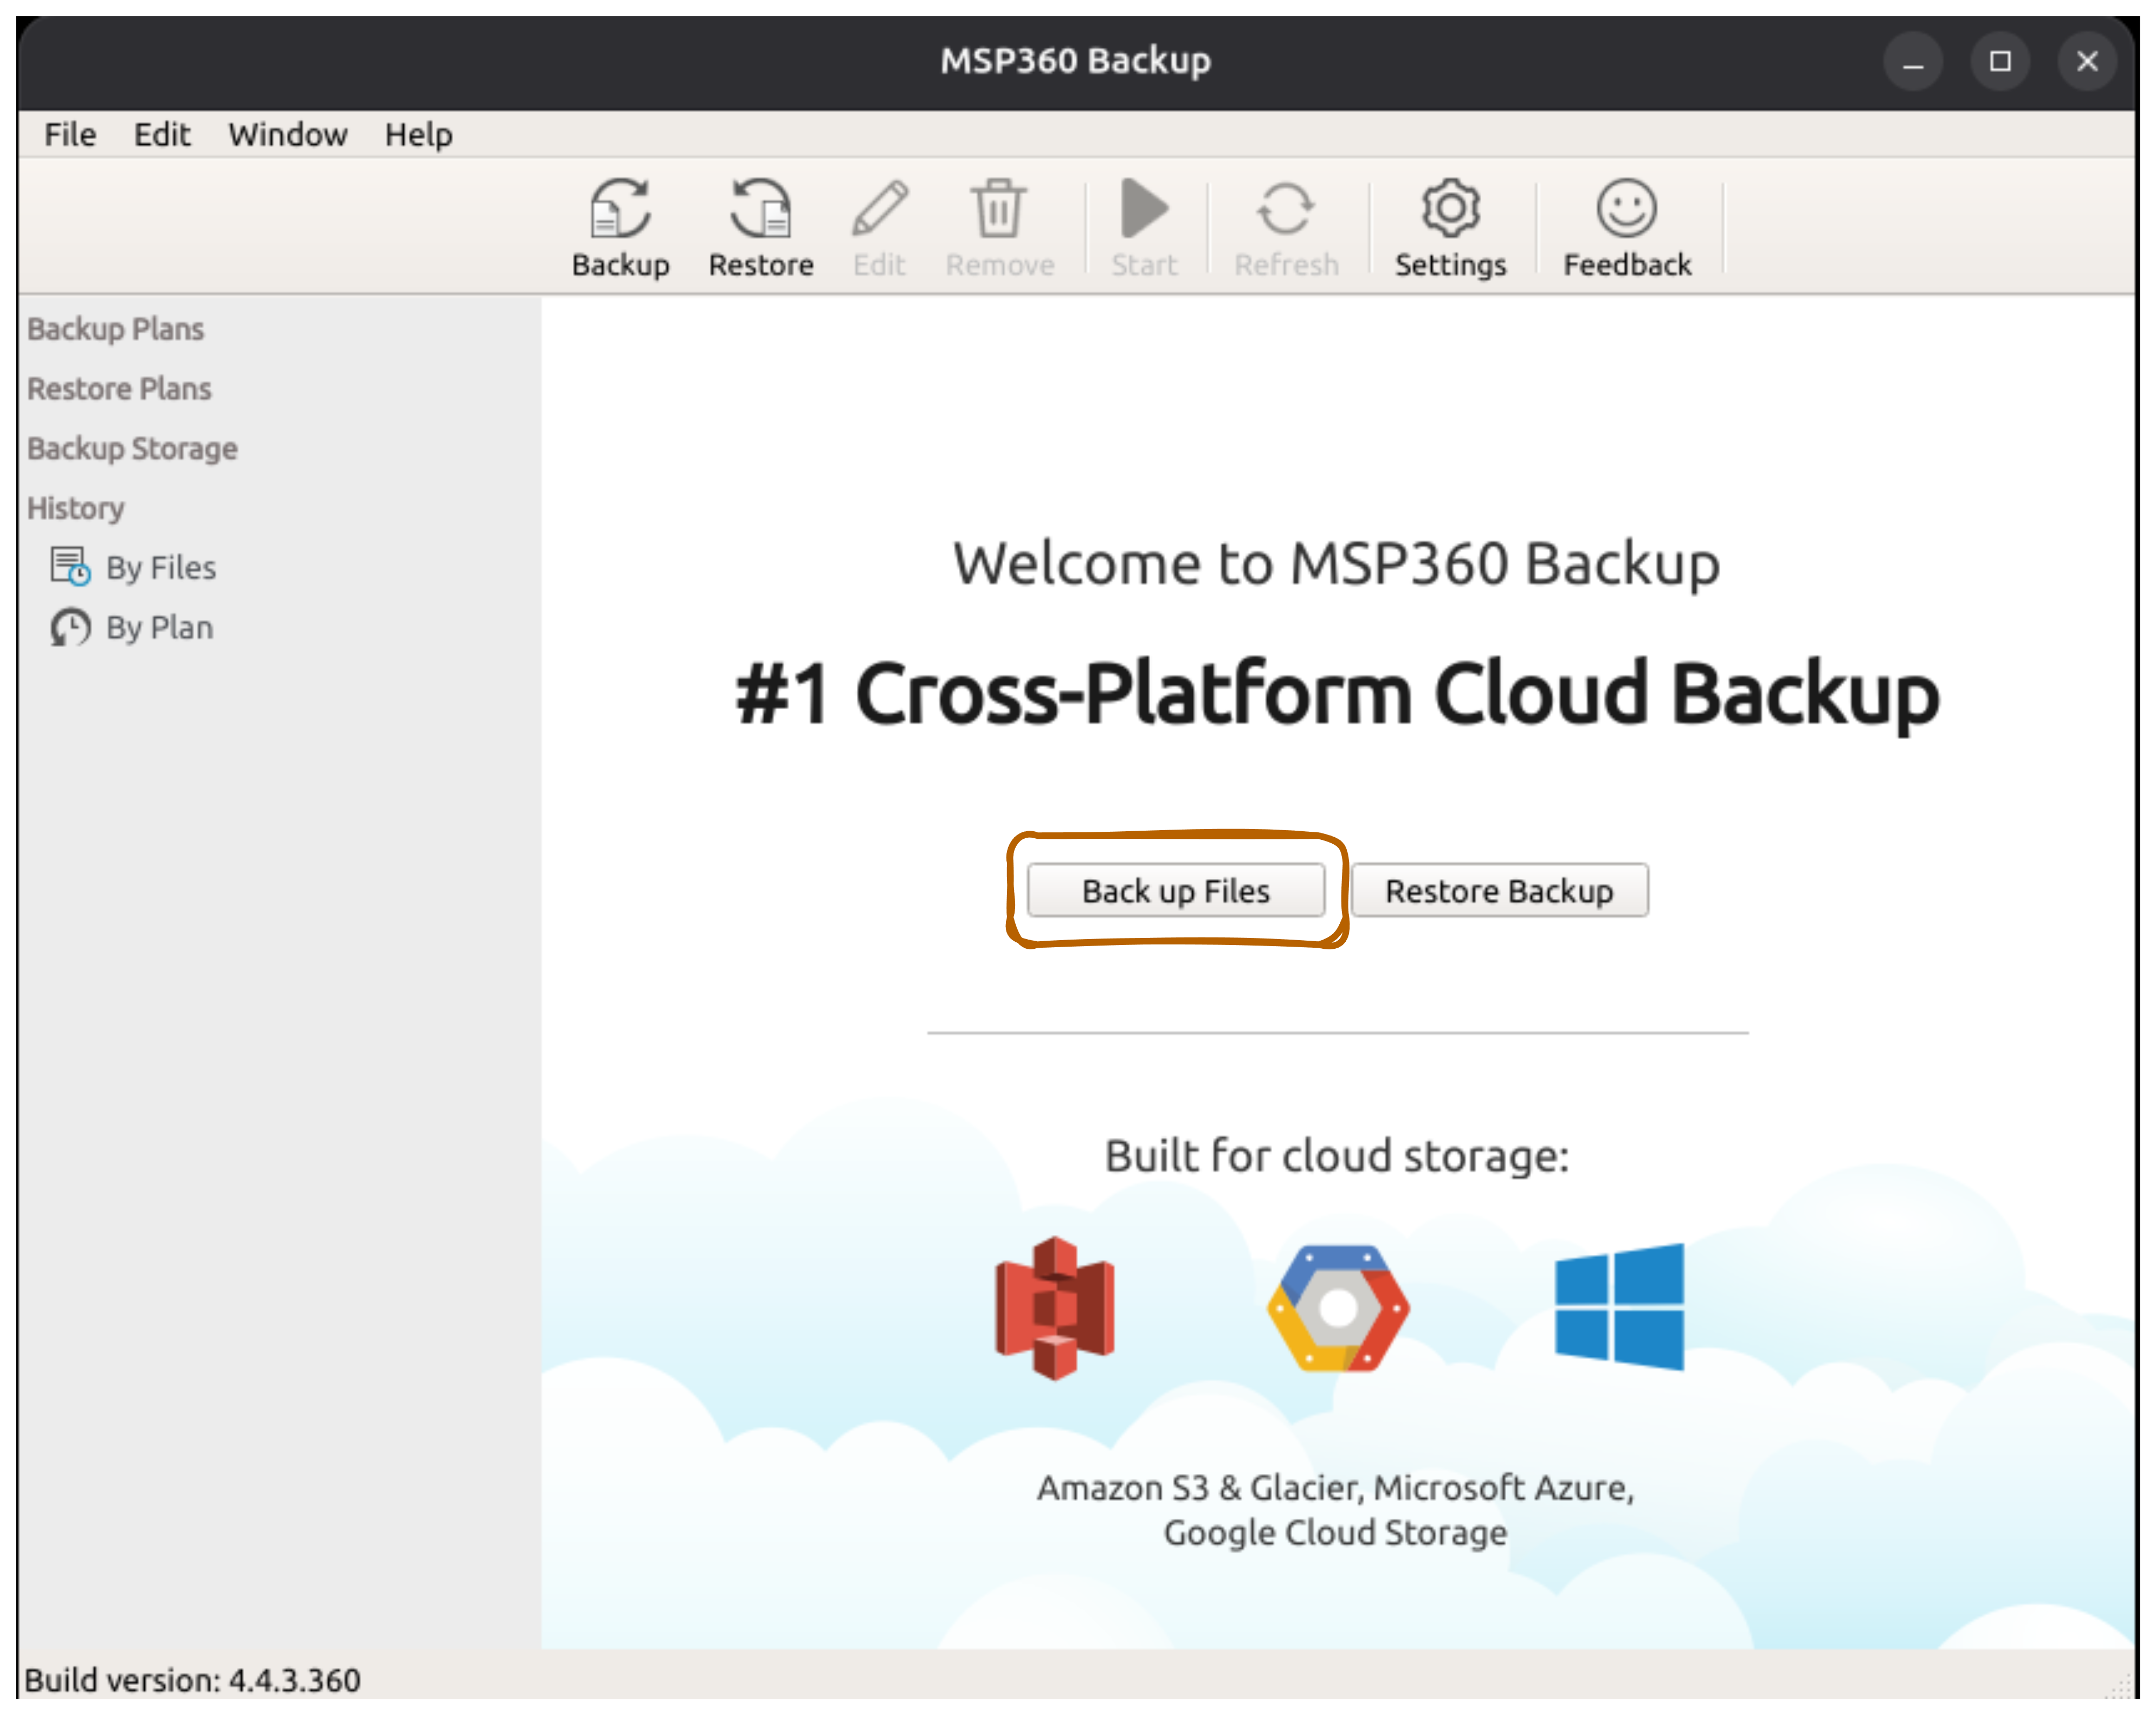
- Open MSP360 (CloudBerry Backup)
- Click Back up Files (orange button highlighted)
The welcome screen shows: “Welcome to MSP360 Backup - #1 Cross-Platform Cloud Backup”
Step 2: Select S3 Compatible Storage
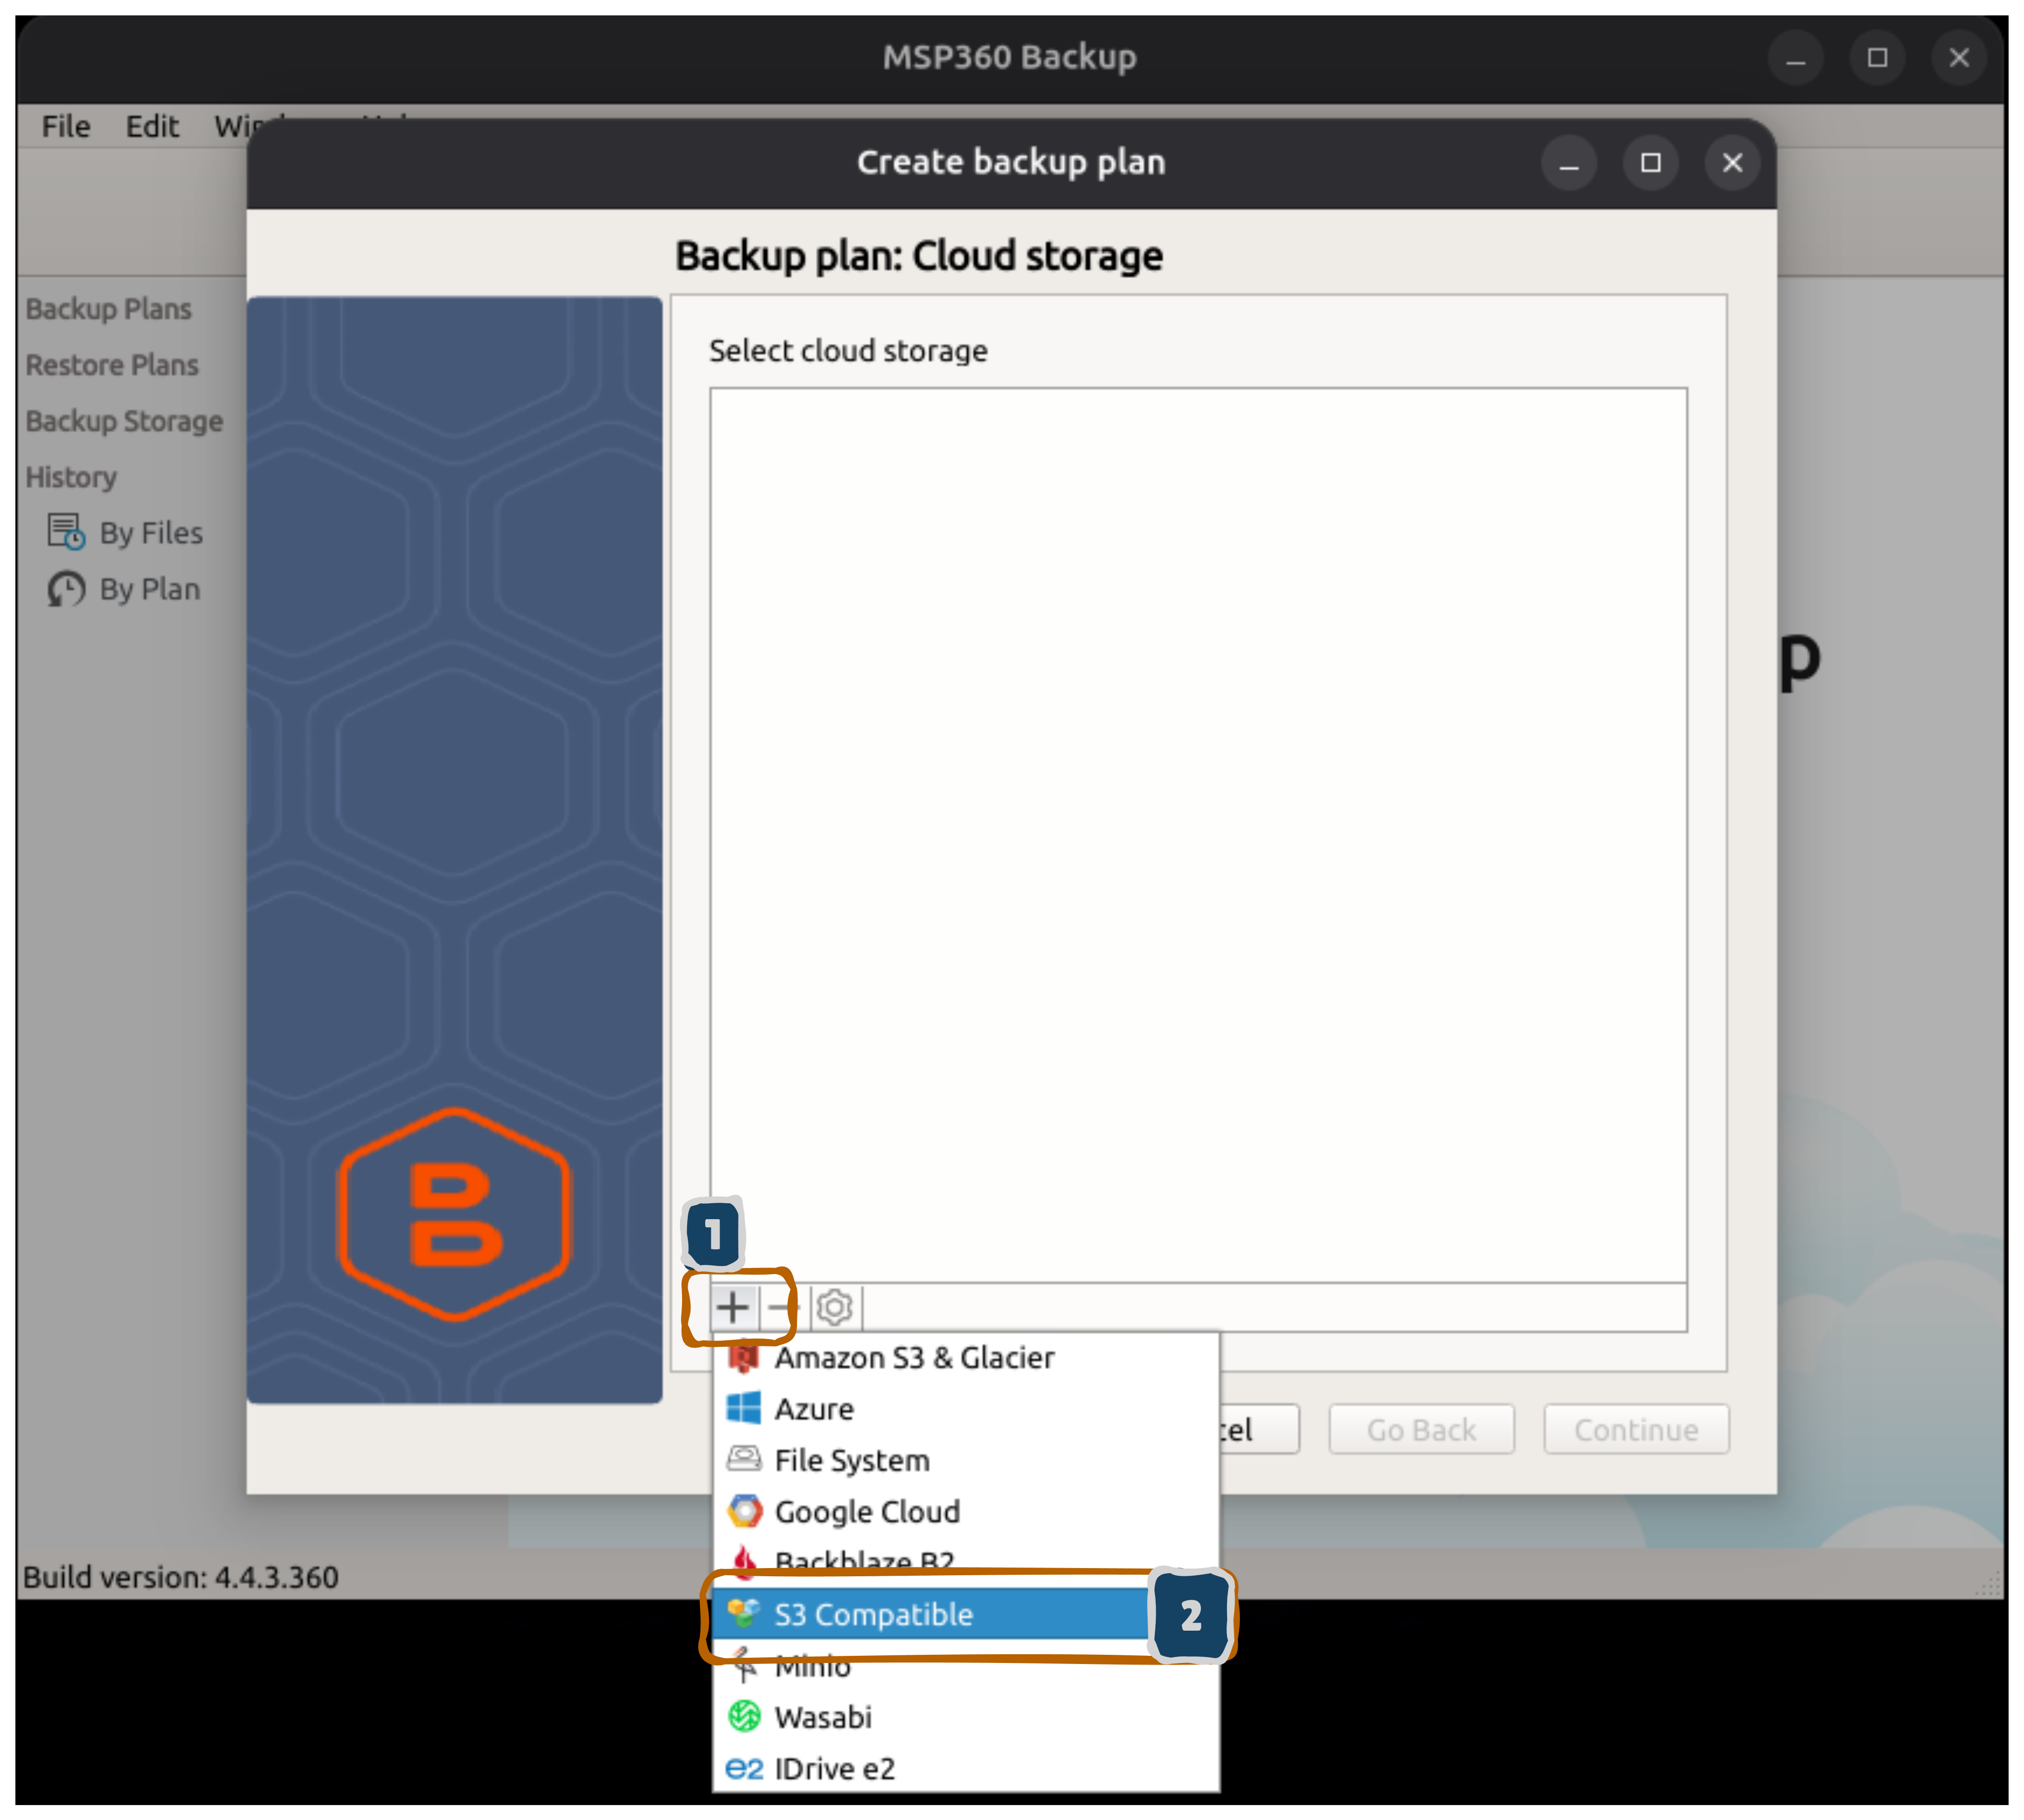
- In the “Create backup plan” dialog, look at Select cloud storage
- Find and click on S3 Compatible (highlighted in blue)
This option allows you to use GDX Cloud’s S3-compatible endpoint.
Step 3: Enter Your GDX Cloud Credentials
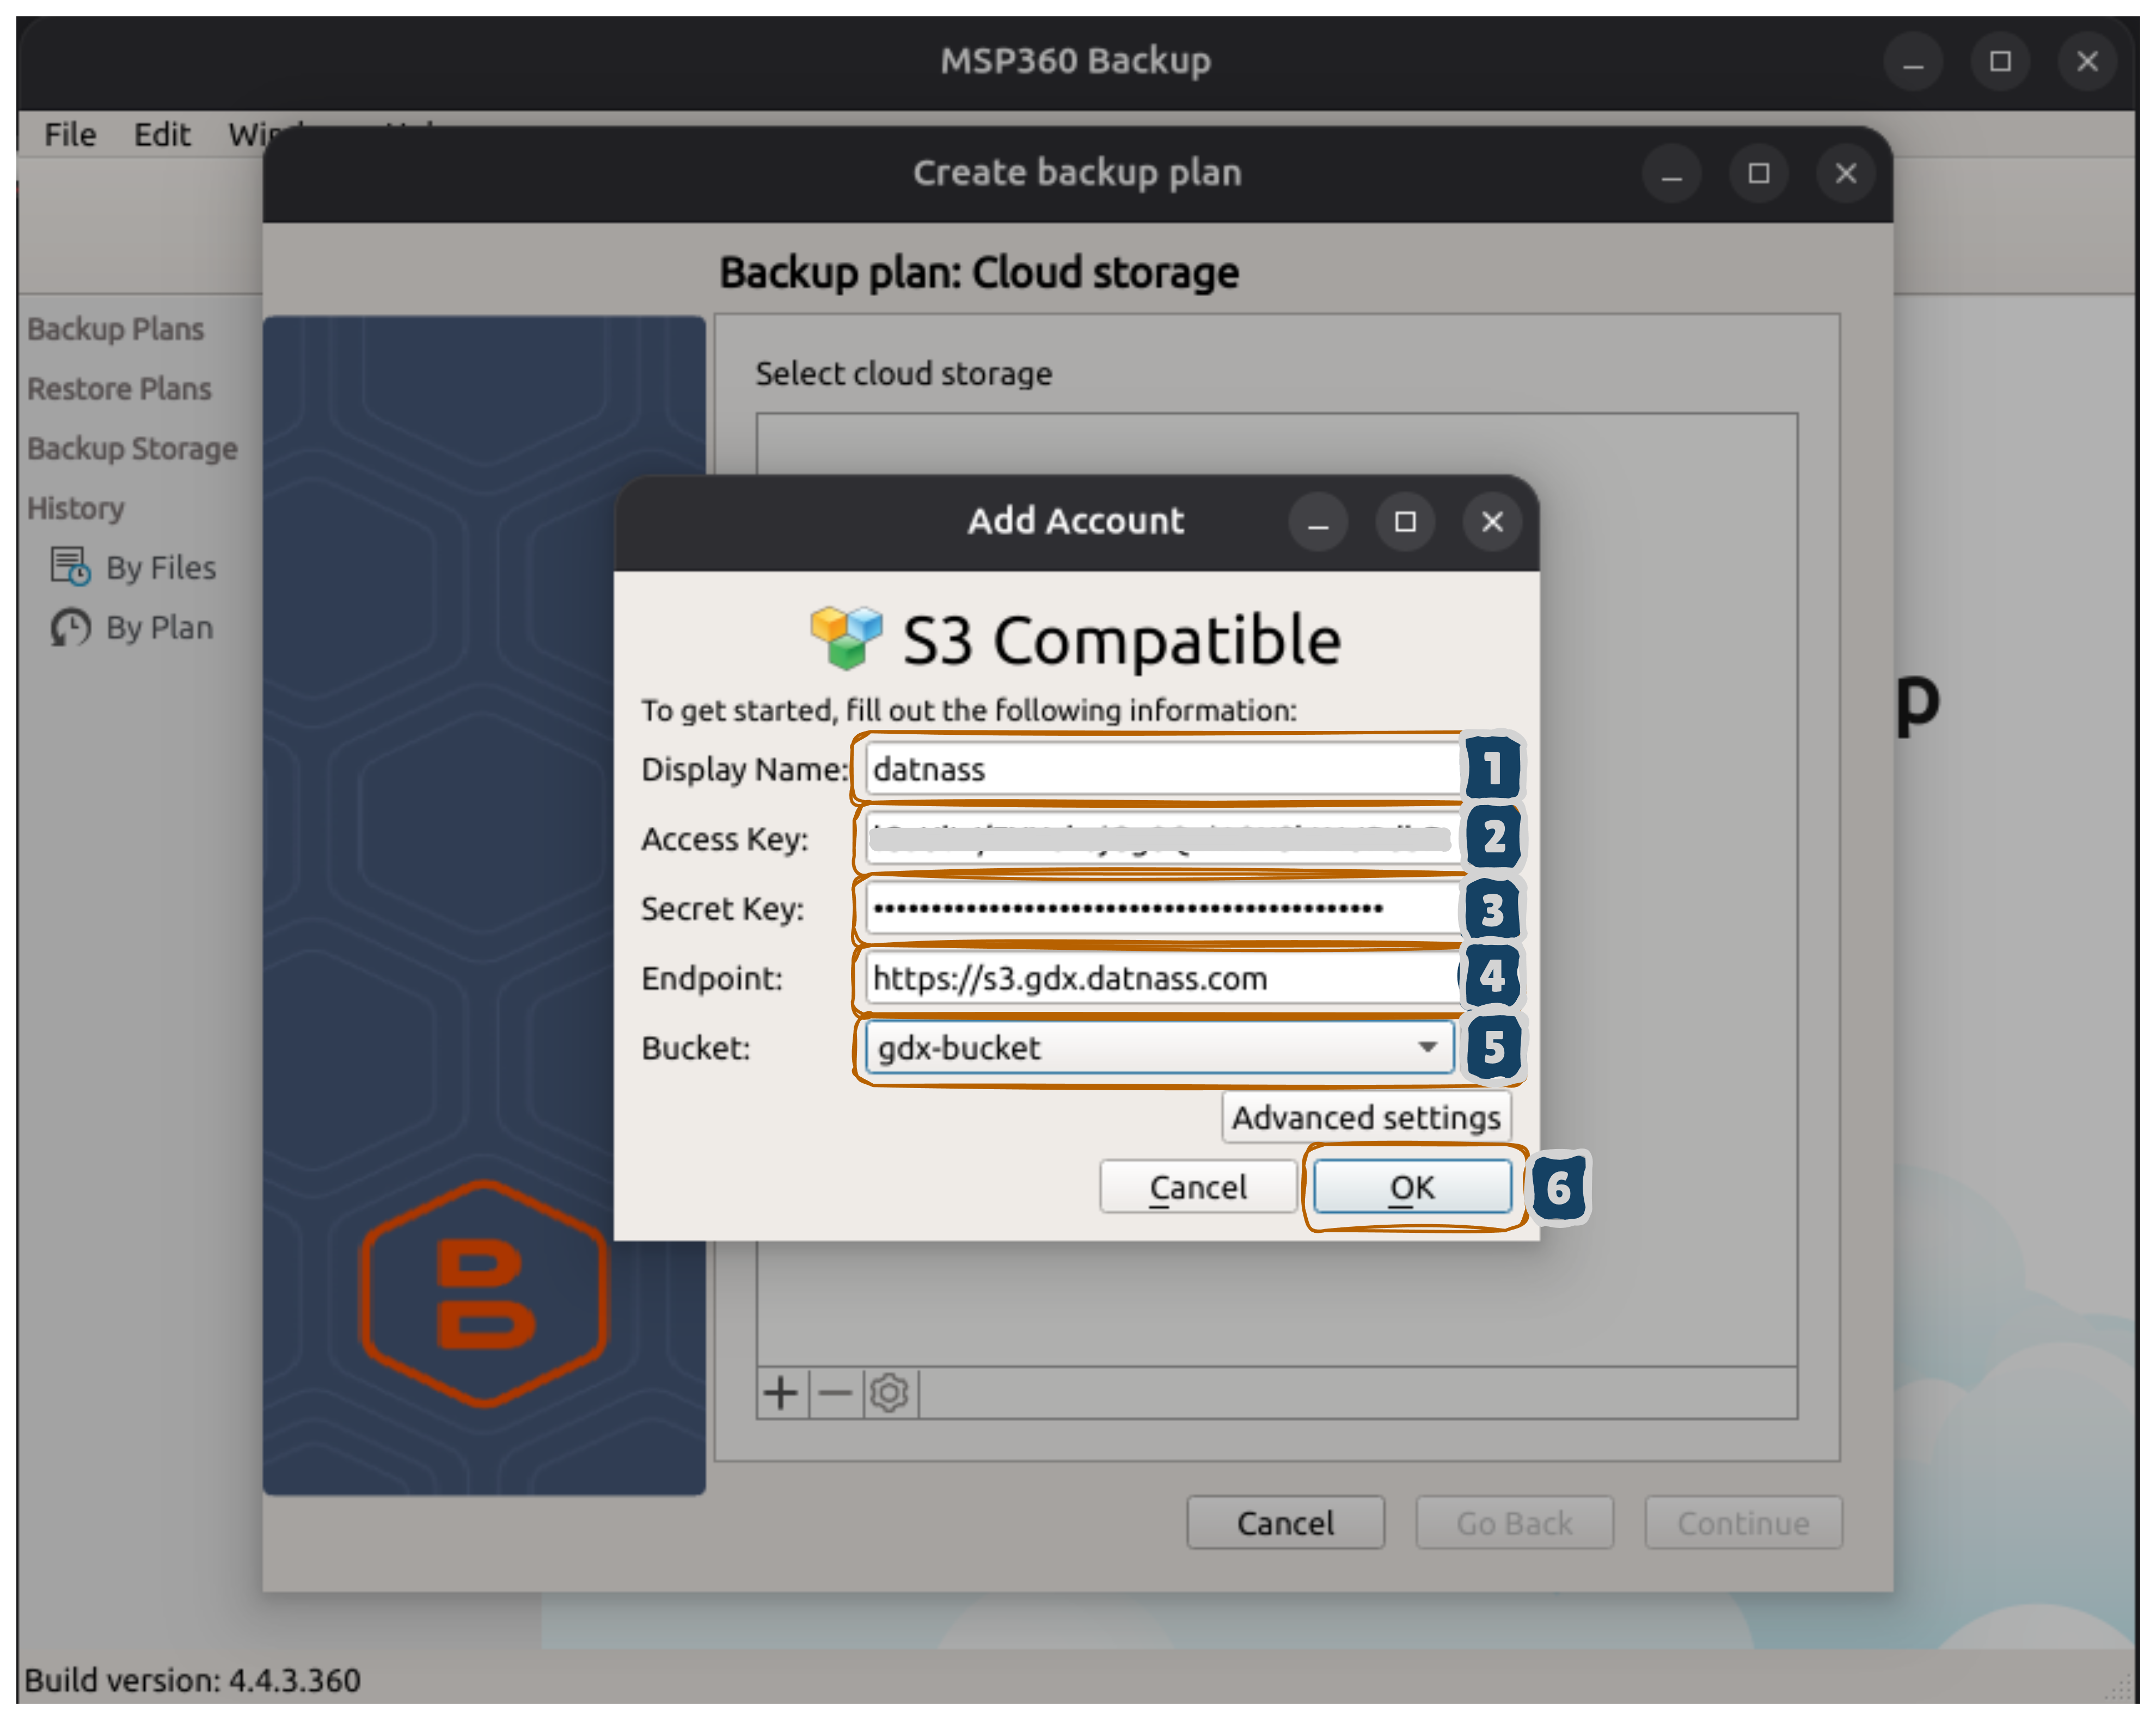
Fill out the fields as shown in the dialog:
- Display Name:
datnassorGDX Cloud - Access Key: Your GDX Cloud Access Key ID
- Secret Key: Your GDX Cloud Secret Access Key (displayed as dots)
- Endpoint:
https://s3.gdx.datnass.com - Bucket:
gdx-bucket(or your bucket name) - Click OK
S3 Configuration Details
Ensure you use the exact endpoint URL and valid credentials from your GDX Cloud console. Verify that your bucket name matches the one in your GDX Cloud account.Step 4: Select Your Storage Account
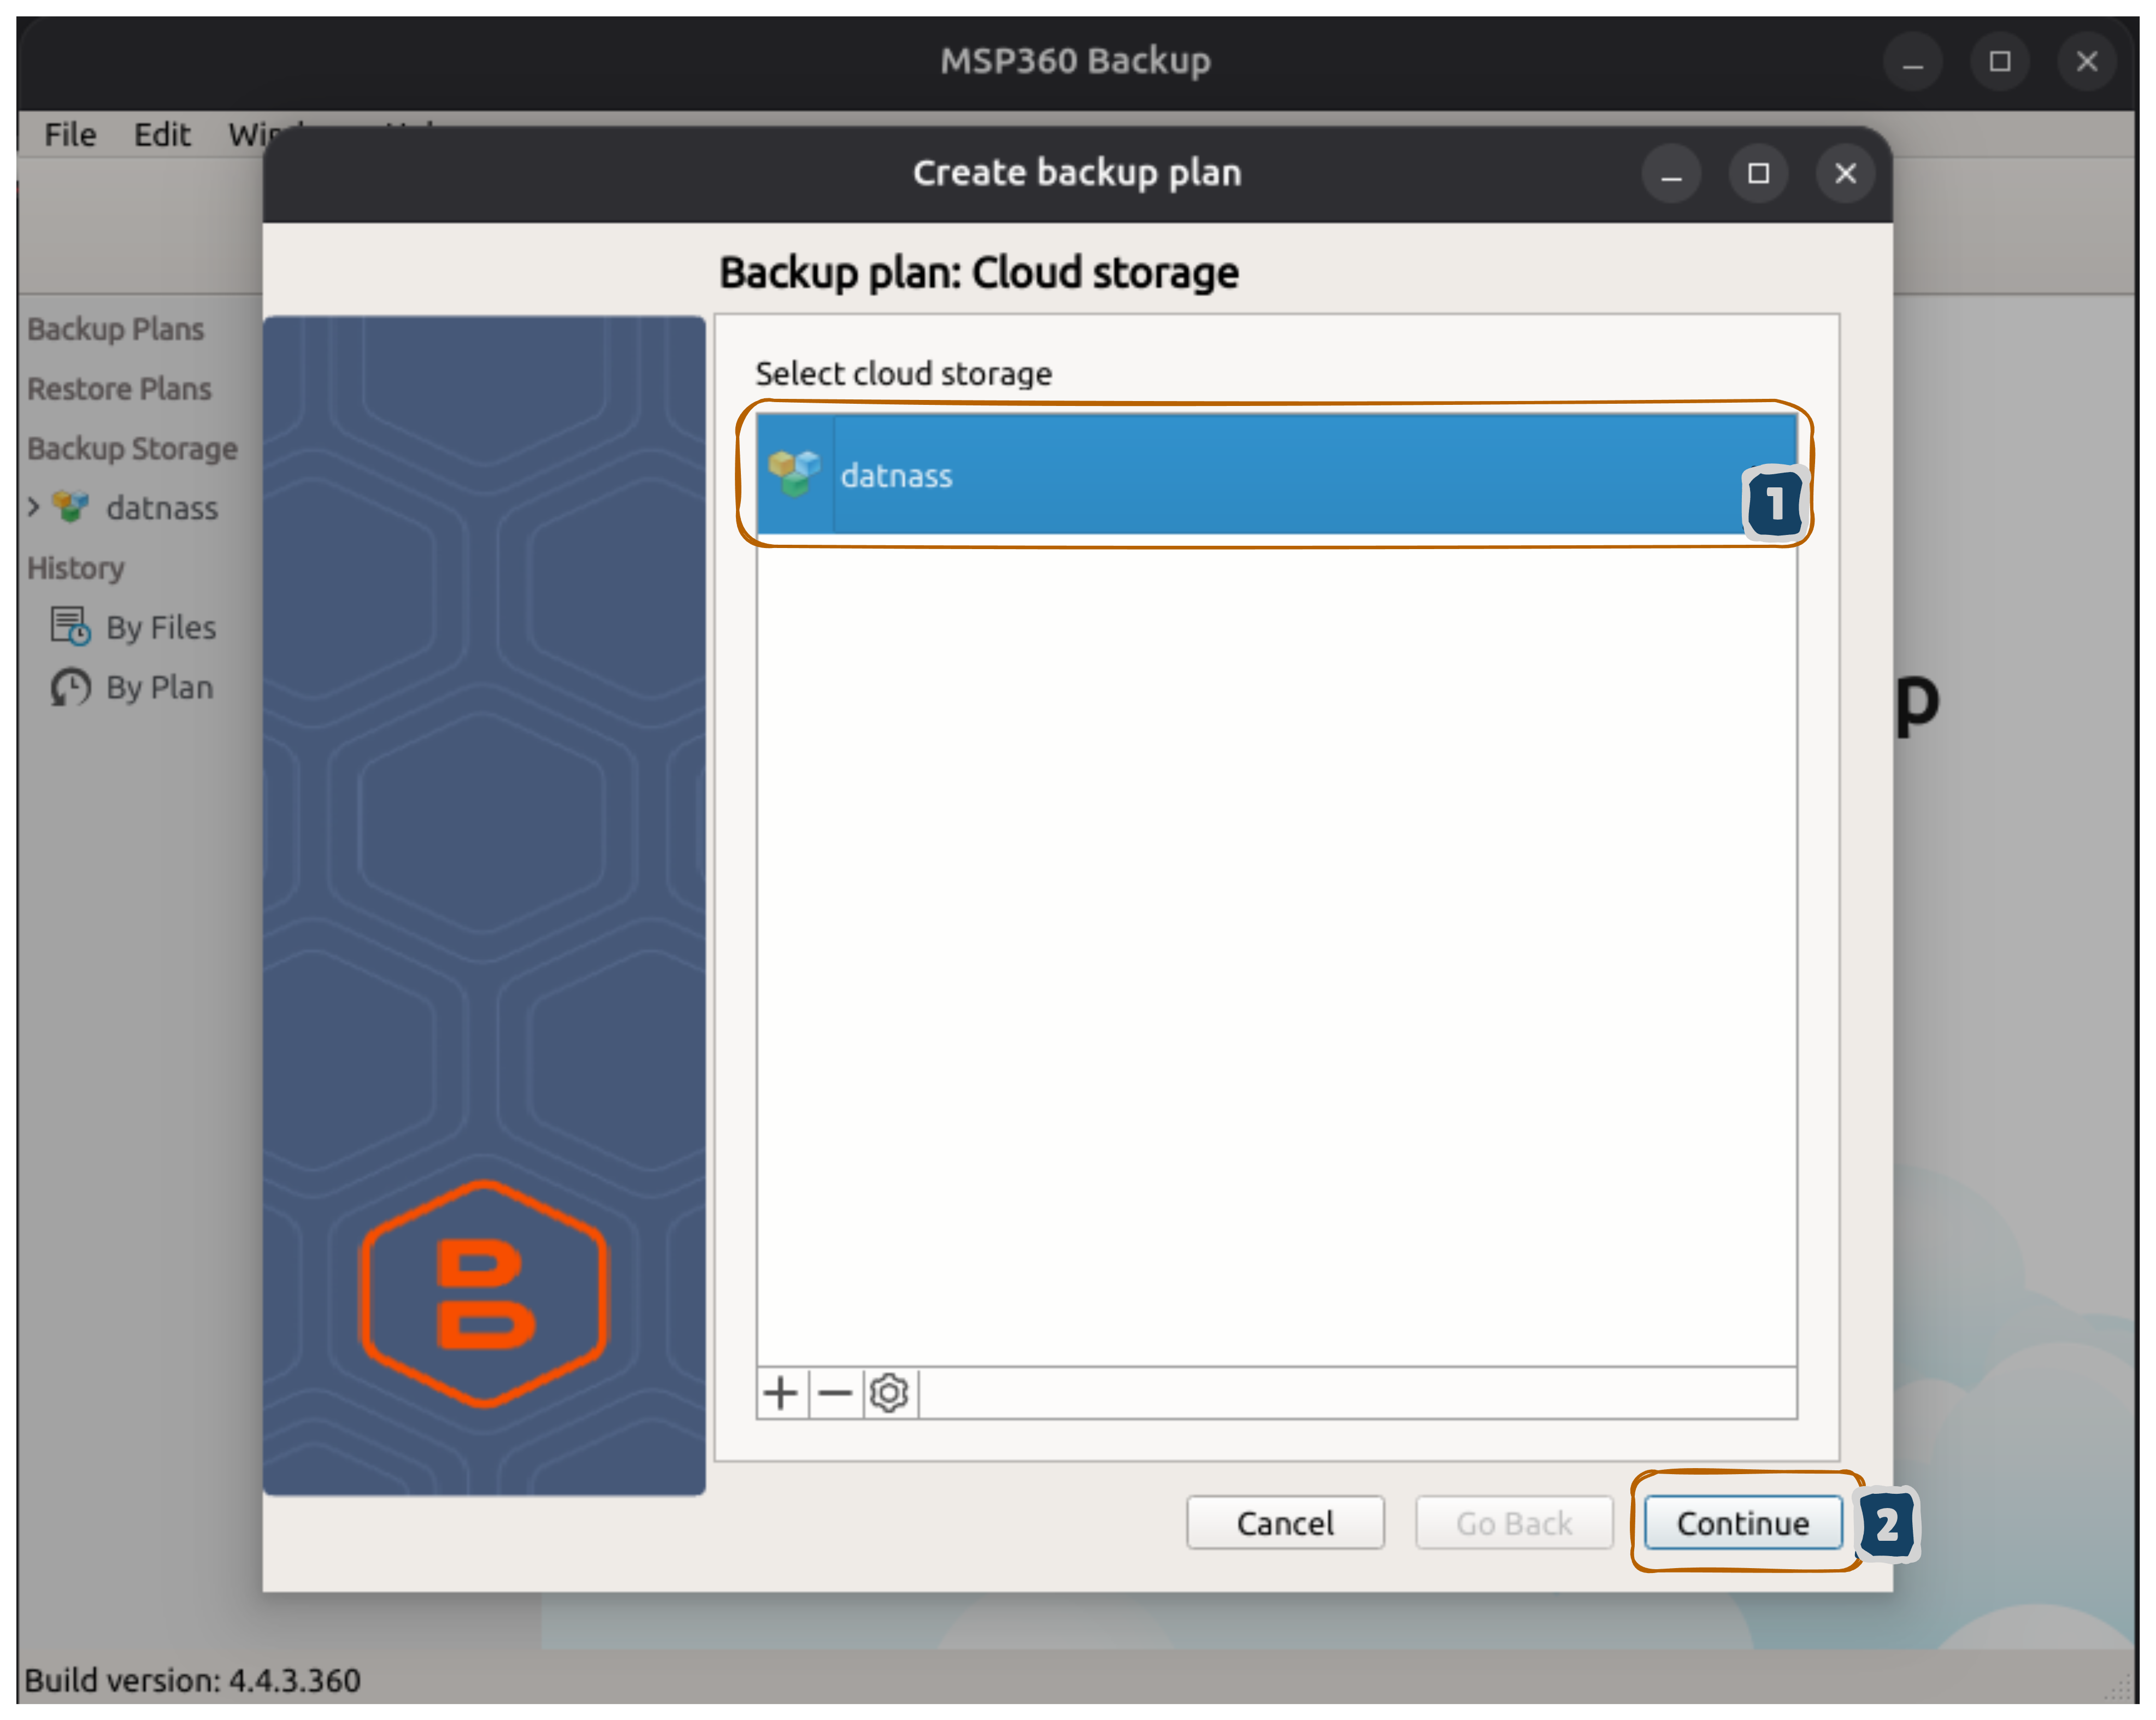
- Your newly added account datnass appears highlighted in blue
- Click Continue to proceed
Step 5: Name Your Backup Plan
- Enter a plan name (e.g., “Daily Backup” or “Backup plan on 12/16/25 3:15 PM”)
- Check Save backup plan configuration to the backup storage (recommended)
- Click Continue
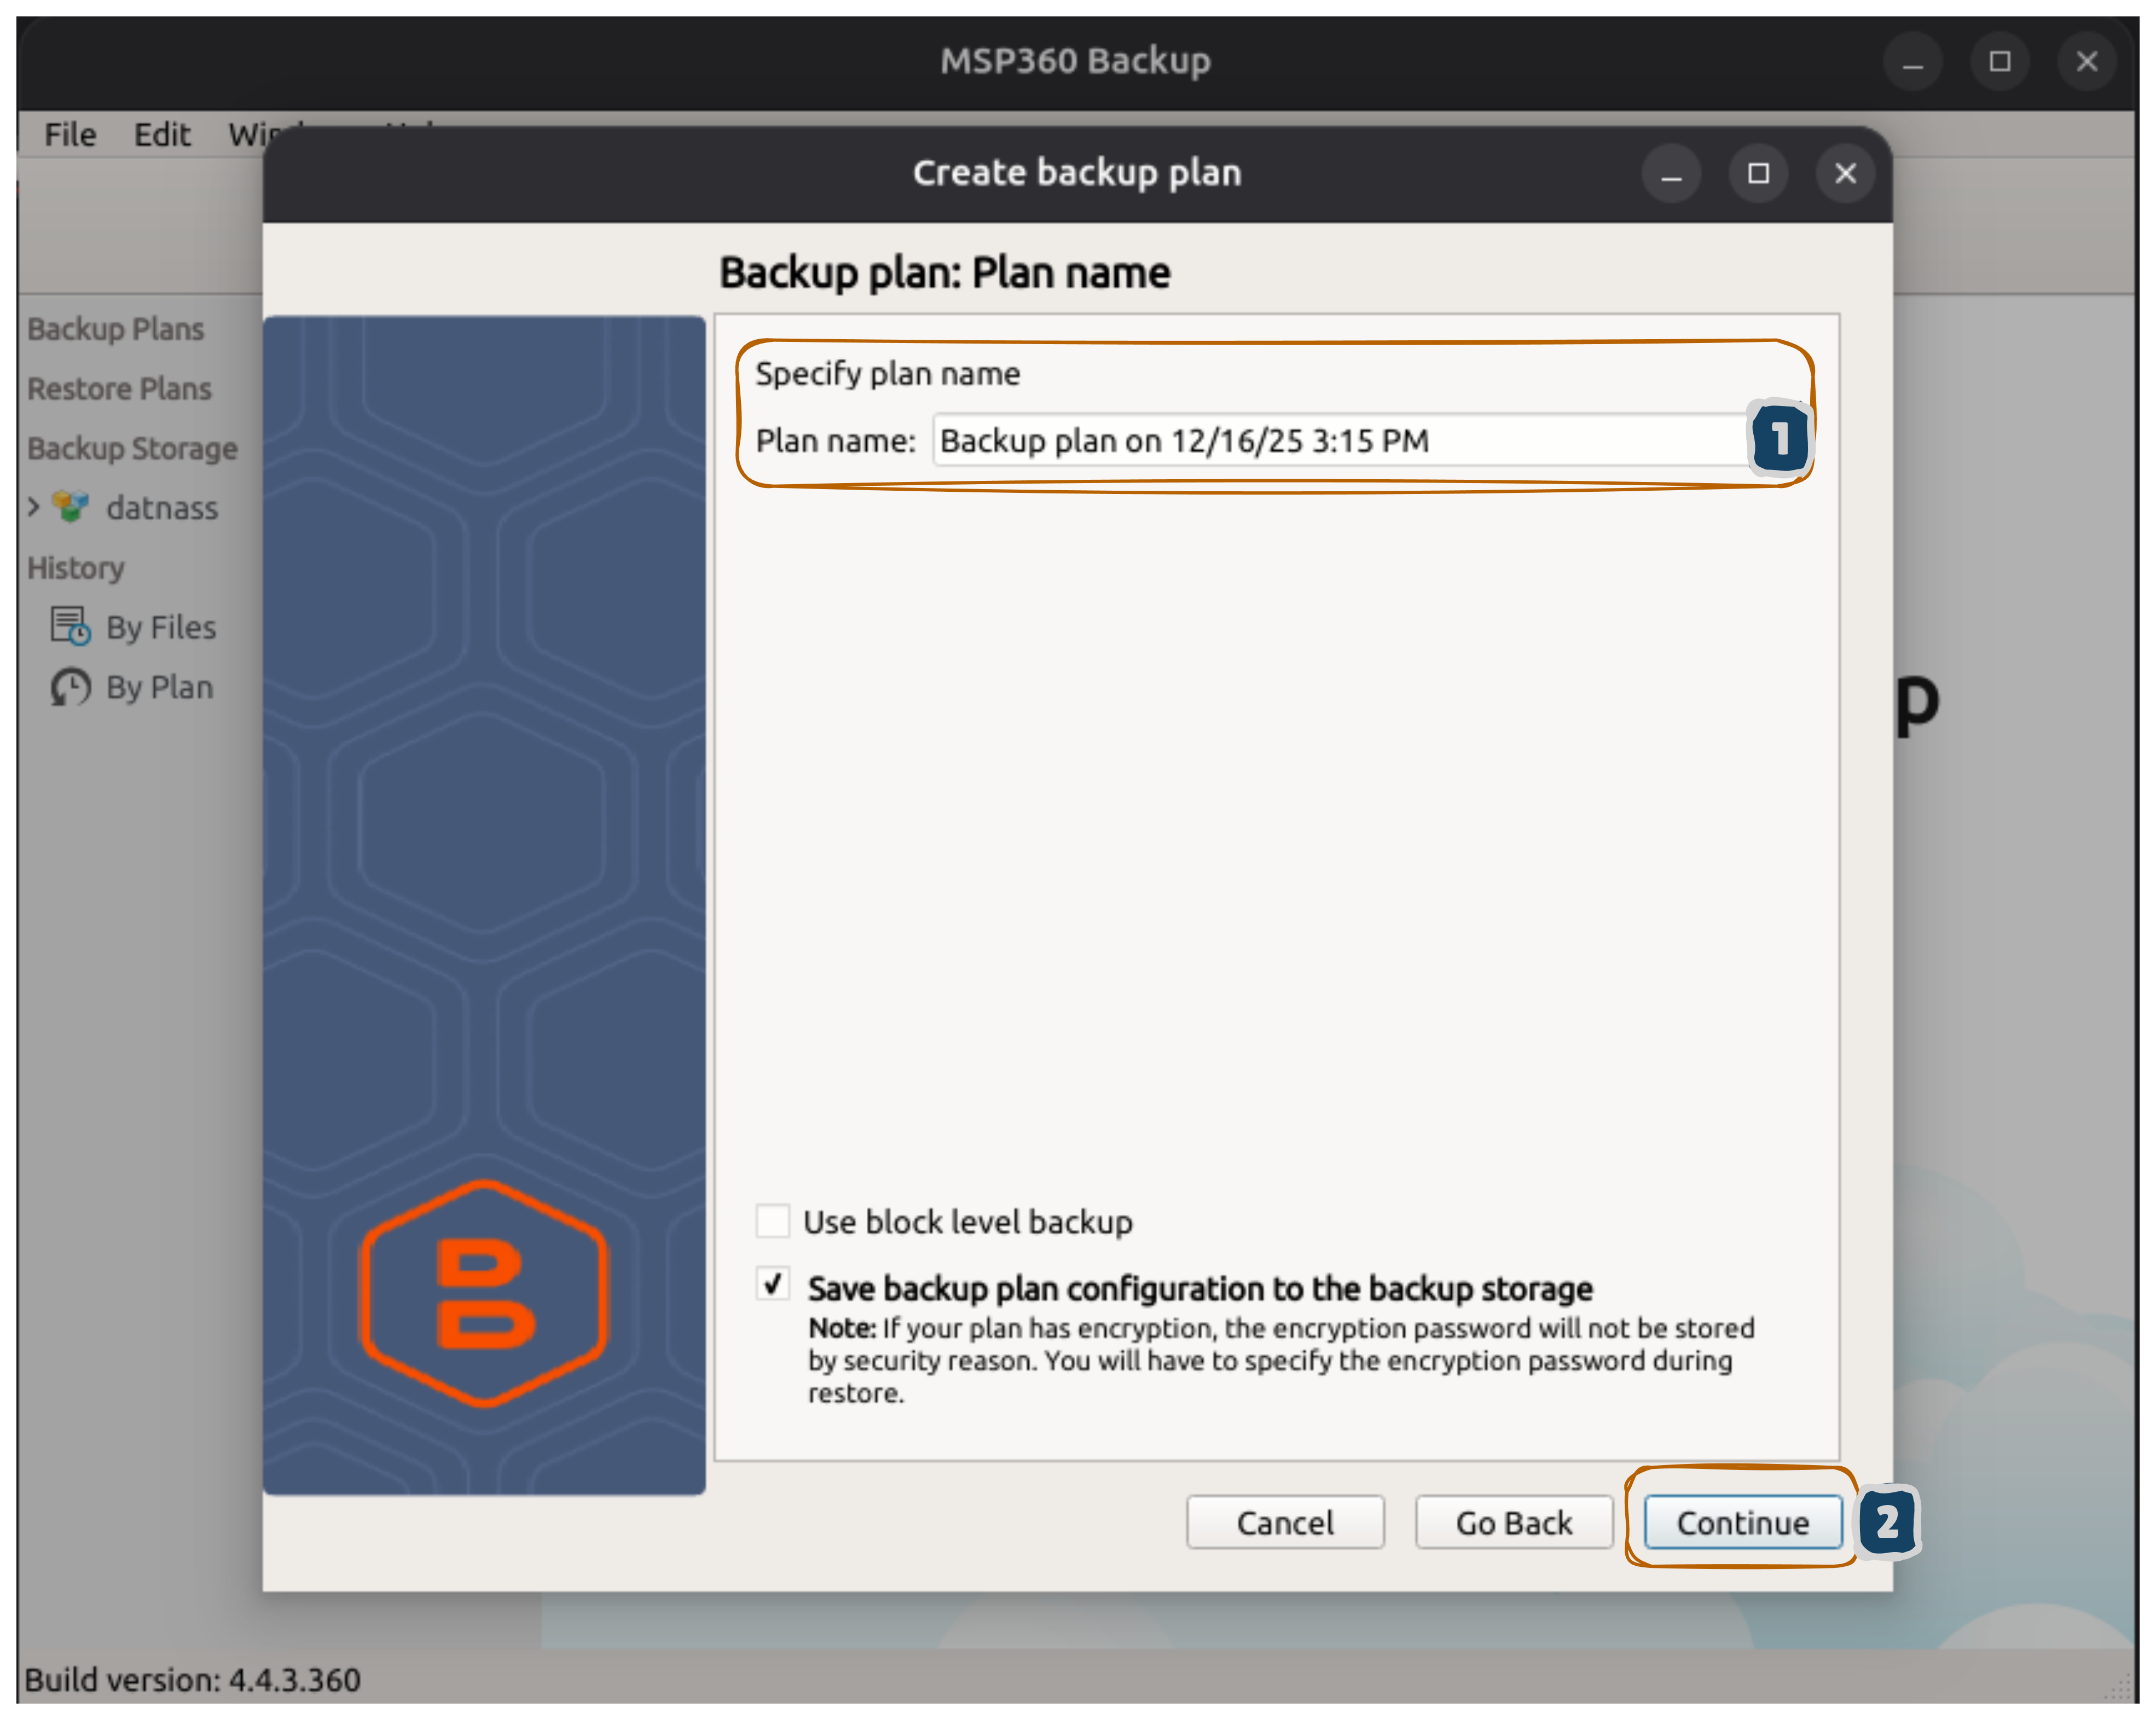
Backup Plan Configuration
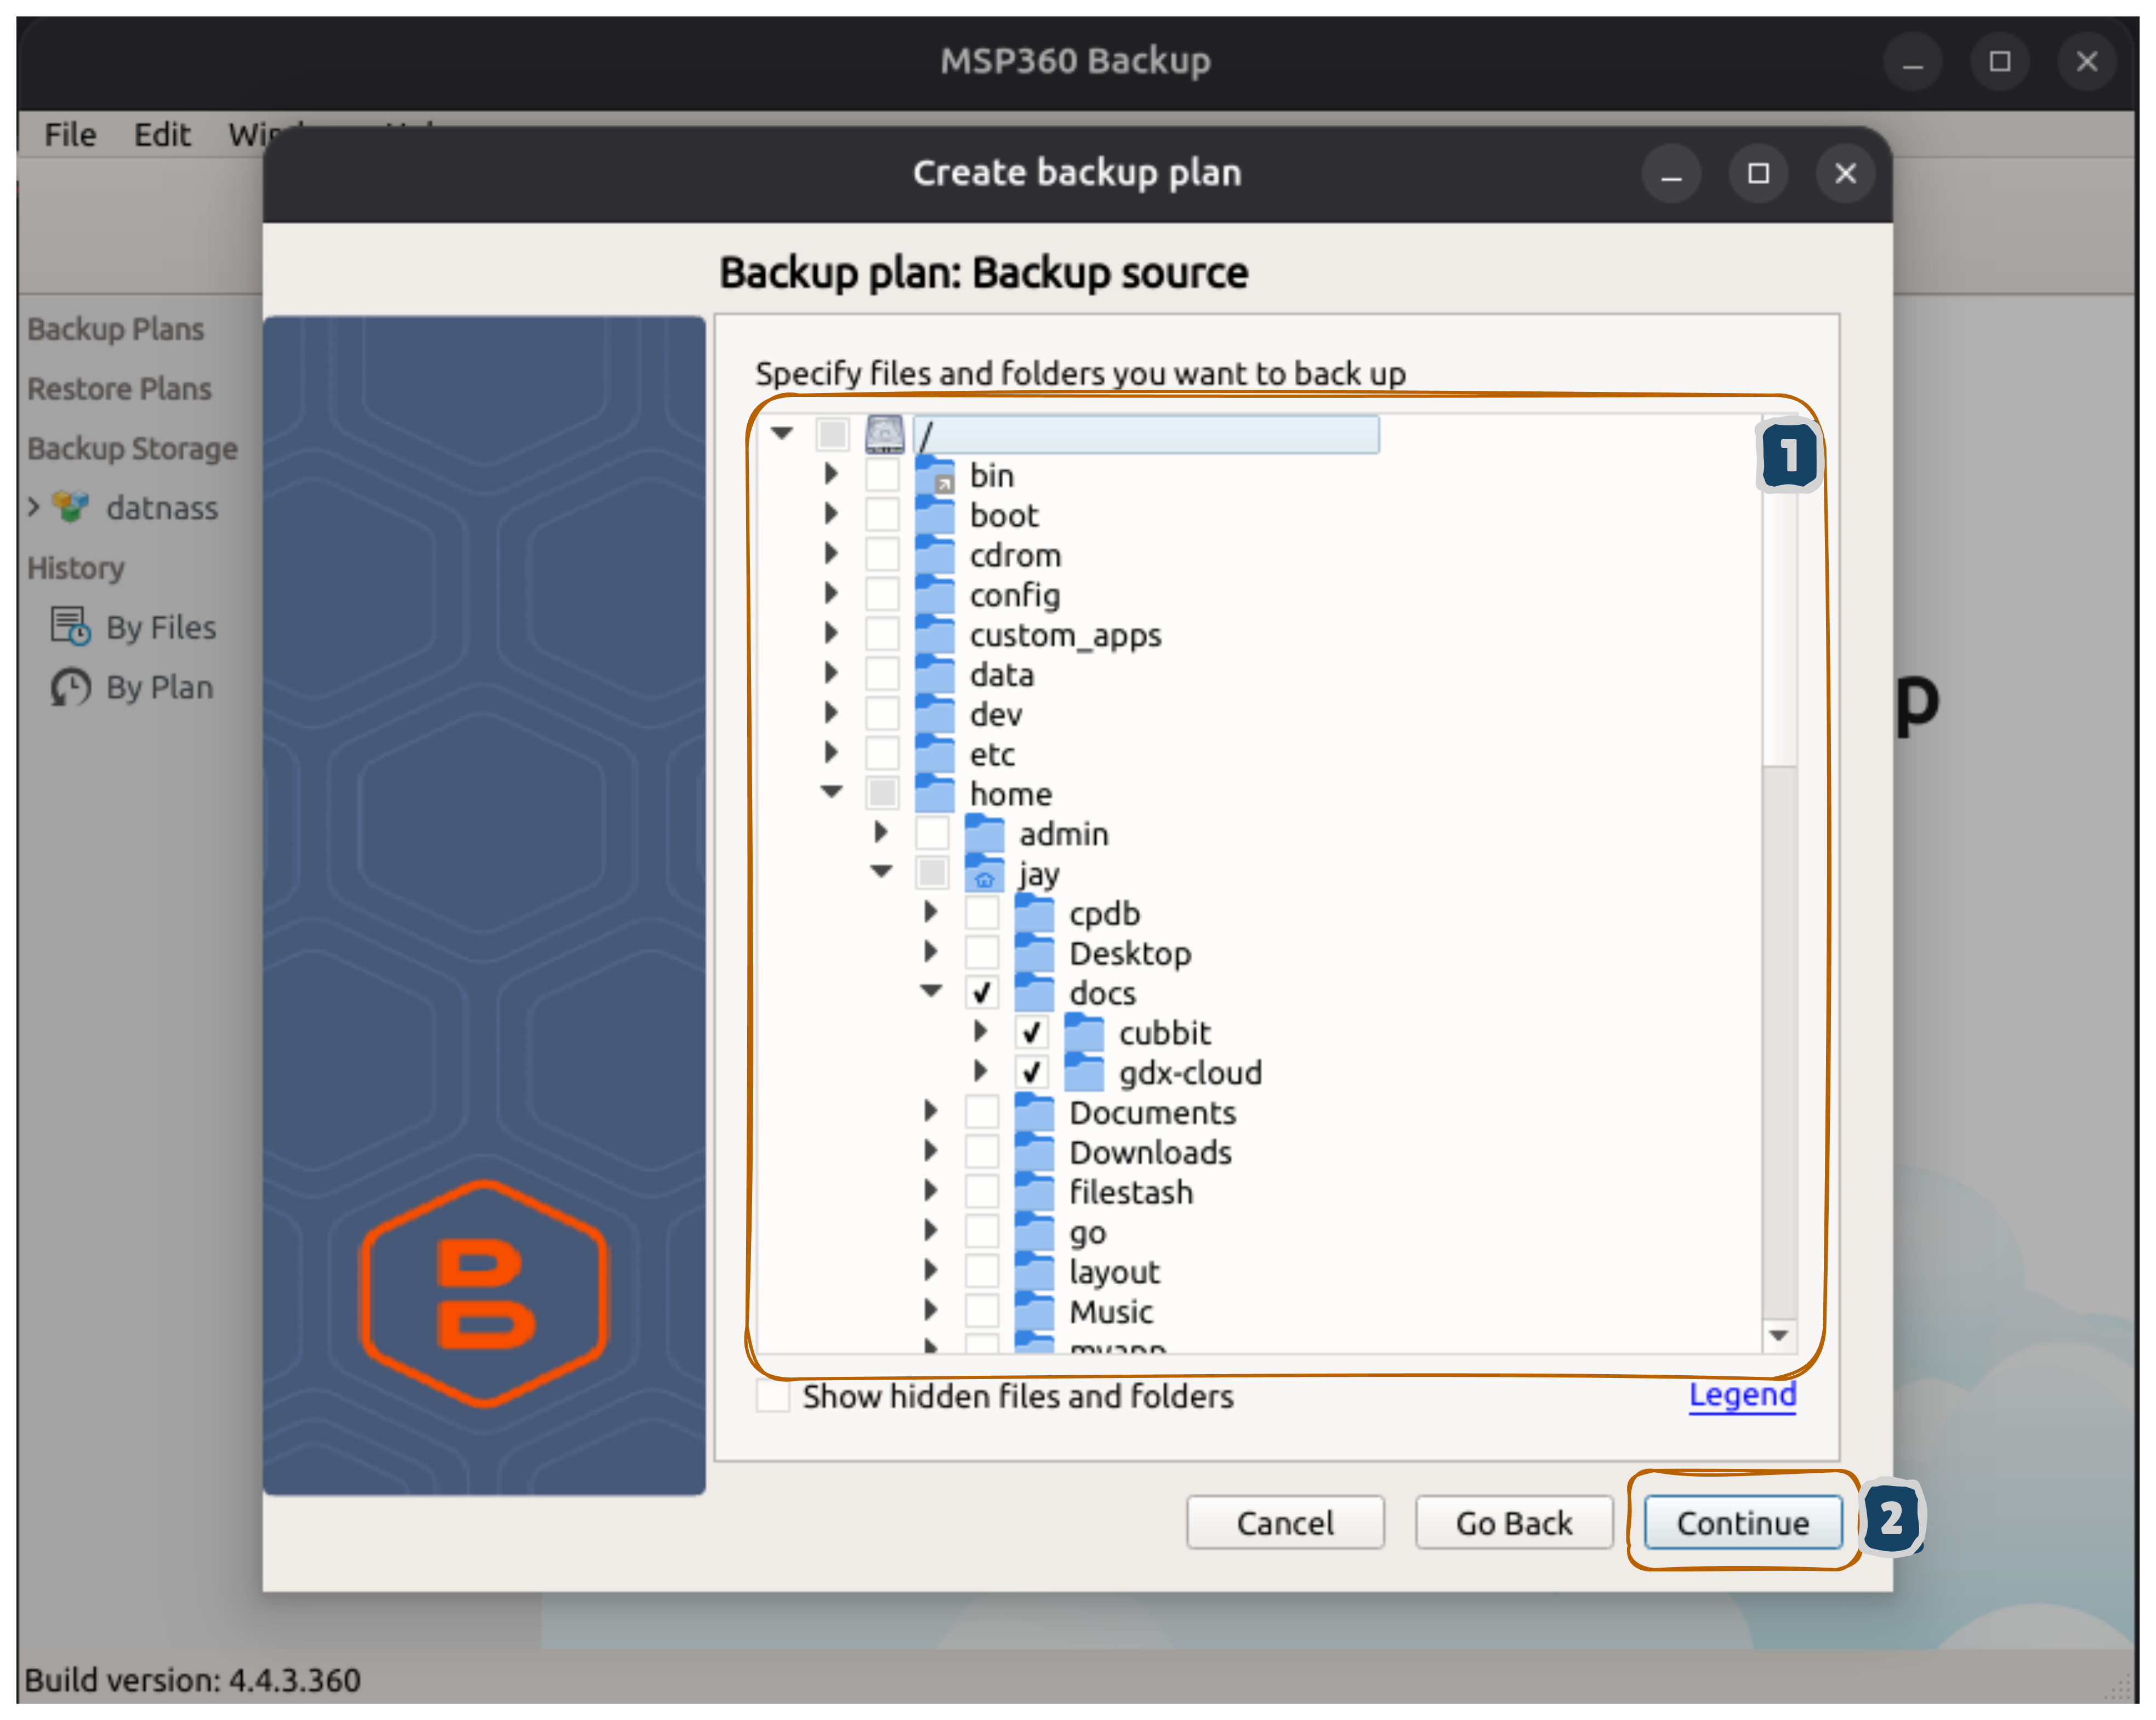
Enabling “Save backup plan configuration to the backup storage” allows you to recover your backup plan configuration from the cloud if needed.Step 6: Choose Folders to Backup
- A file tree appears showing your system folders
- Check the boxes next to folders you want to backup (e.g., /home/jay/docs, Documents, Desktop)
- You can expand folders to select specific subfolders
- Click Continue when done
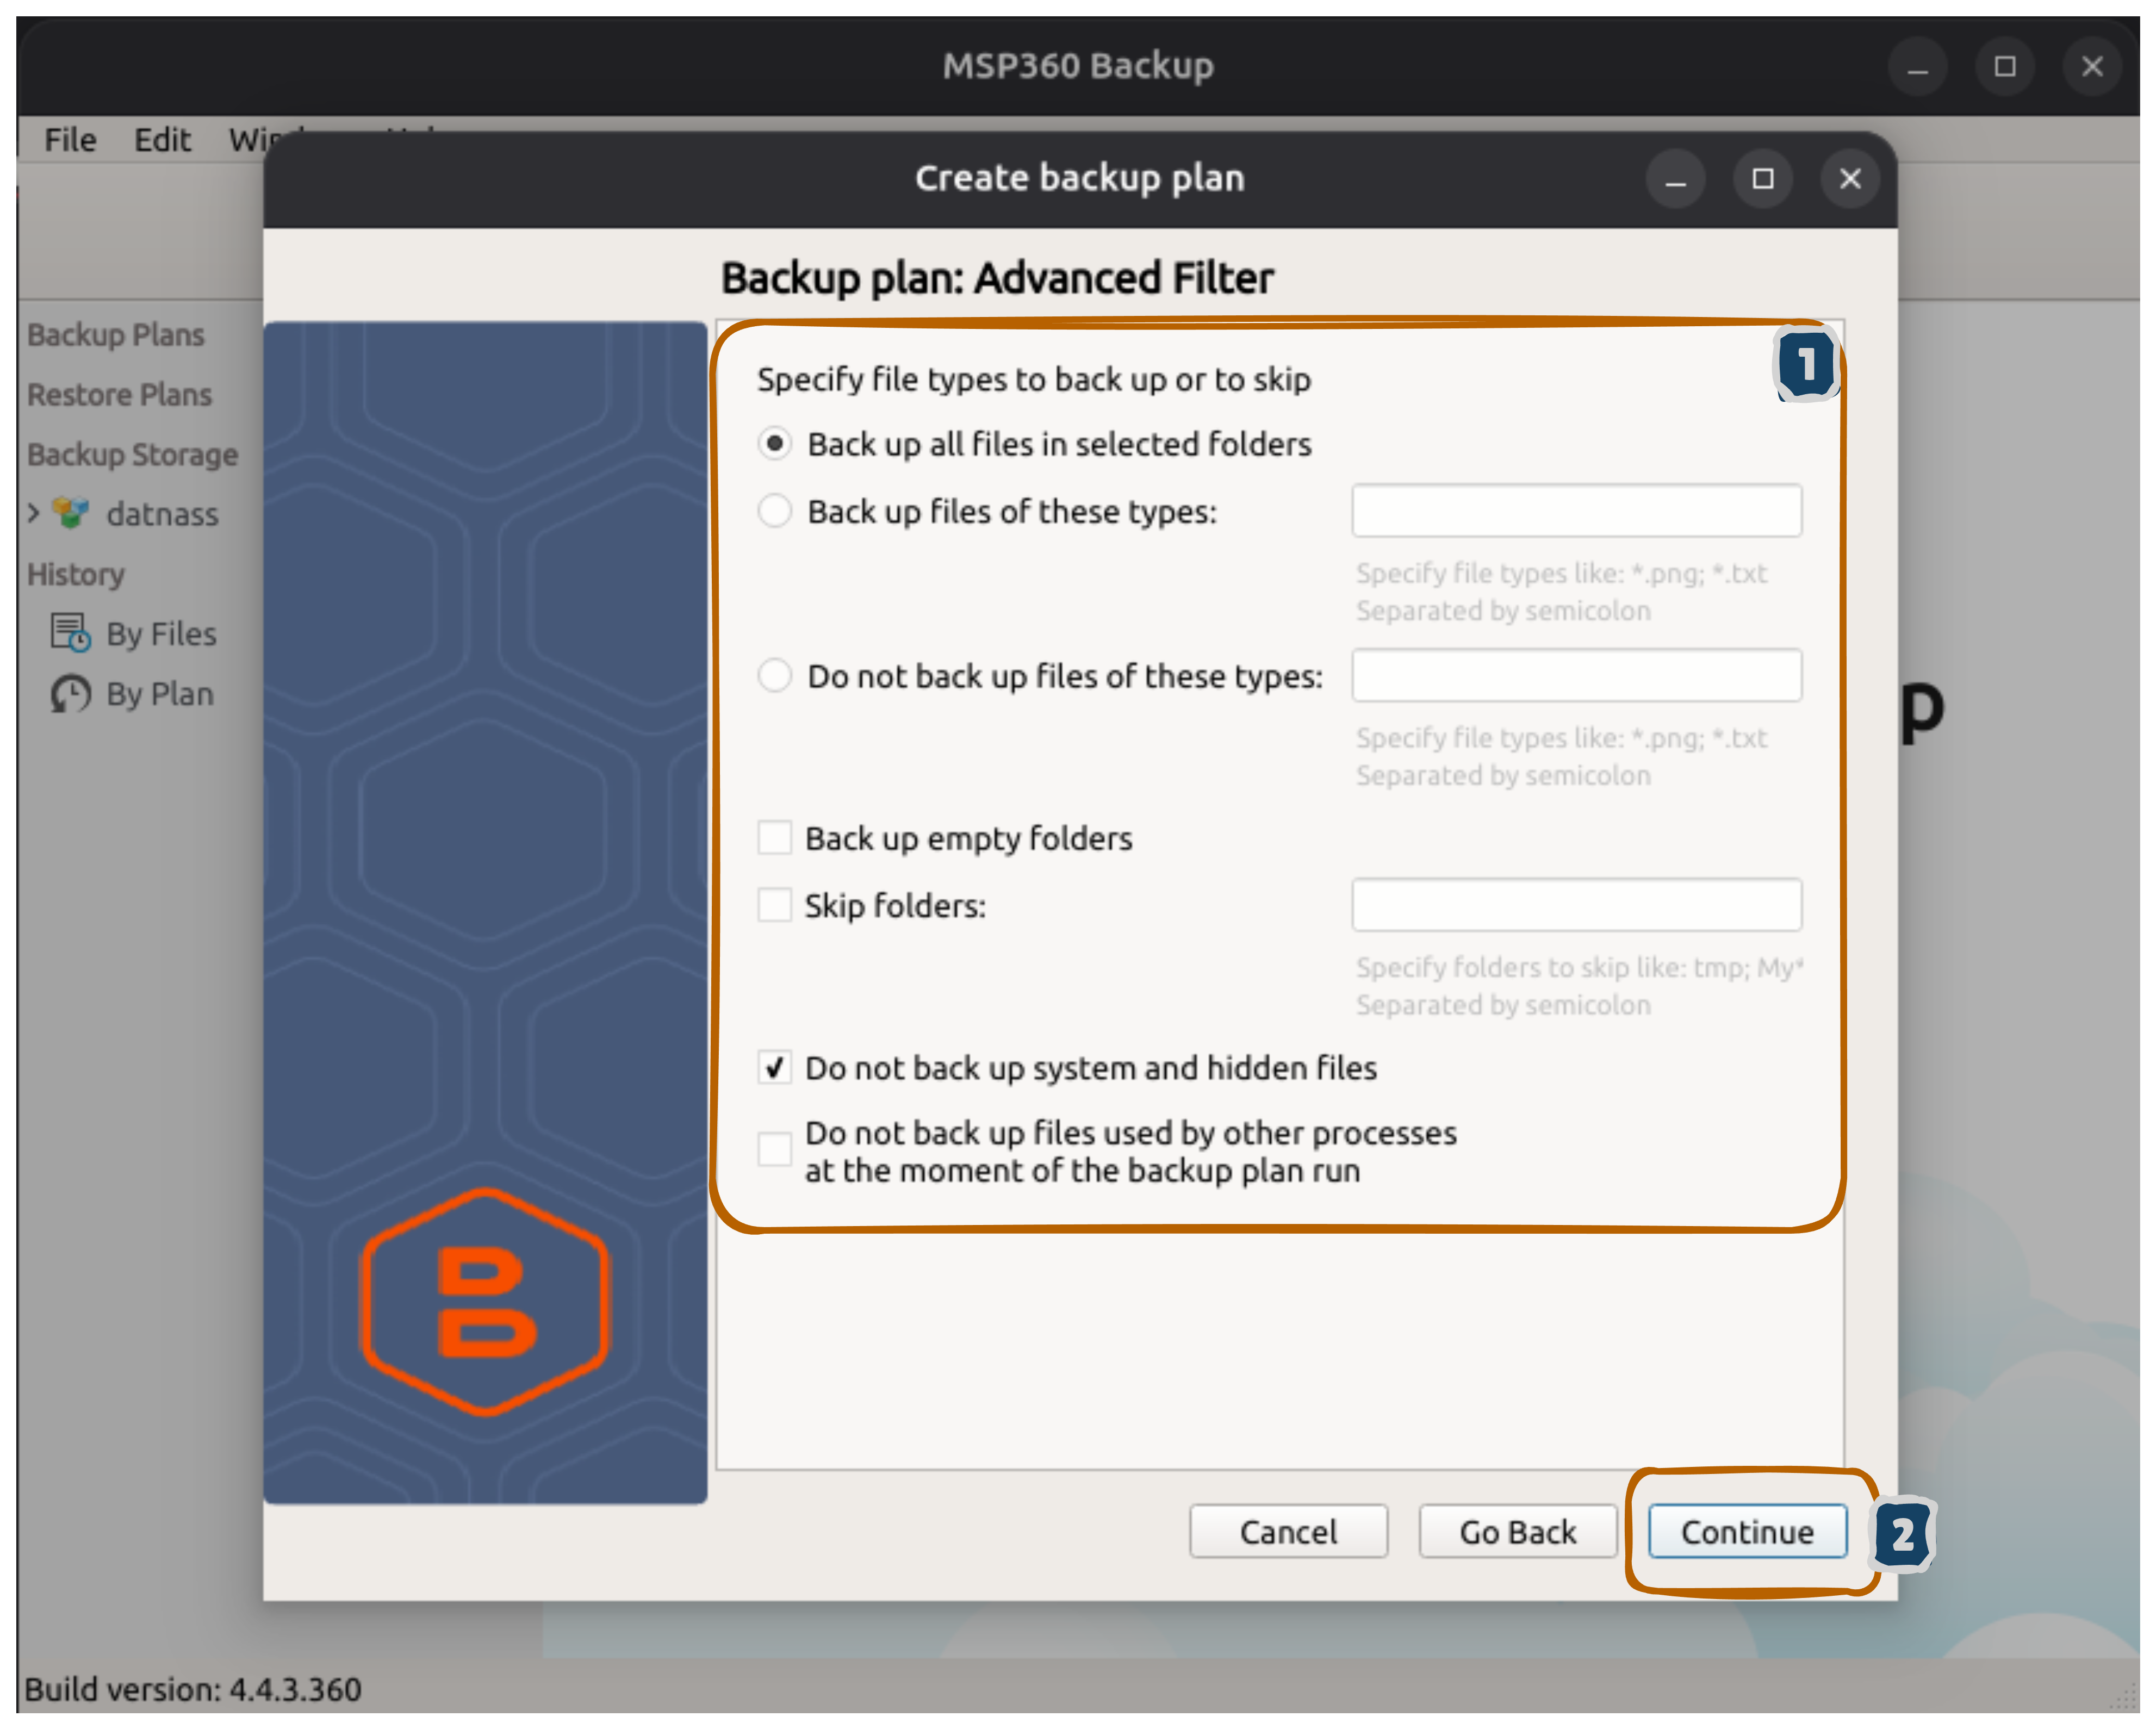
Step 7: Advanced File Filters (Optional)
- Back up all files in selected folders is selected by default (recommended)
- Do not back up system and hidden files is checked (reduces backup size)
- Keep these defaults for simple setup
- Click Continue
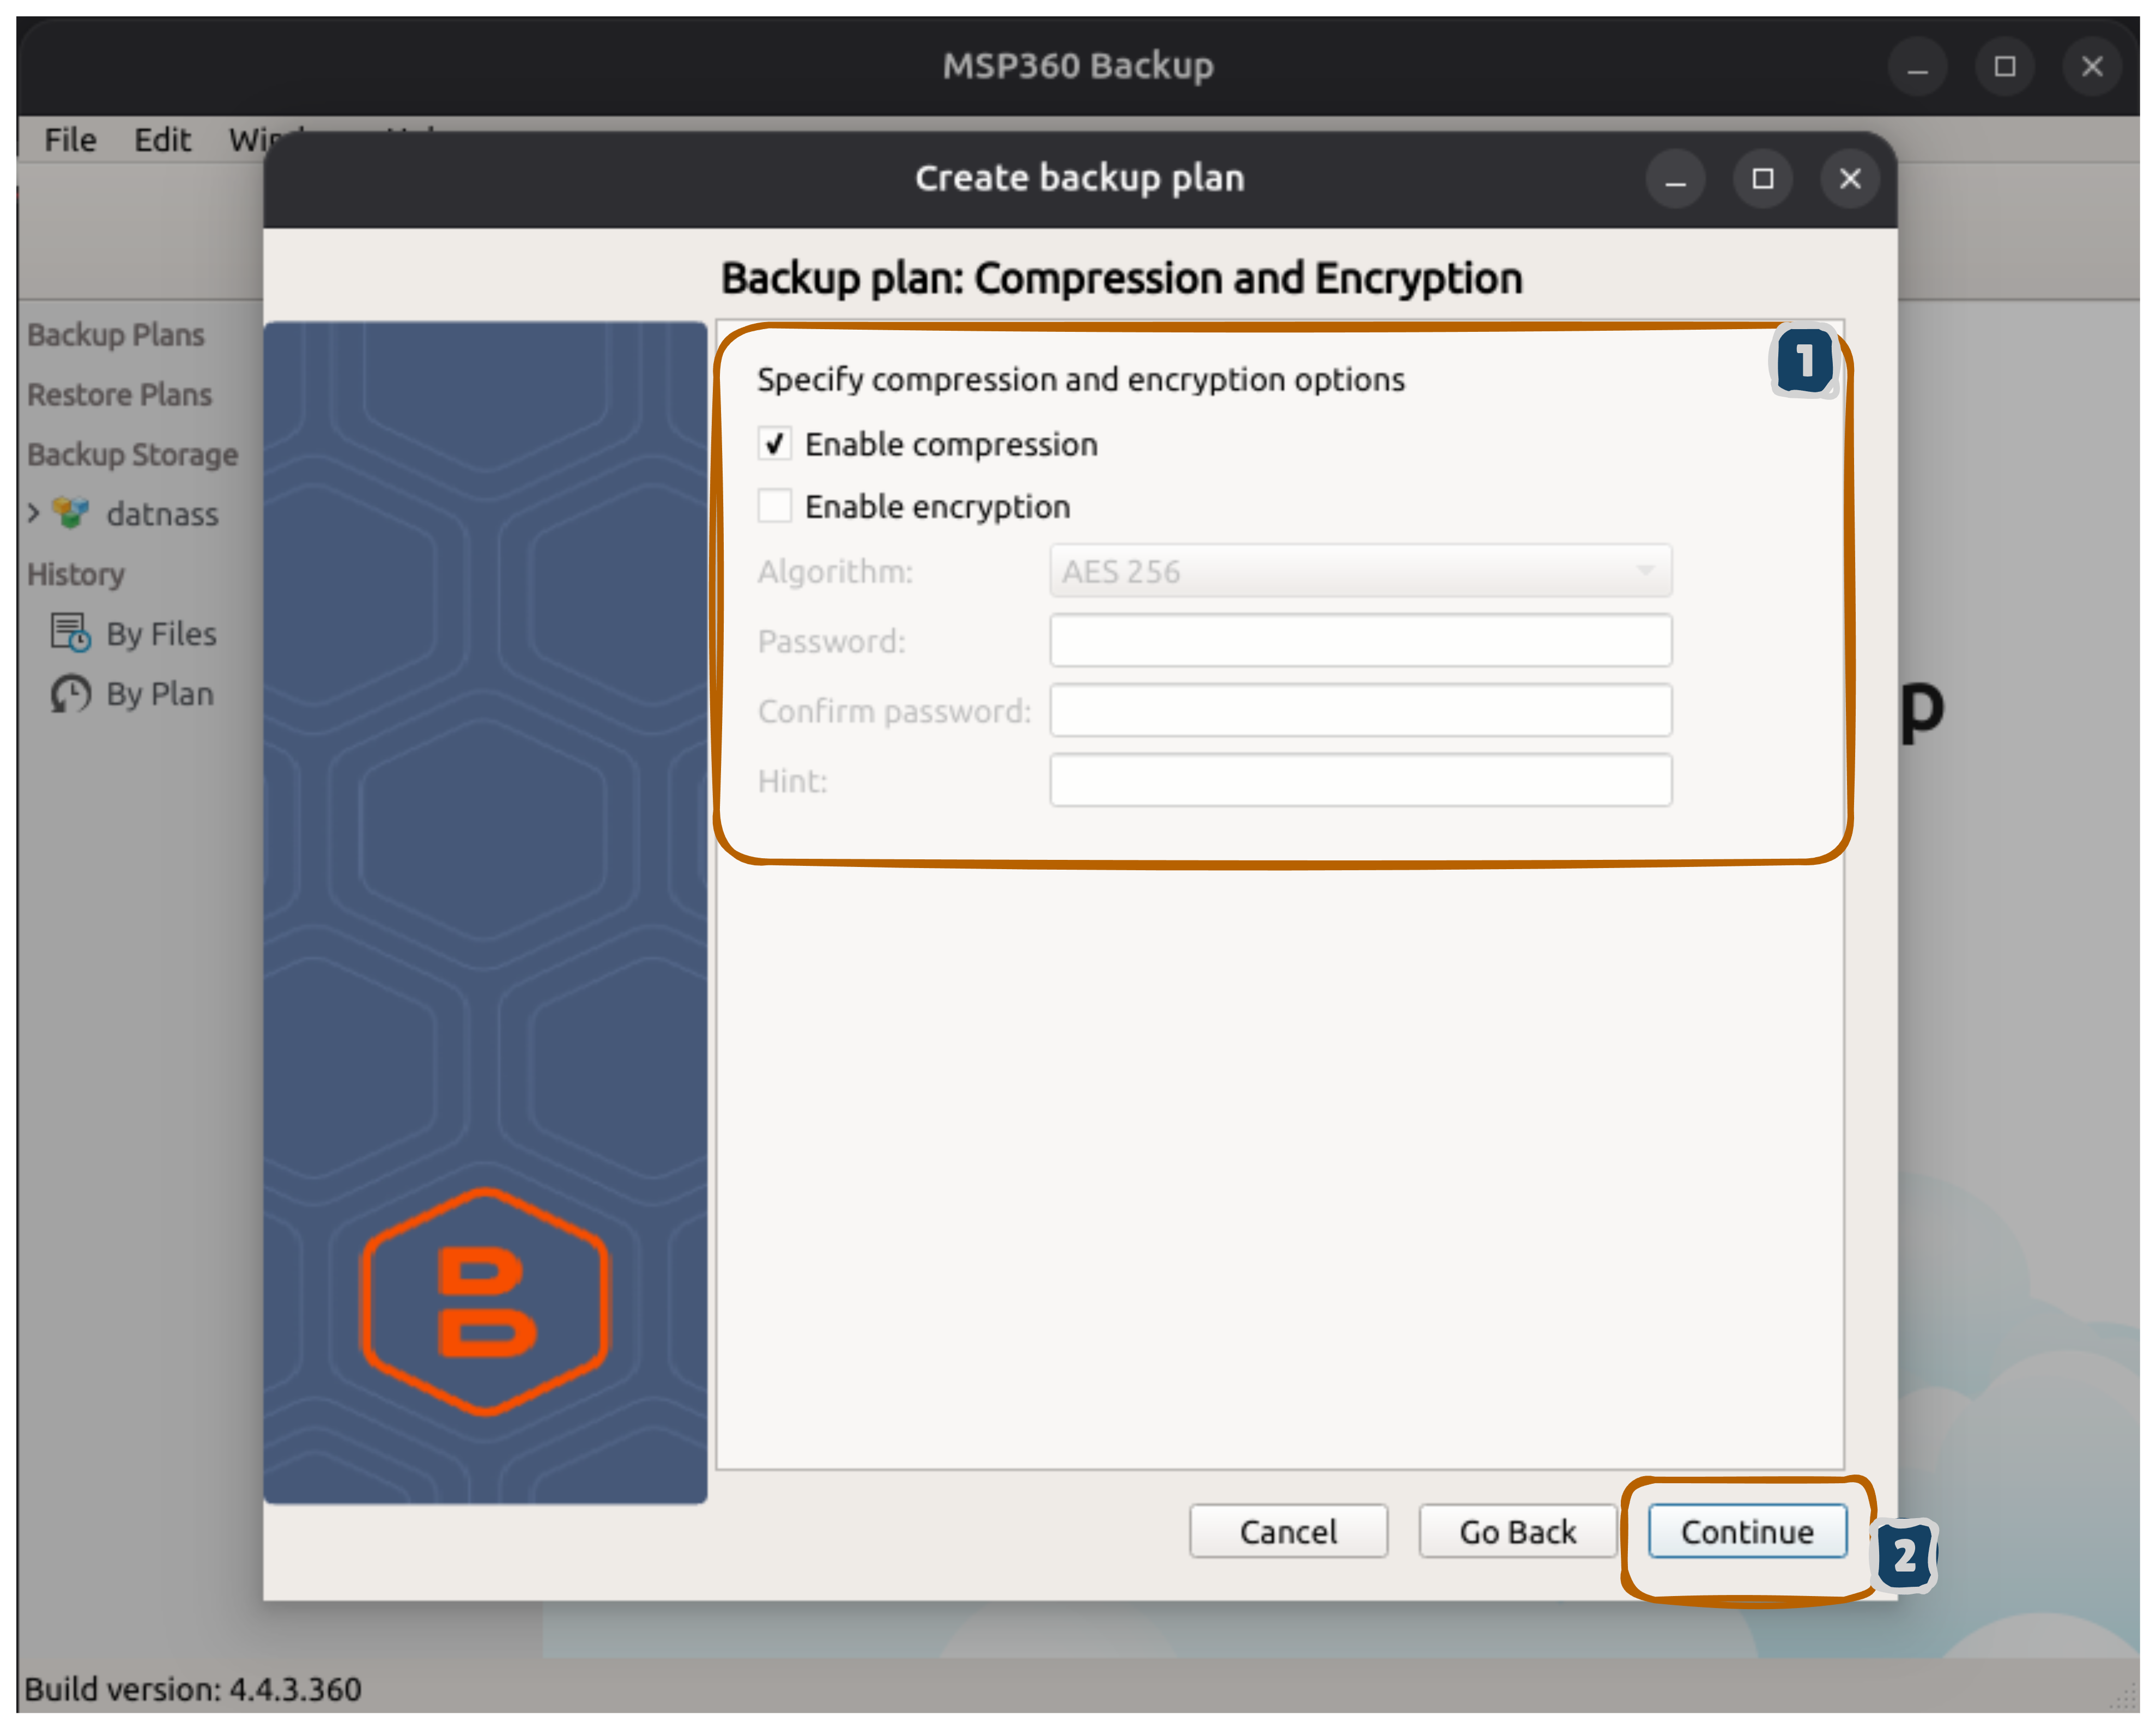
Step 8: Compression and Encryption
- Check Enable compression (reduces file size by 30-70%)
- Leave Enable encryption unchecked unless you require additional security
- Click Continue
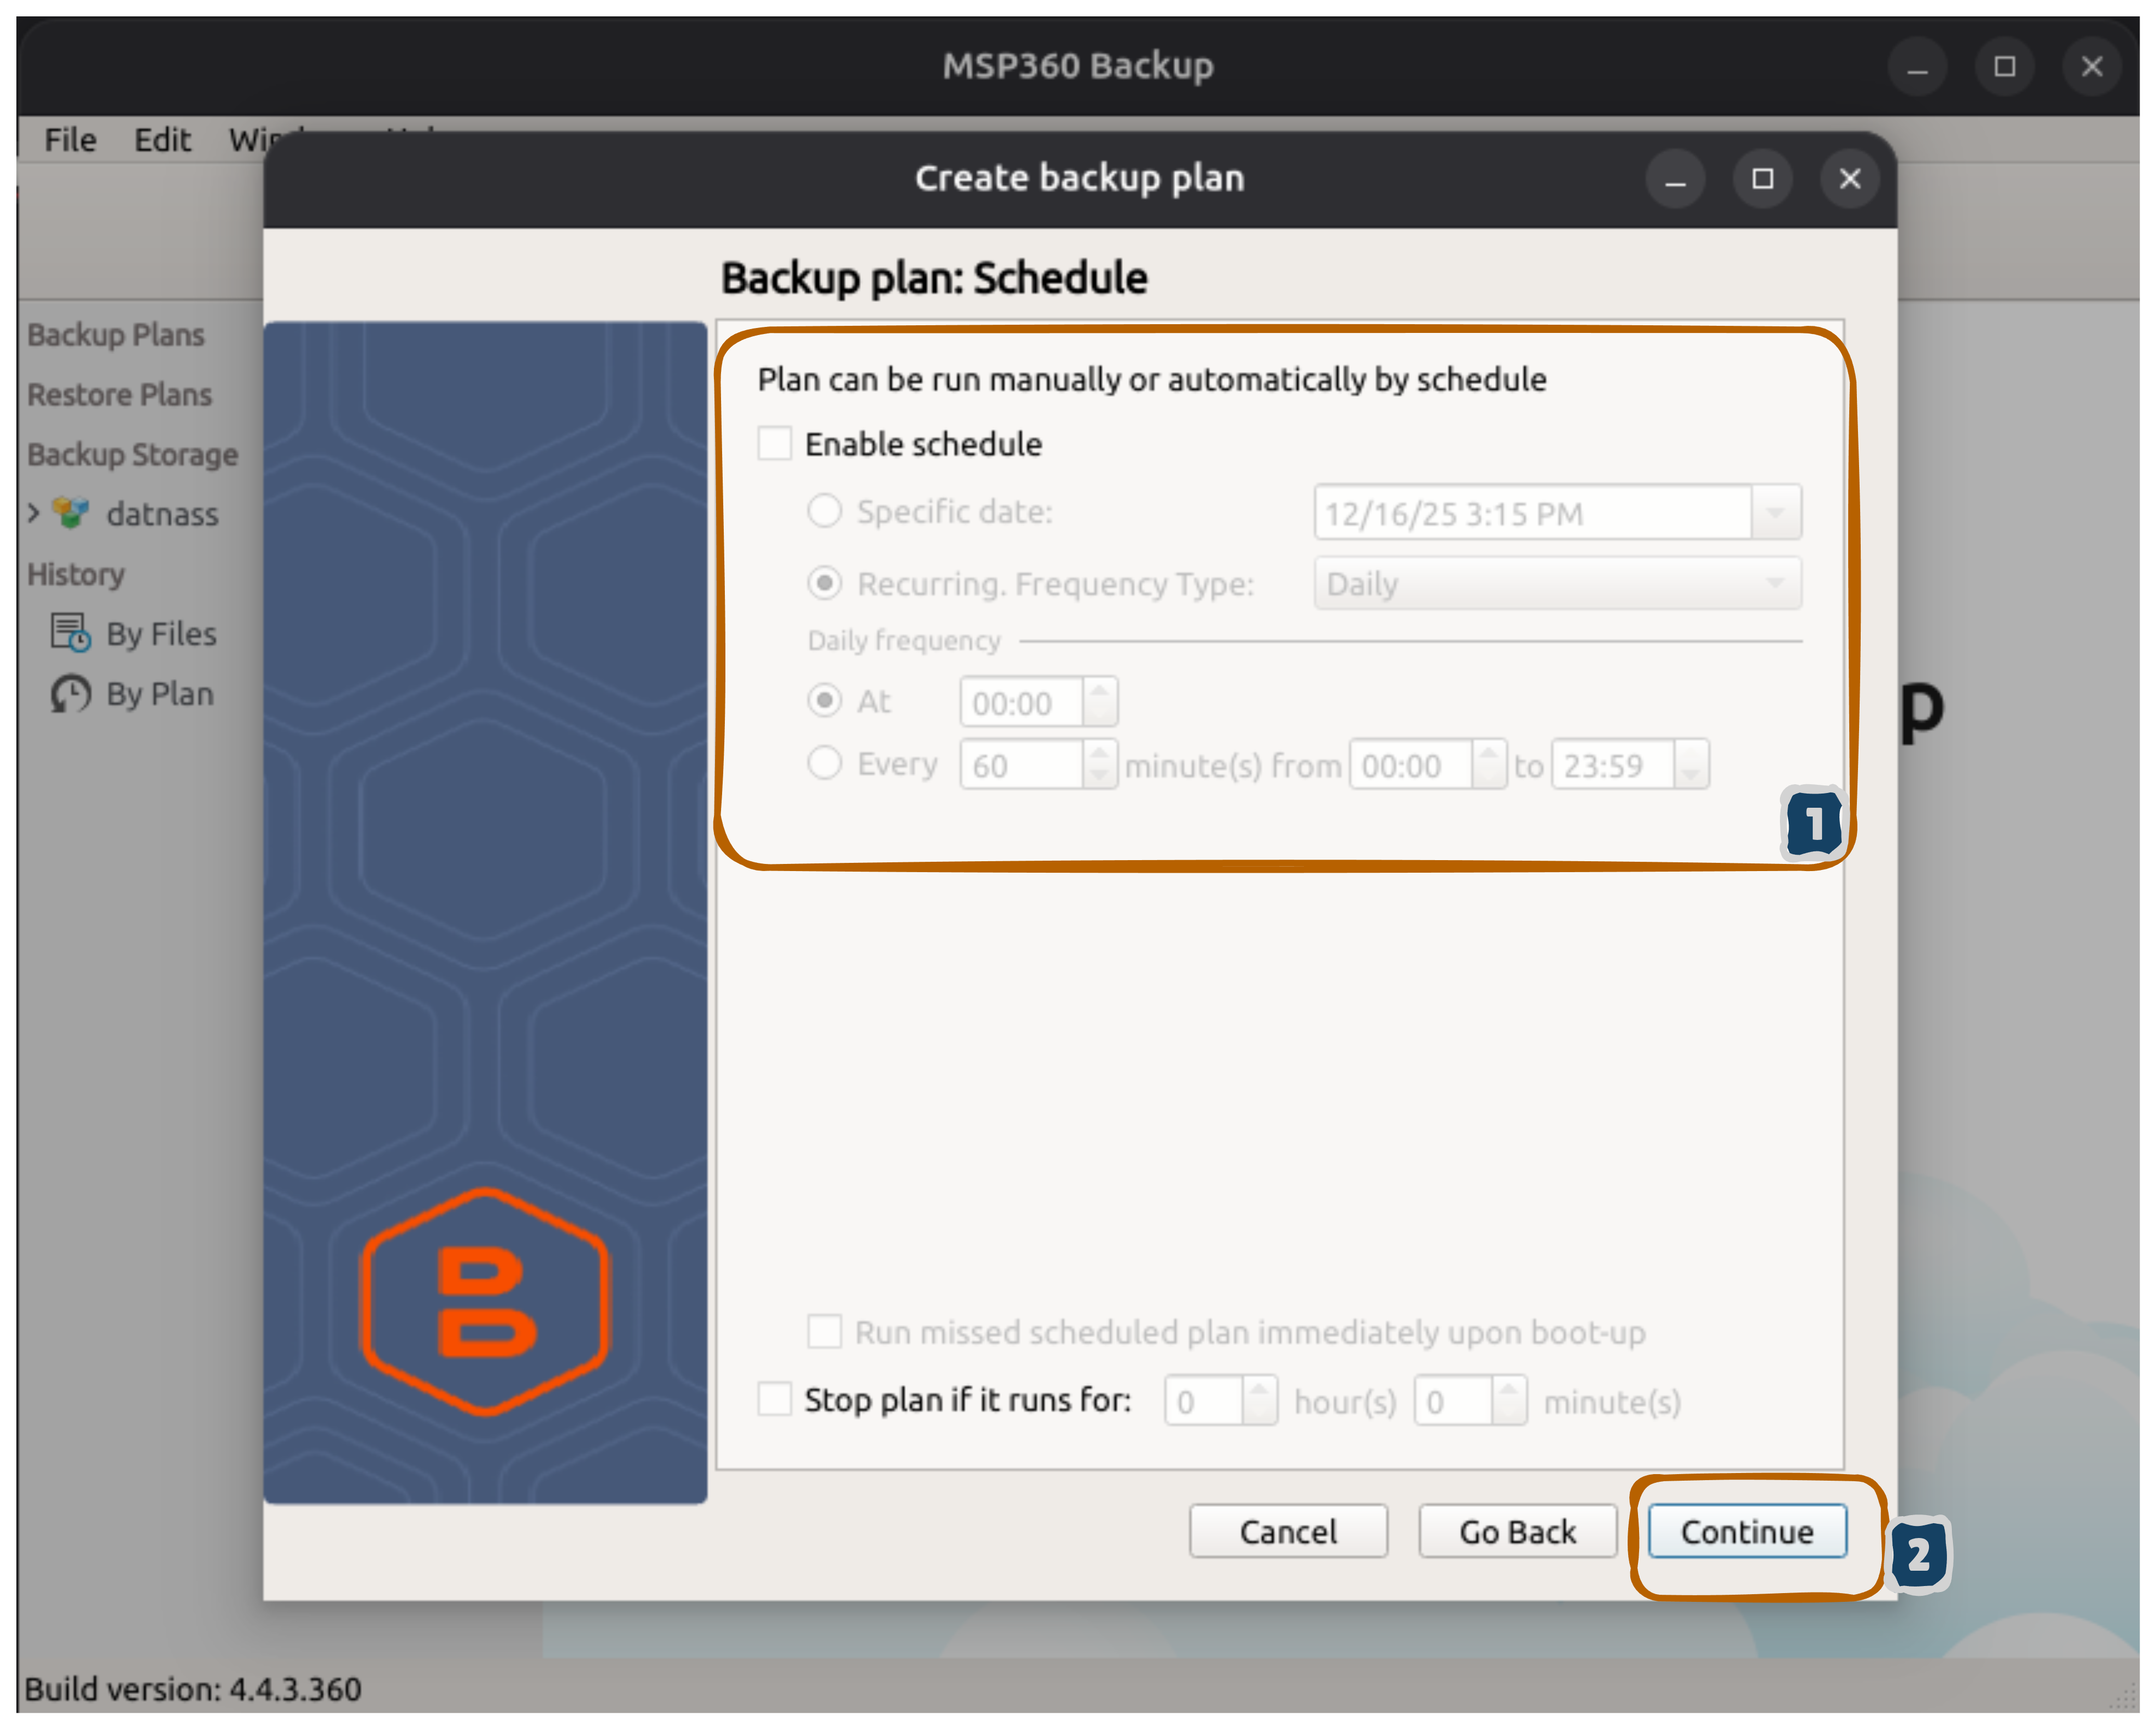
Step 9: Backup Schedule
Option 1 - Manual (recommended for testing):
- Leave Enable schedule unchecked
- Click Continue
Option 2 - Automatic Daily:
- Check Enable schedule
- Select Recurring, Frequency Type: Daily
- Set time (e.g., 00:00 or 2:00 AM for off-peak hours)
- Click Continue
Scheduling Your Backups
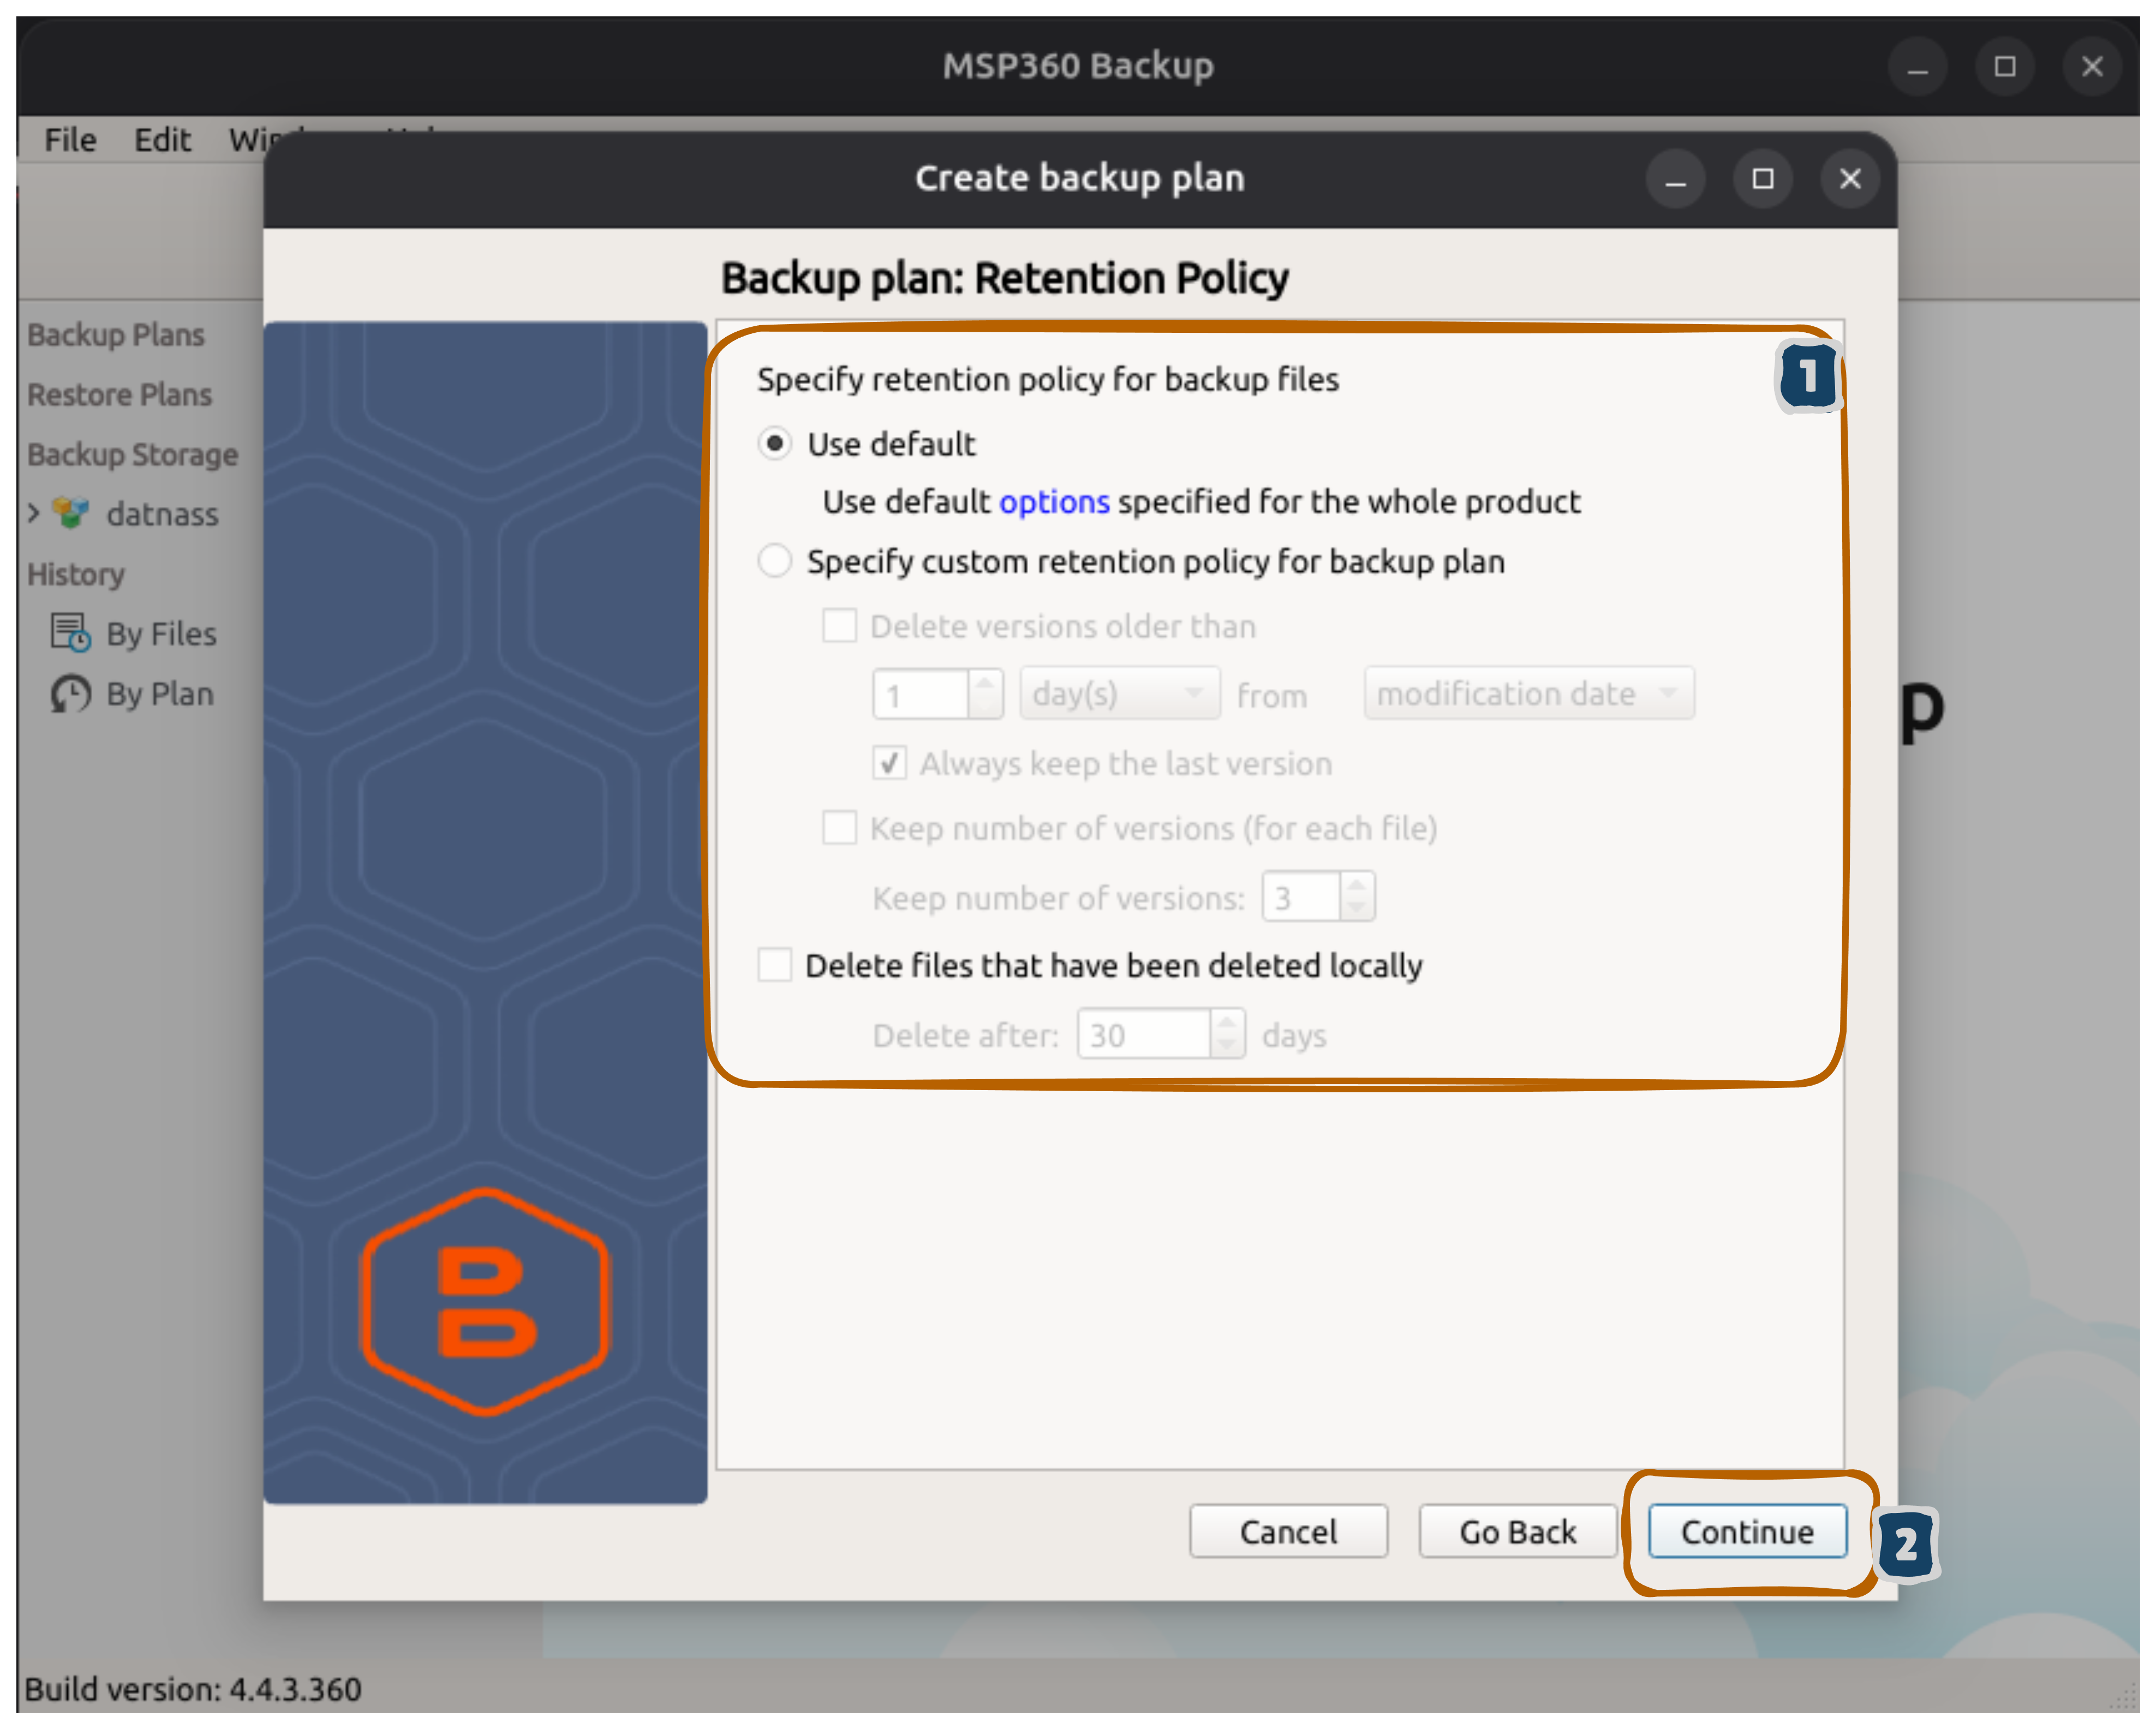
For regular backups, schedule them during off-peak hours (e.g., 2:00 AM) to avoid impacting system performance or network bandwidth.Step 10: Retention Policy
- Use default is selected (recommended)
- Automatically keeps the latest version
- Manages older backup versions
- Click Continue
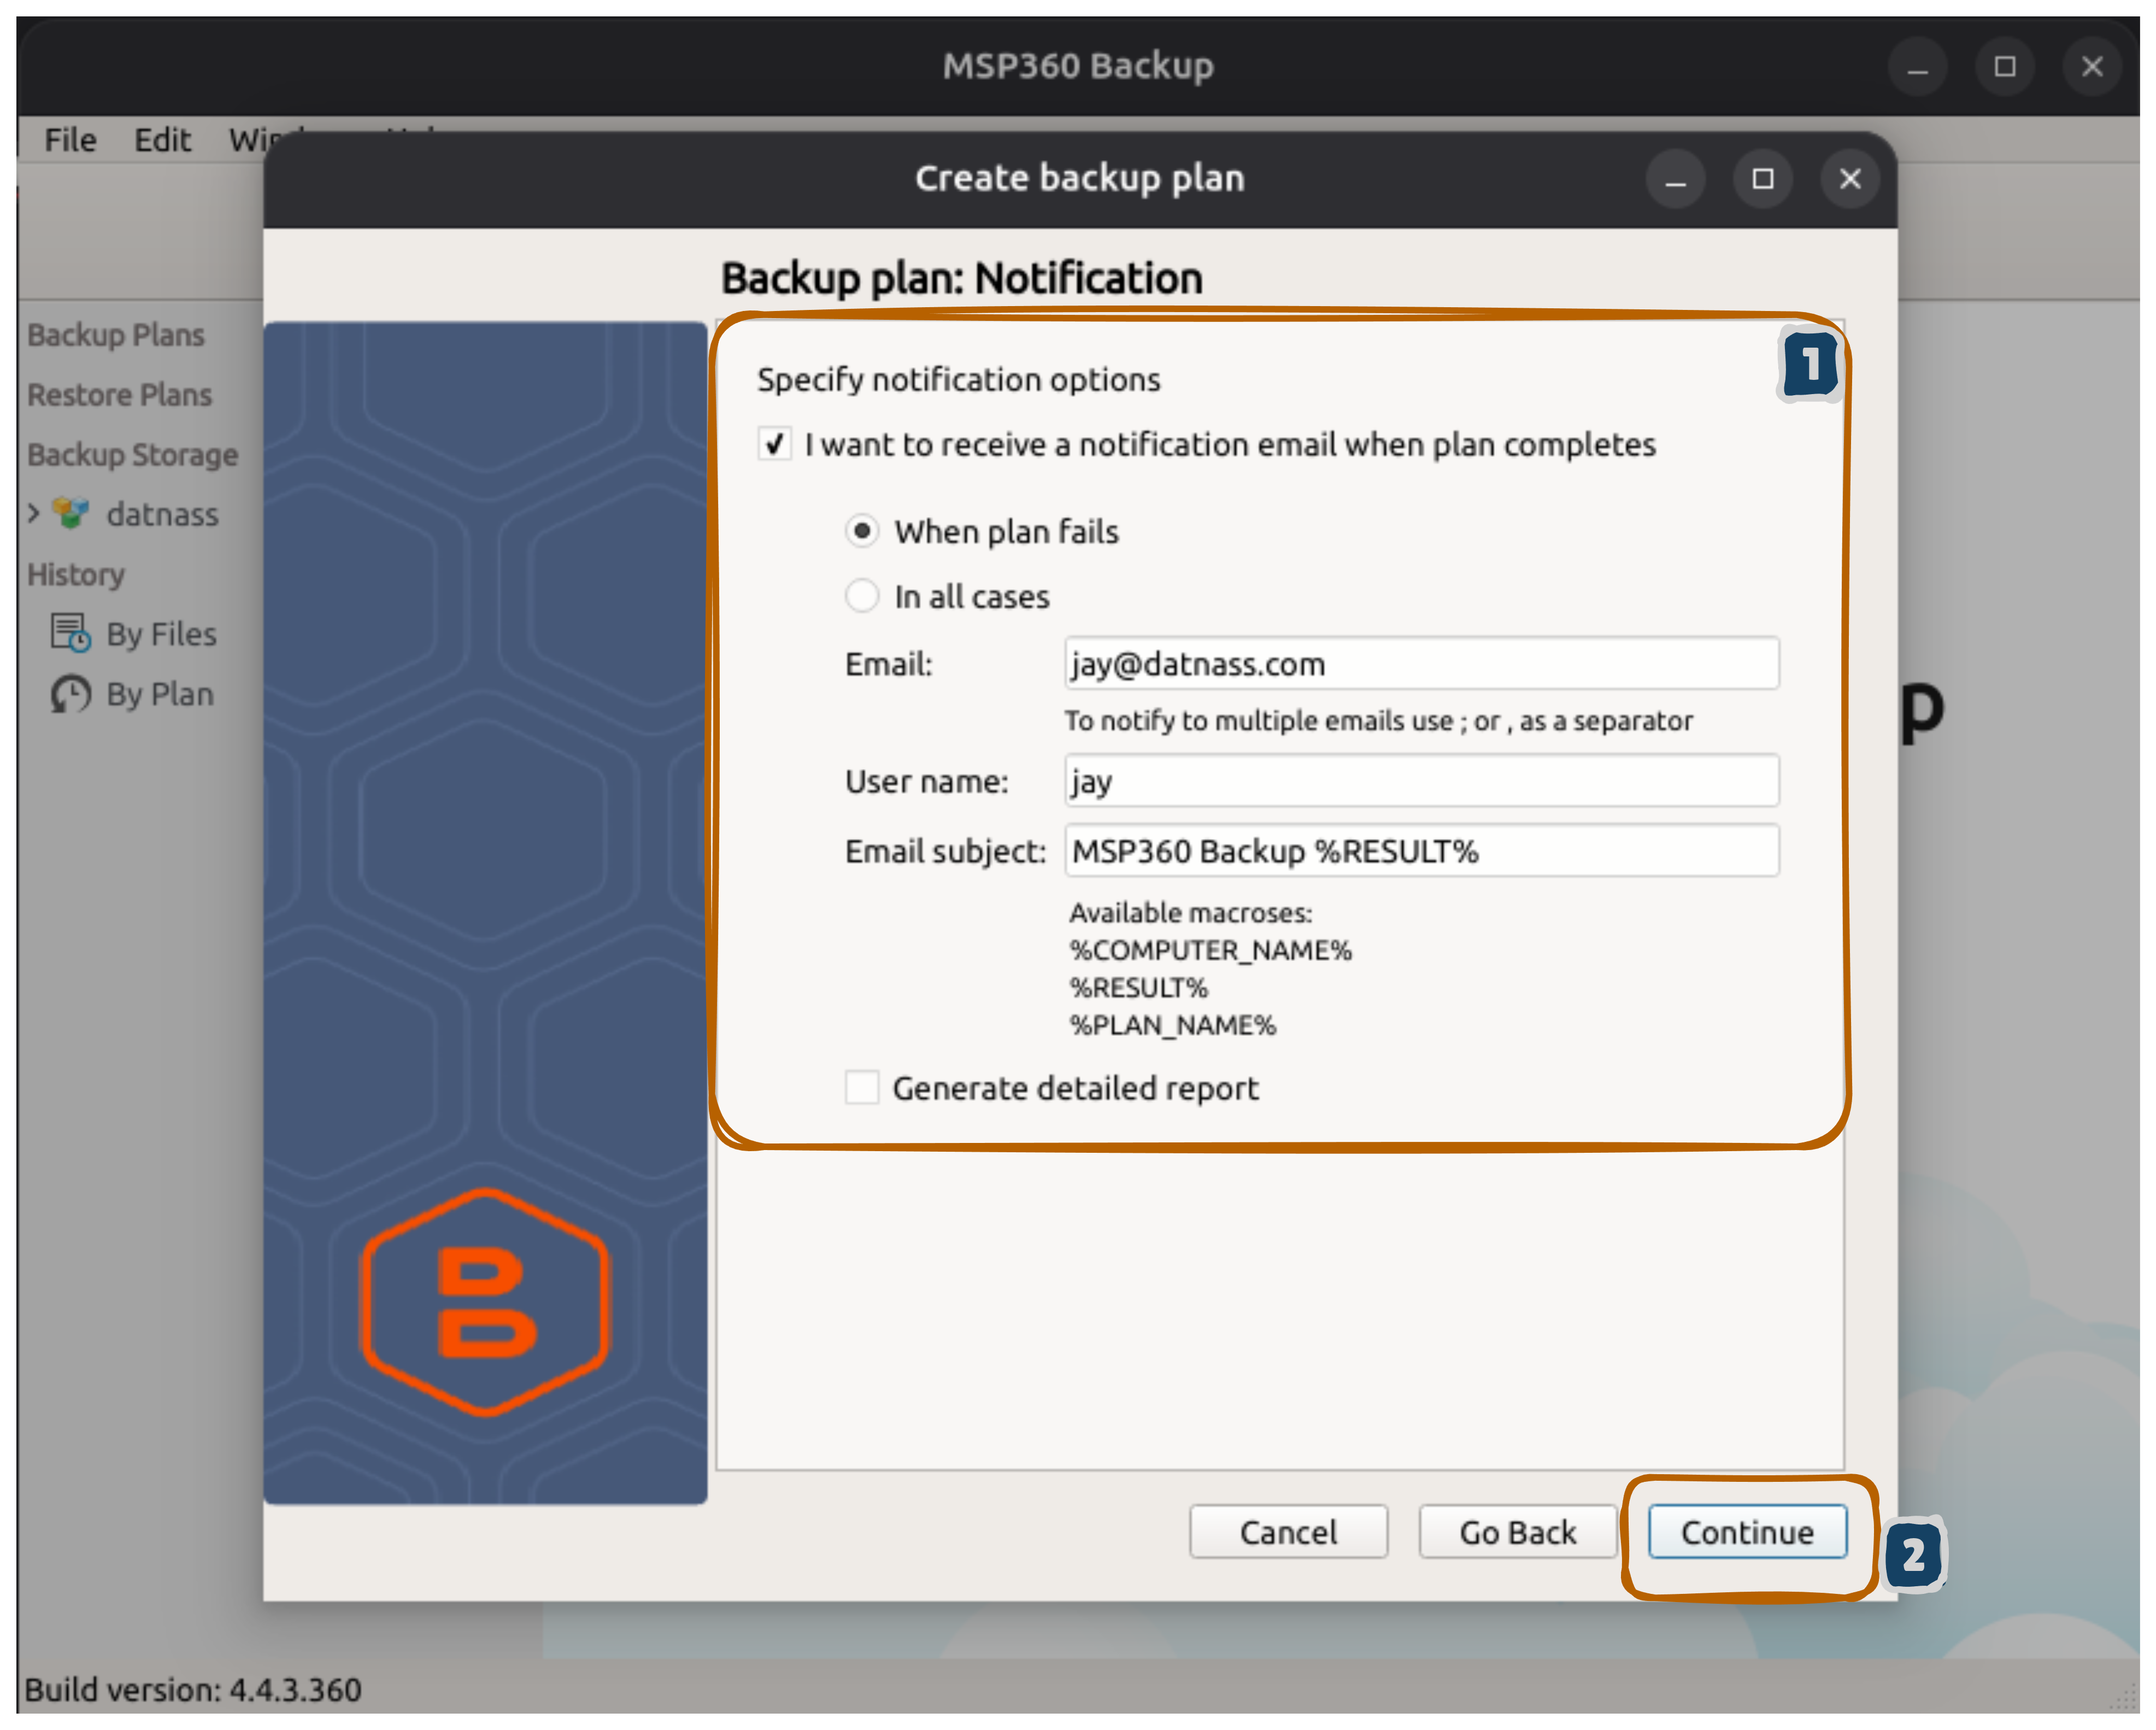
Step 11: Email Notifications
- Check I want to receive a notification email when plan completes
- Select When plan fails (or In all cases for more notifications)
- Enter your Email address
- Enter User name (your name)
- Email subject is optional (defaults to “MSP360 Backup %RESULT%”)
- Click Continue
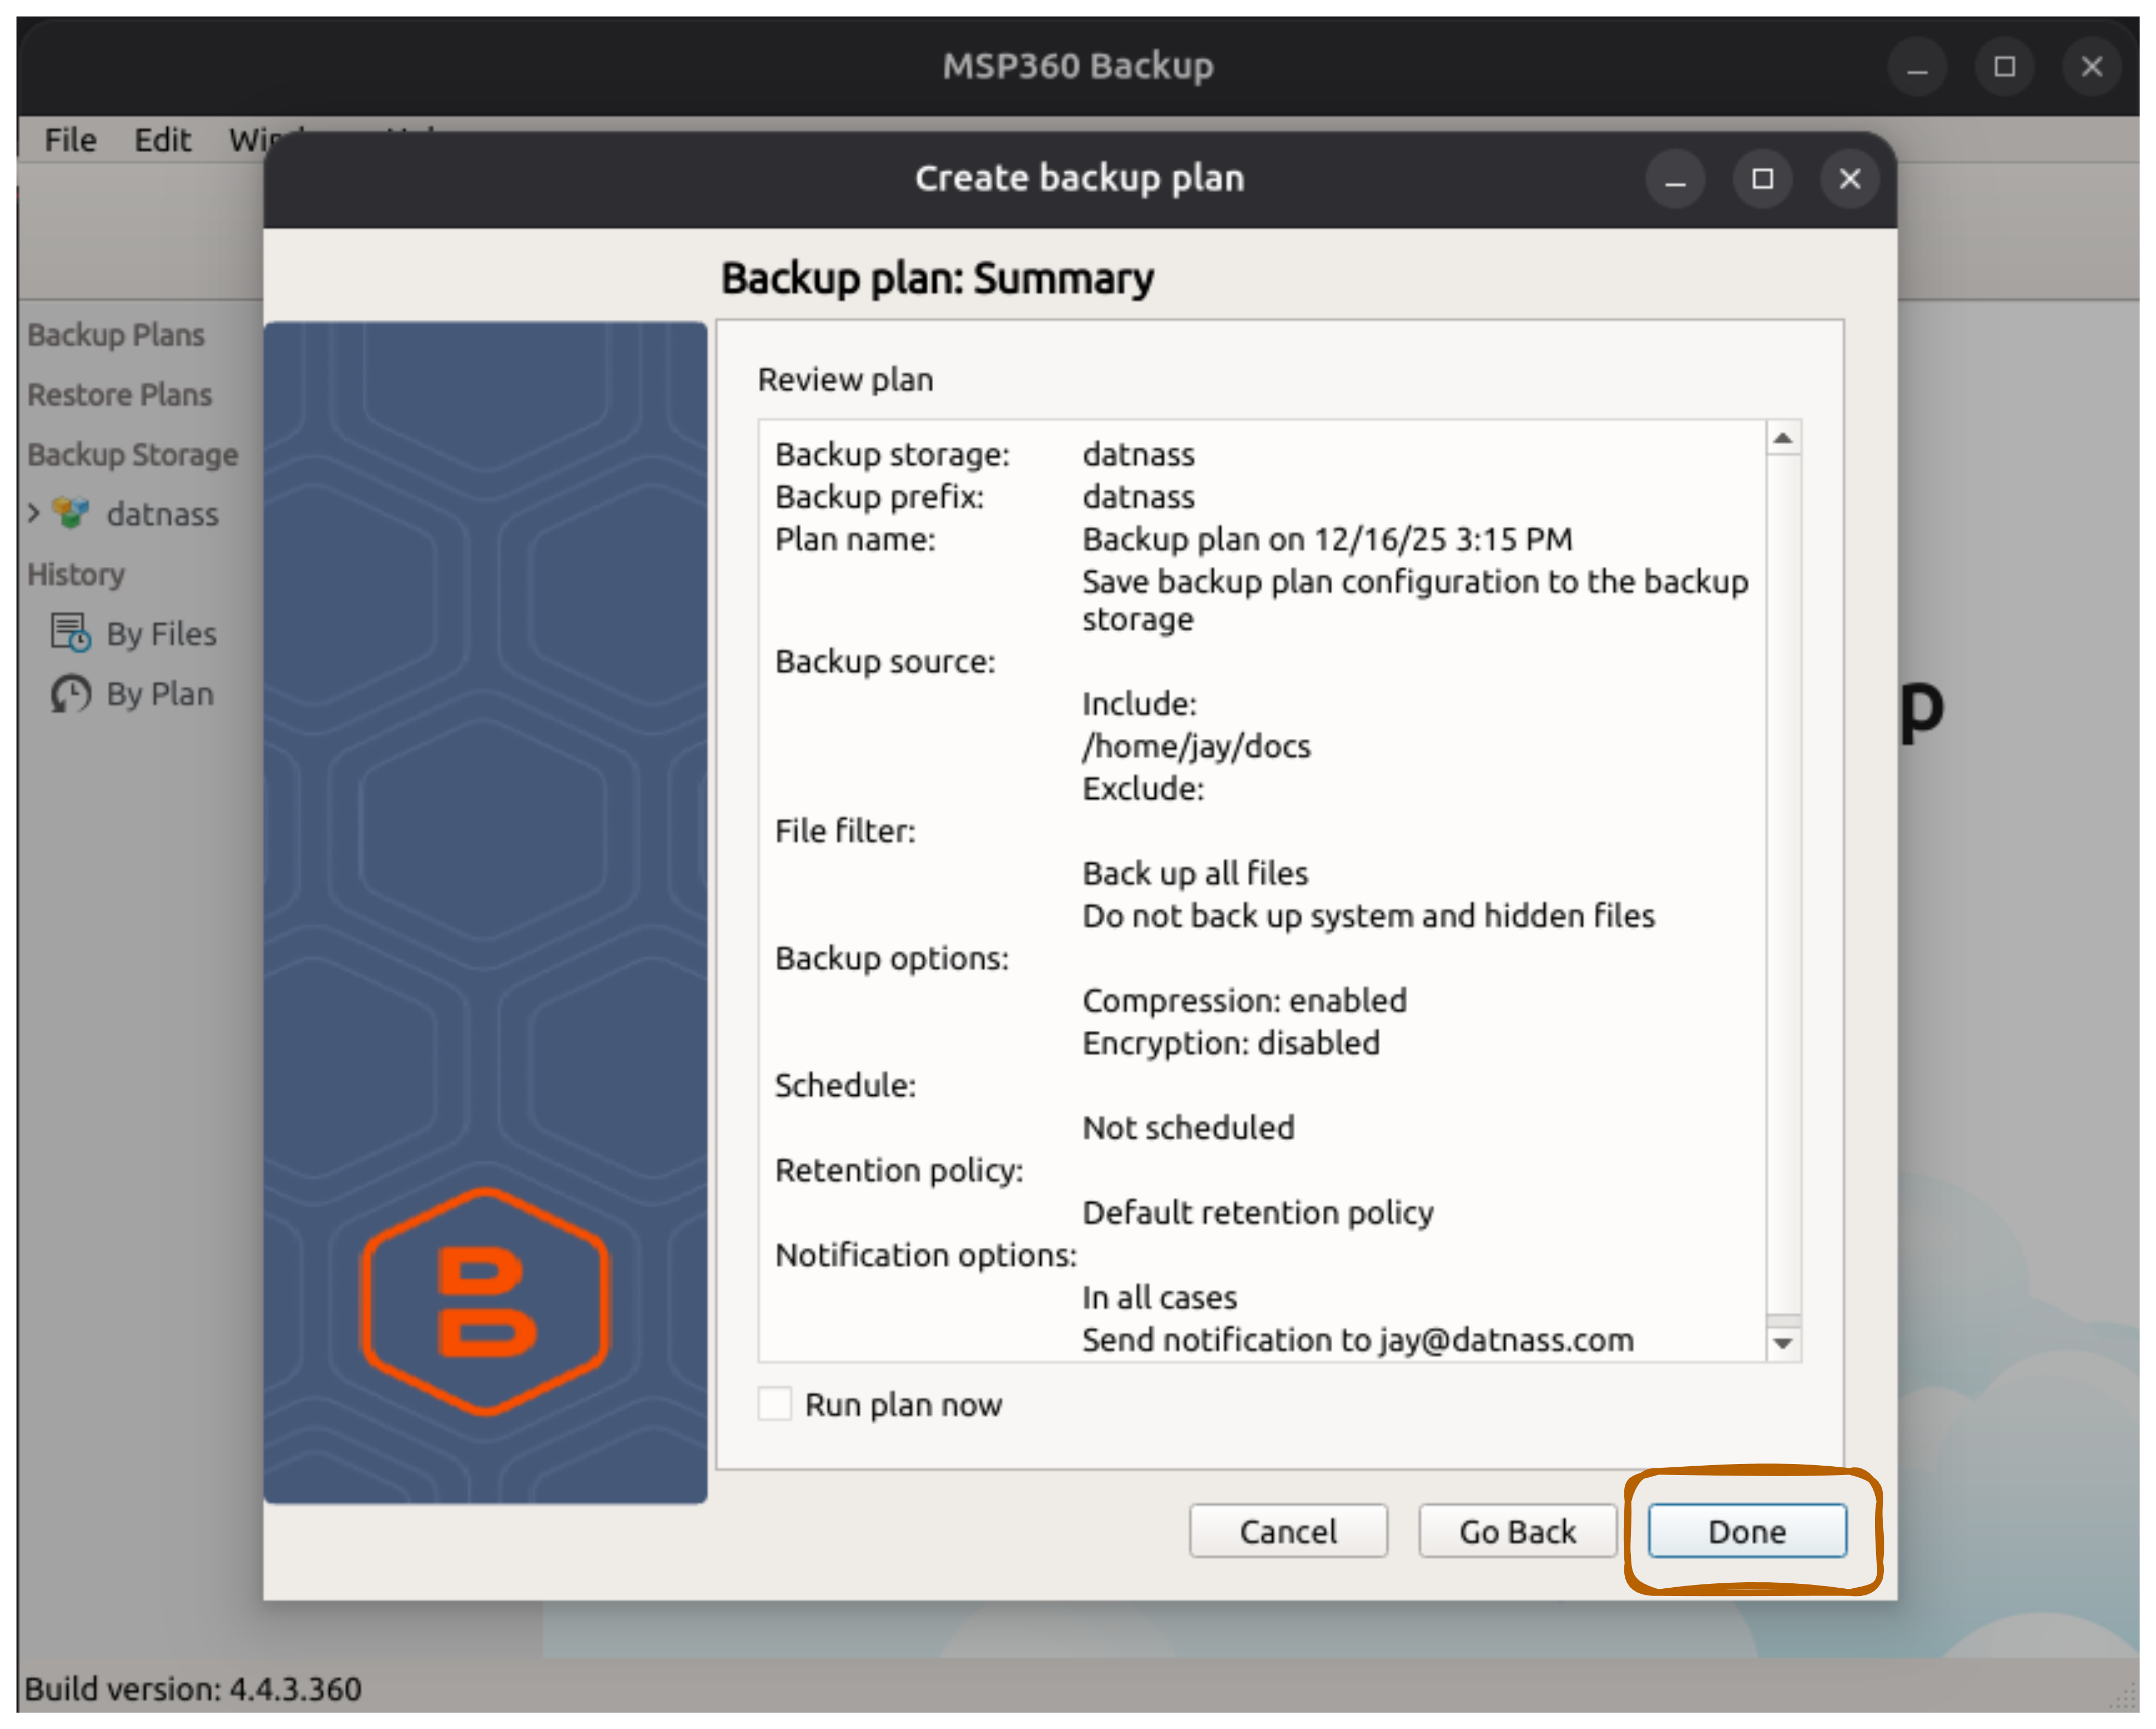
Step 12: Review and Create Backup Plan
- Review the complete summary:
- Backup storage: datnass
- Plan name: Your chosen name
- Backup source: Selected folders
- File filter: Backup all files (system files excluded)
- Backup options: Compression enabled, Encryption disabled
- Schedule: Not scheduled (or your chosen schedule)
- Notification: Your email address
- Click Done to create the plan
Plan Summary
Review all settings before clicking Done. You can edit the plan later if needed, but it’s good to verify everything is correct now.Step 13: Run Your First Backup
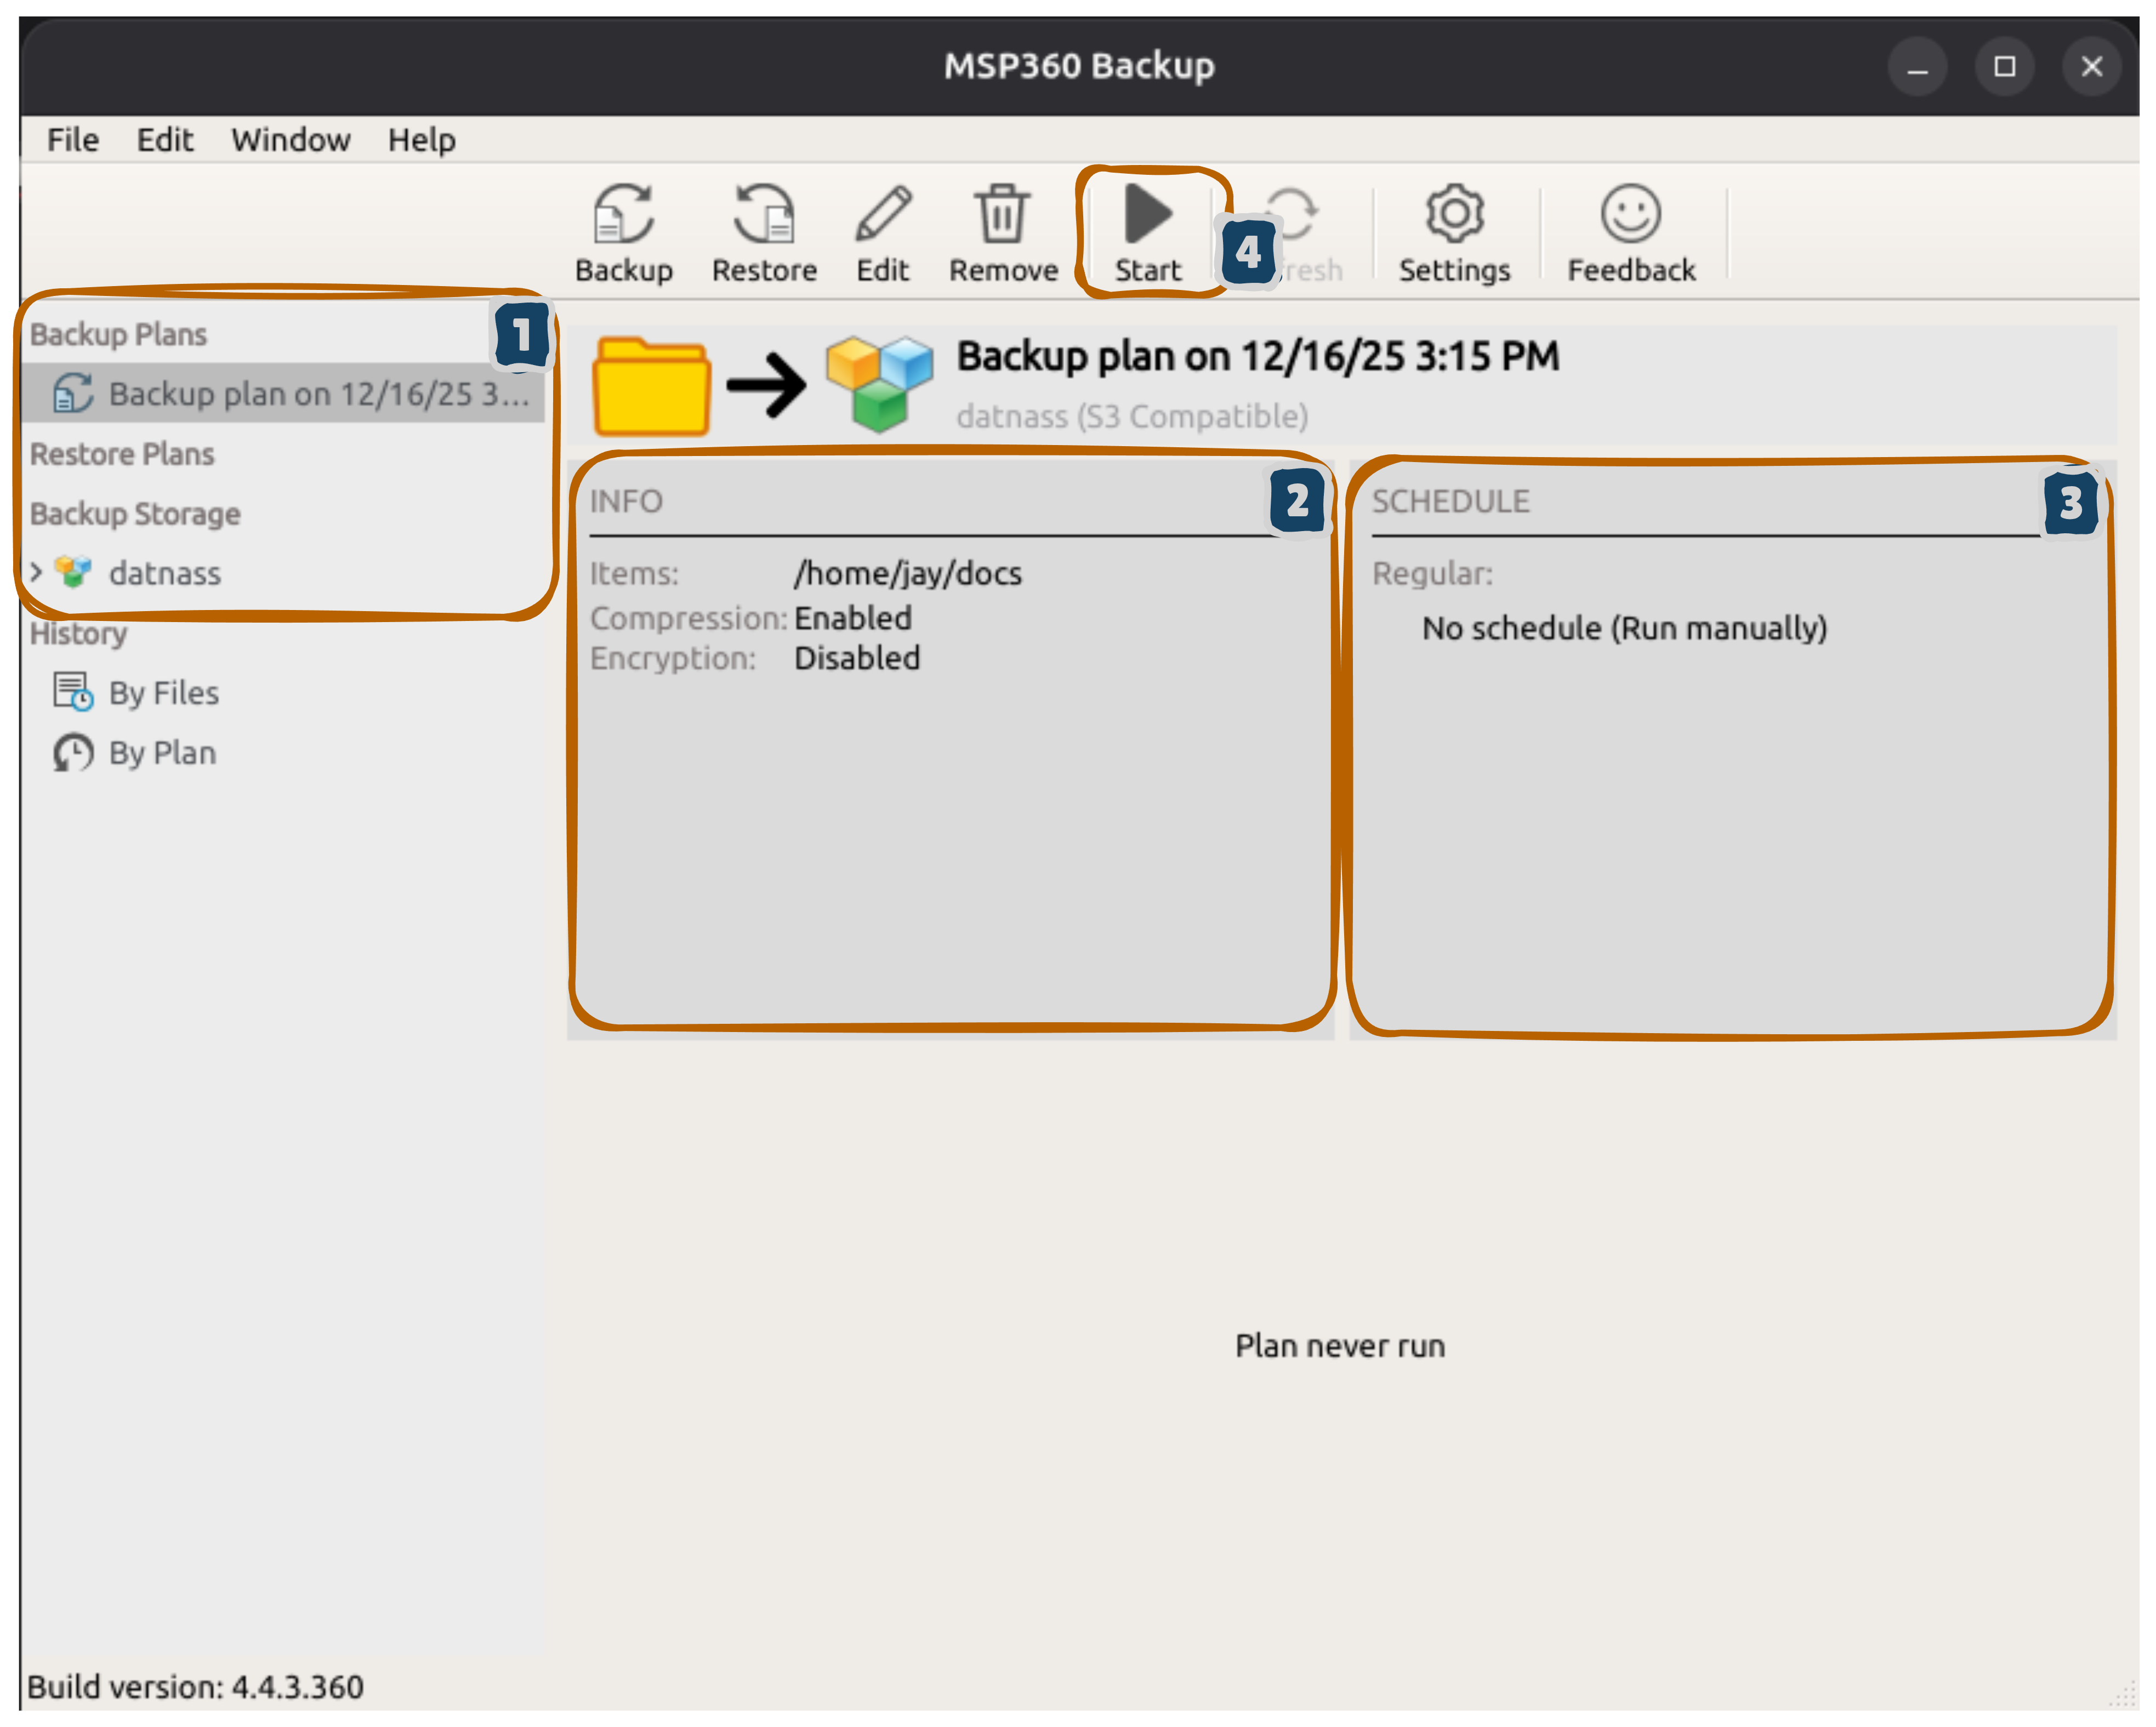
- Your backup plan appears in the left sidebar under Backup Plans
- Plan details display in the INFO panel (items, compression status, etc.)
- The SCHEDULE panel shows “No schedule (Run manually)”
- Click the green Start button in the top toolbar
- The backup begins immediately
Testing Your Backup
For your first backup, start it manually to monitor the progress and ensure everything works correctly before scheduling automated backups.Step 14: Monitor Backup Progress
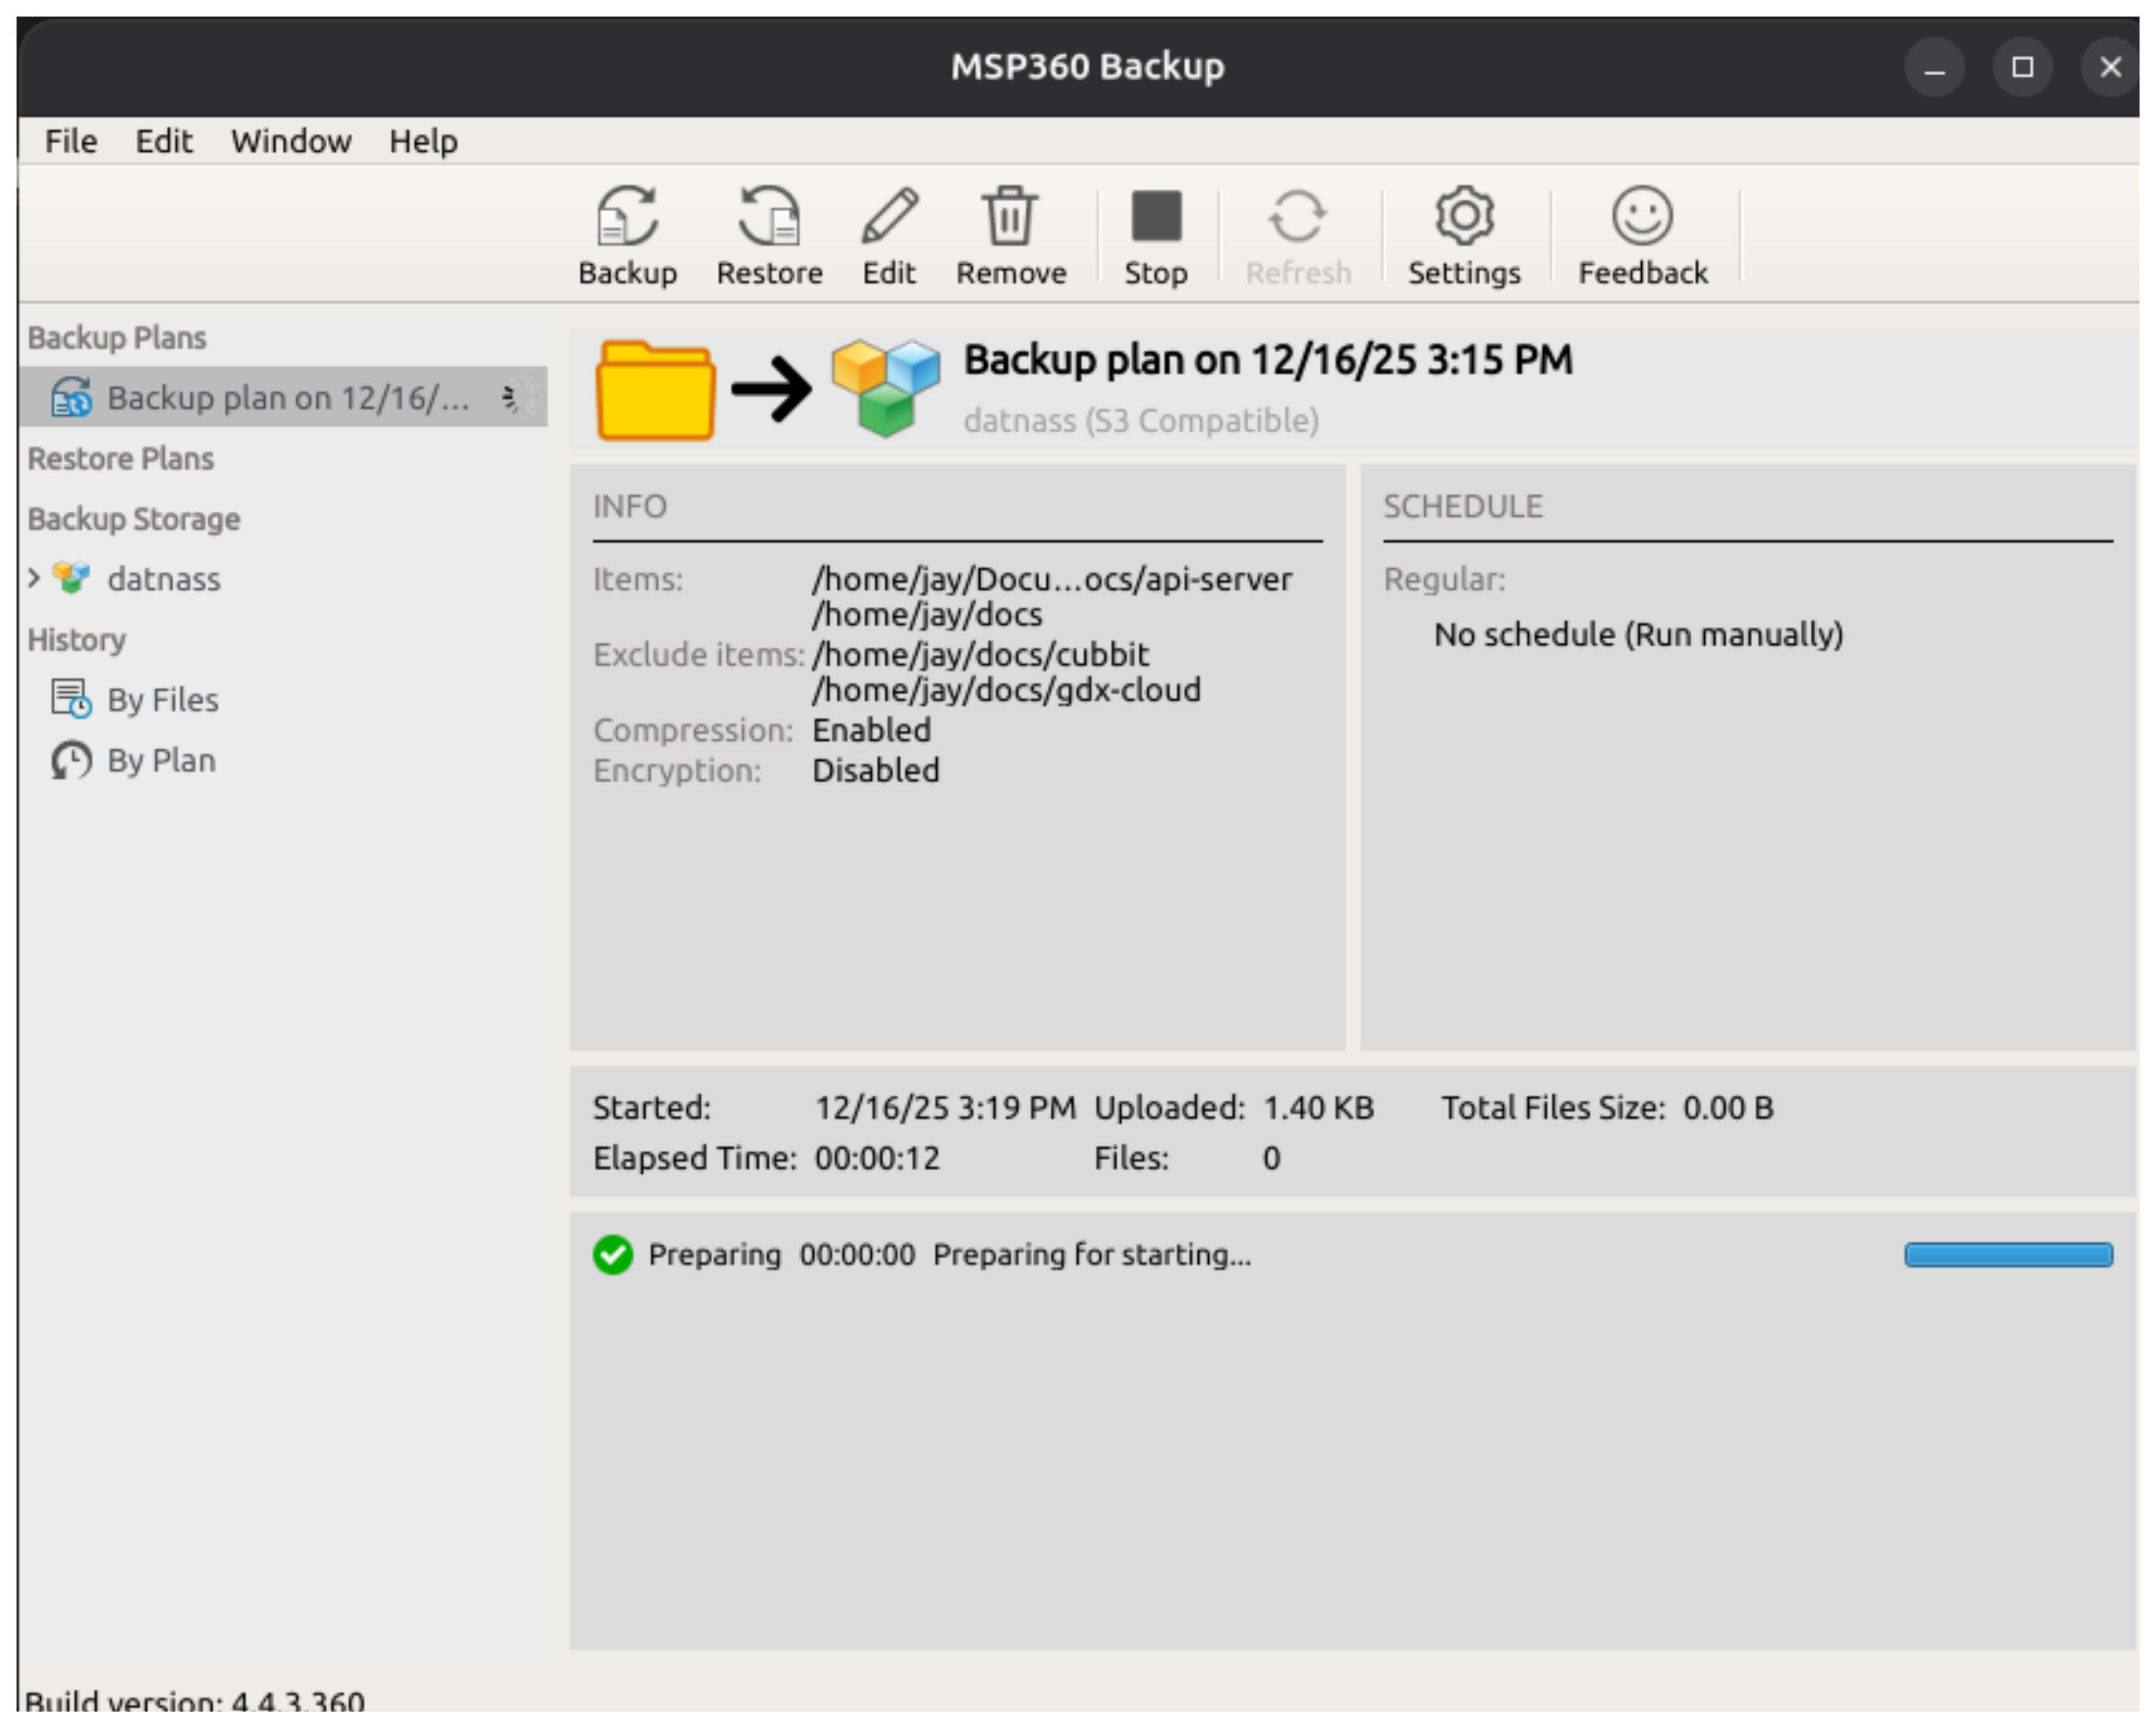
As the backup runs, you’ll see real-time updates:
- Started: Time when backup began (e.g., 12/16/25 3:19 PM)
- Uploaded: Data transferred to GDX Cloud (in KB/MB)
- Elapsed Time: Time spent so far (e.g., 00:00:12)
- Files: Number of files processed
- Status message: Green checkmark shows “Preparing…” then updates
A blue progress bar at the bottom shows completion percentage. The backup is done when it reaches 100%.
To Restore Files
- Click Restore at the top
- Select your GDX Cloud account
- Choose the backup date and files to restore
- Select where to restore them
- Click Start Restore
Common Issues
Troubleshooting Connection Problems
Most backup failures are caused by incorrect credentials or network issues. Always verify your endpoint URL and access keys match your GDX Cloud console before trying other solutions.Can’t connect?
- Verify the endpoint URL is
https://s3.gdx.datnass.com - Ensure your firewall allows HTTPS traffic
Access denied?
- Verify the Access Key ID and Secret Access Key from GDX Cloud console are correct
Backup running slow?
- Check your network connection
- Enable compression to reduce backup size
Support & Resources
- MSP360 Documentation: https://www.msp360.com/backup/documentation
- GDX Cloud Console: https://console.gdx.datnass.com
Your backups are now configured to run securely to GDX Cloud.