How to Connect NAKIVO with GDX-Cloud
(End-User Guide with Screenshots)
This guide shows how to connect NAKIVO Backup & Replication with GDX-Cloud using S3-compatible storage.
No technical background is required.
What This Guide Helps You Do
After completing these steps, you will be able to:
- Store backups securely in GDX-Cloud
- Use cloud storage as a backup destination
- Protect your data with encrypted connections
Before You Start
Make sure you have:
- Access to your NAKIVO dashboard
- Your GDX-Cloud credentials:
- Access Key
- Secret Key
- S3 Service Endpoint (provided by GDX Cloud console)
Step 1: Open Inventory Settings
- Log in to your NAKIVO dashboard.
- Click Settings from the left menu.
- Select Inventory.
- Click the ➕ Add button.
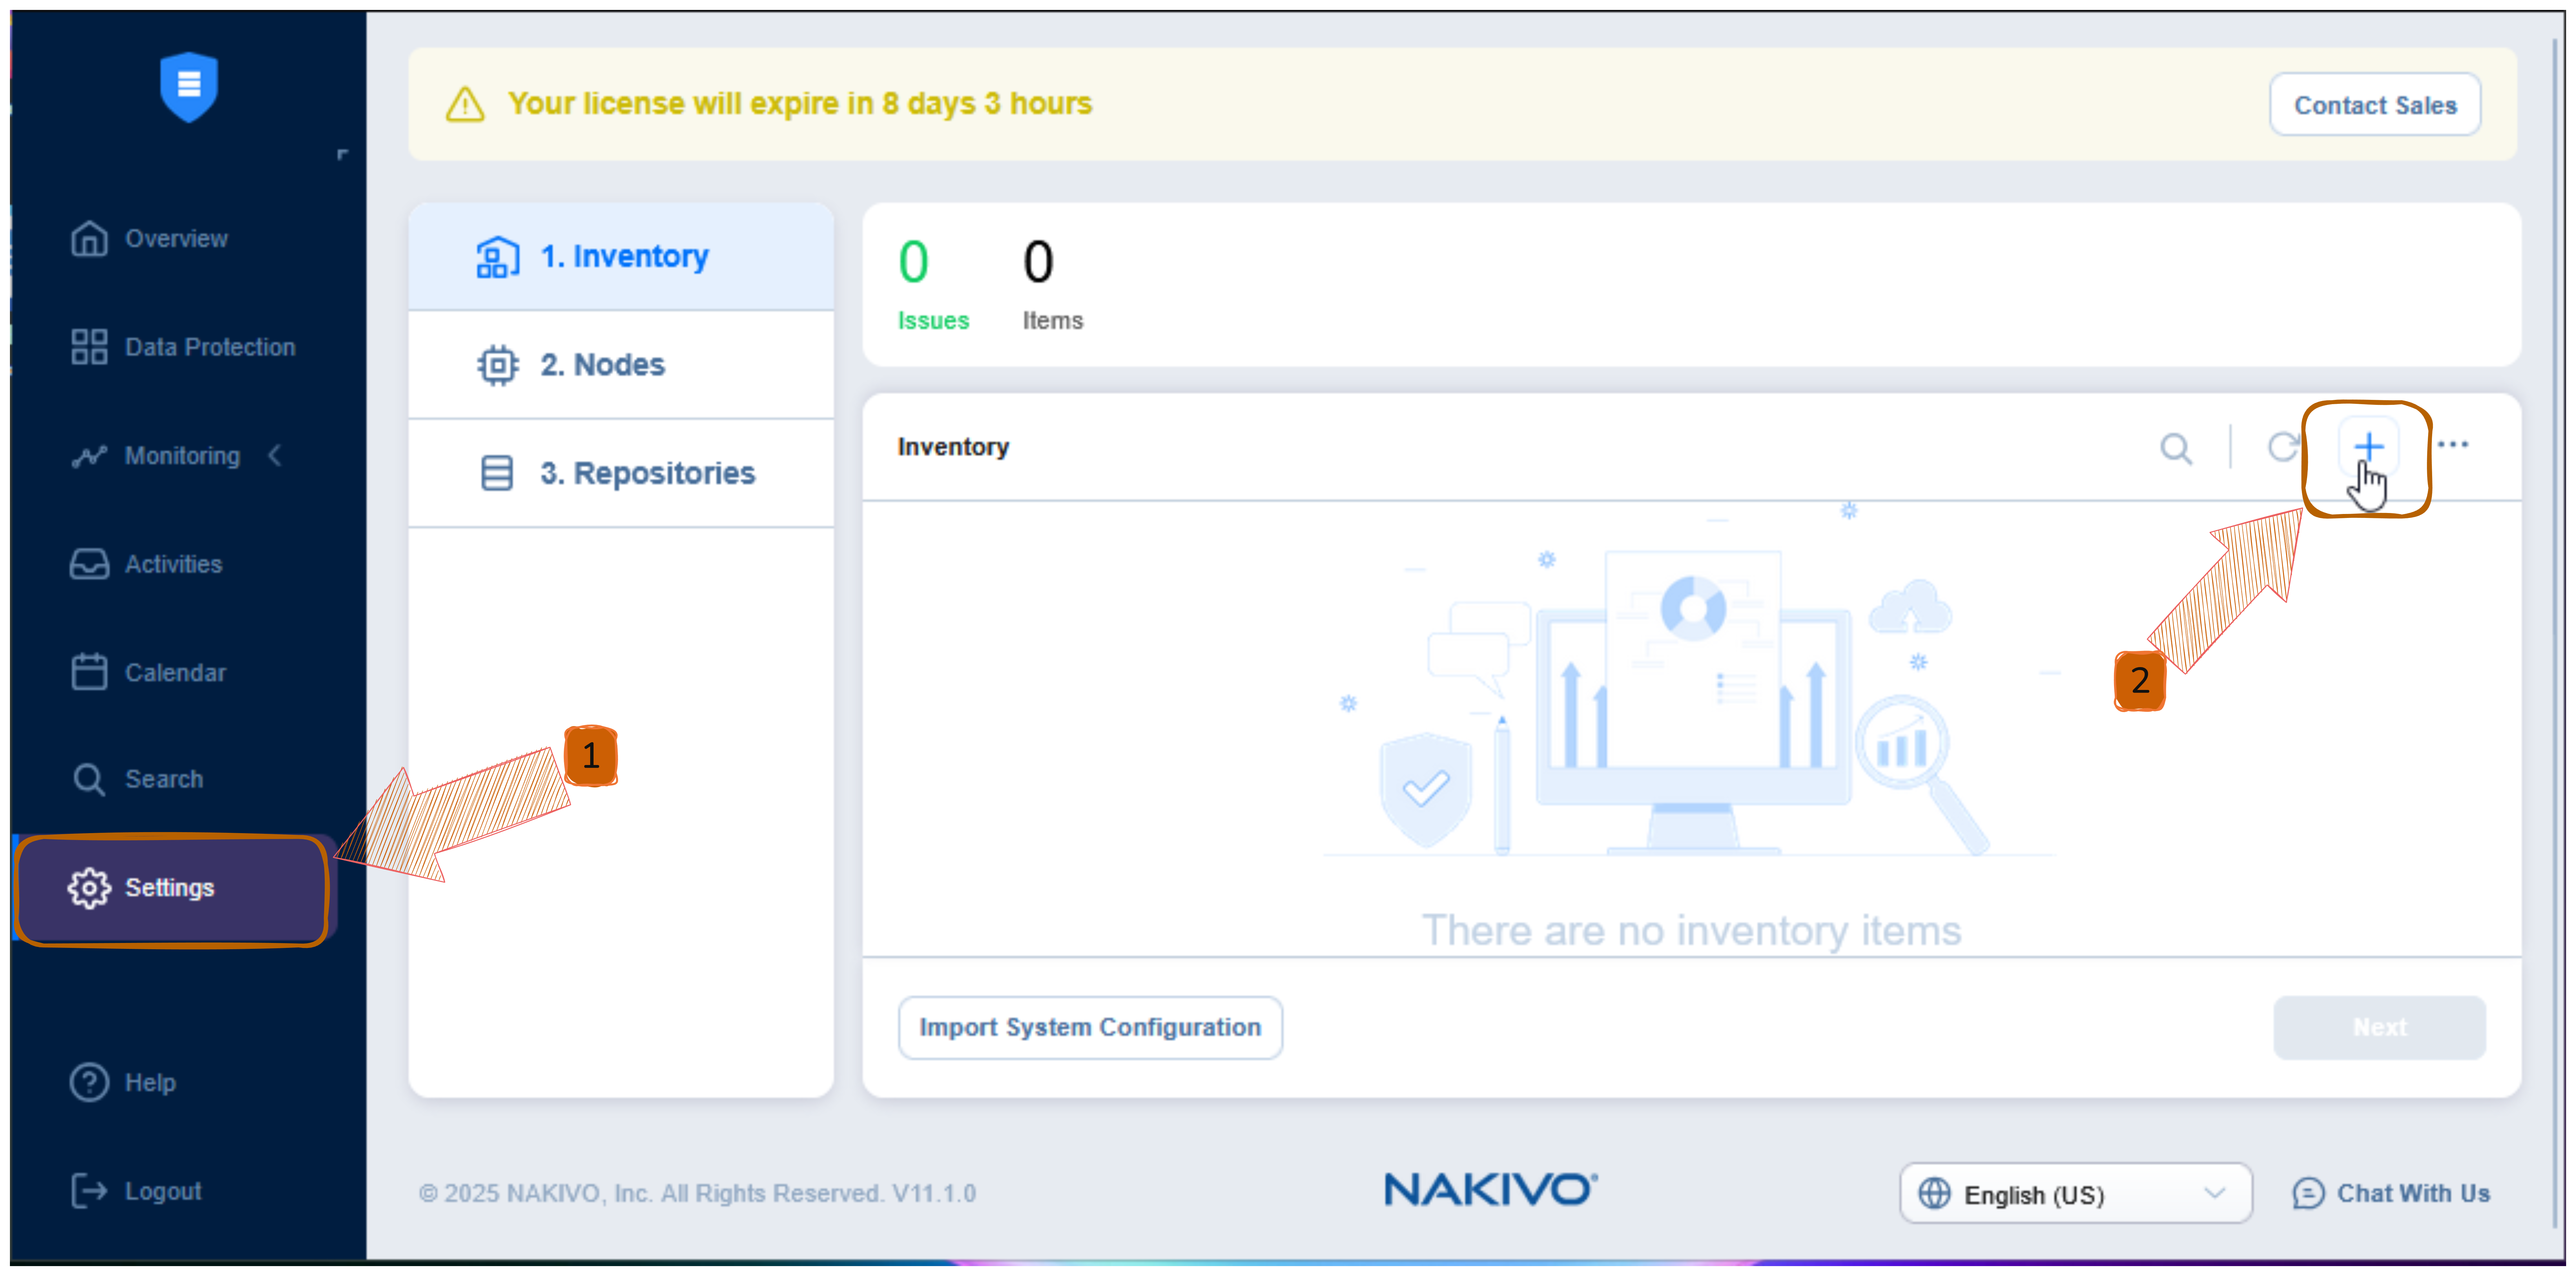 Settings → Inventory page with “Add (+)” button highlighted
Step 2: Select Cloud Storage
- On the Platform screen, select Cloud Storage.
- Click Next.
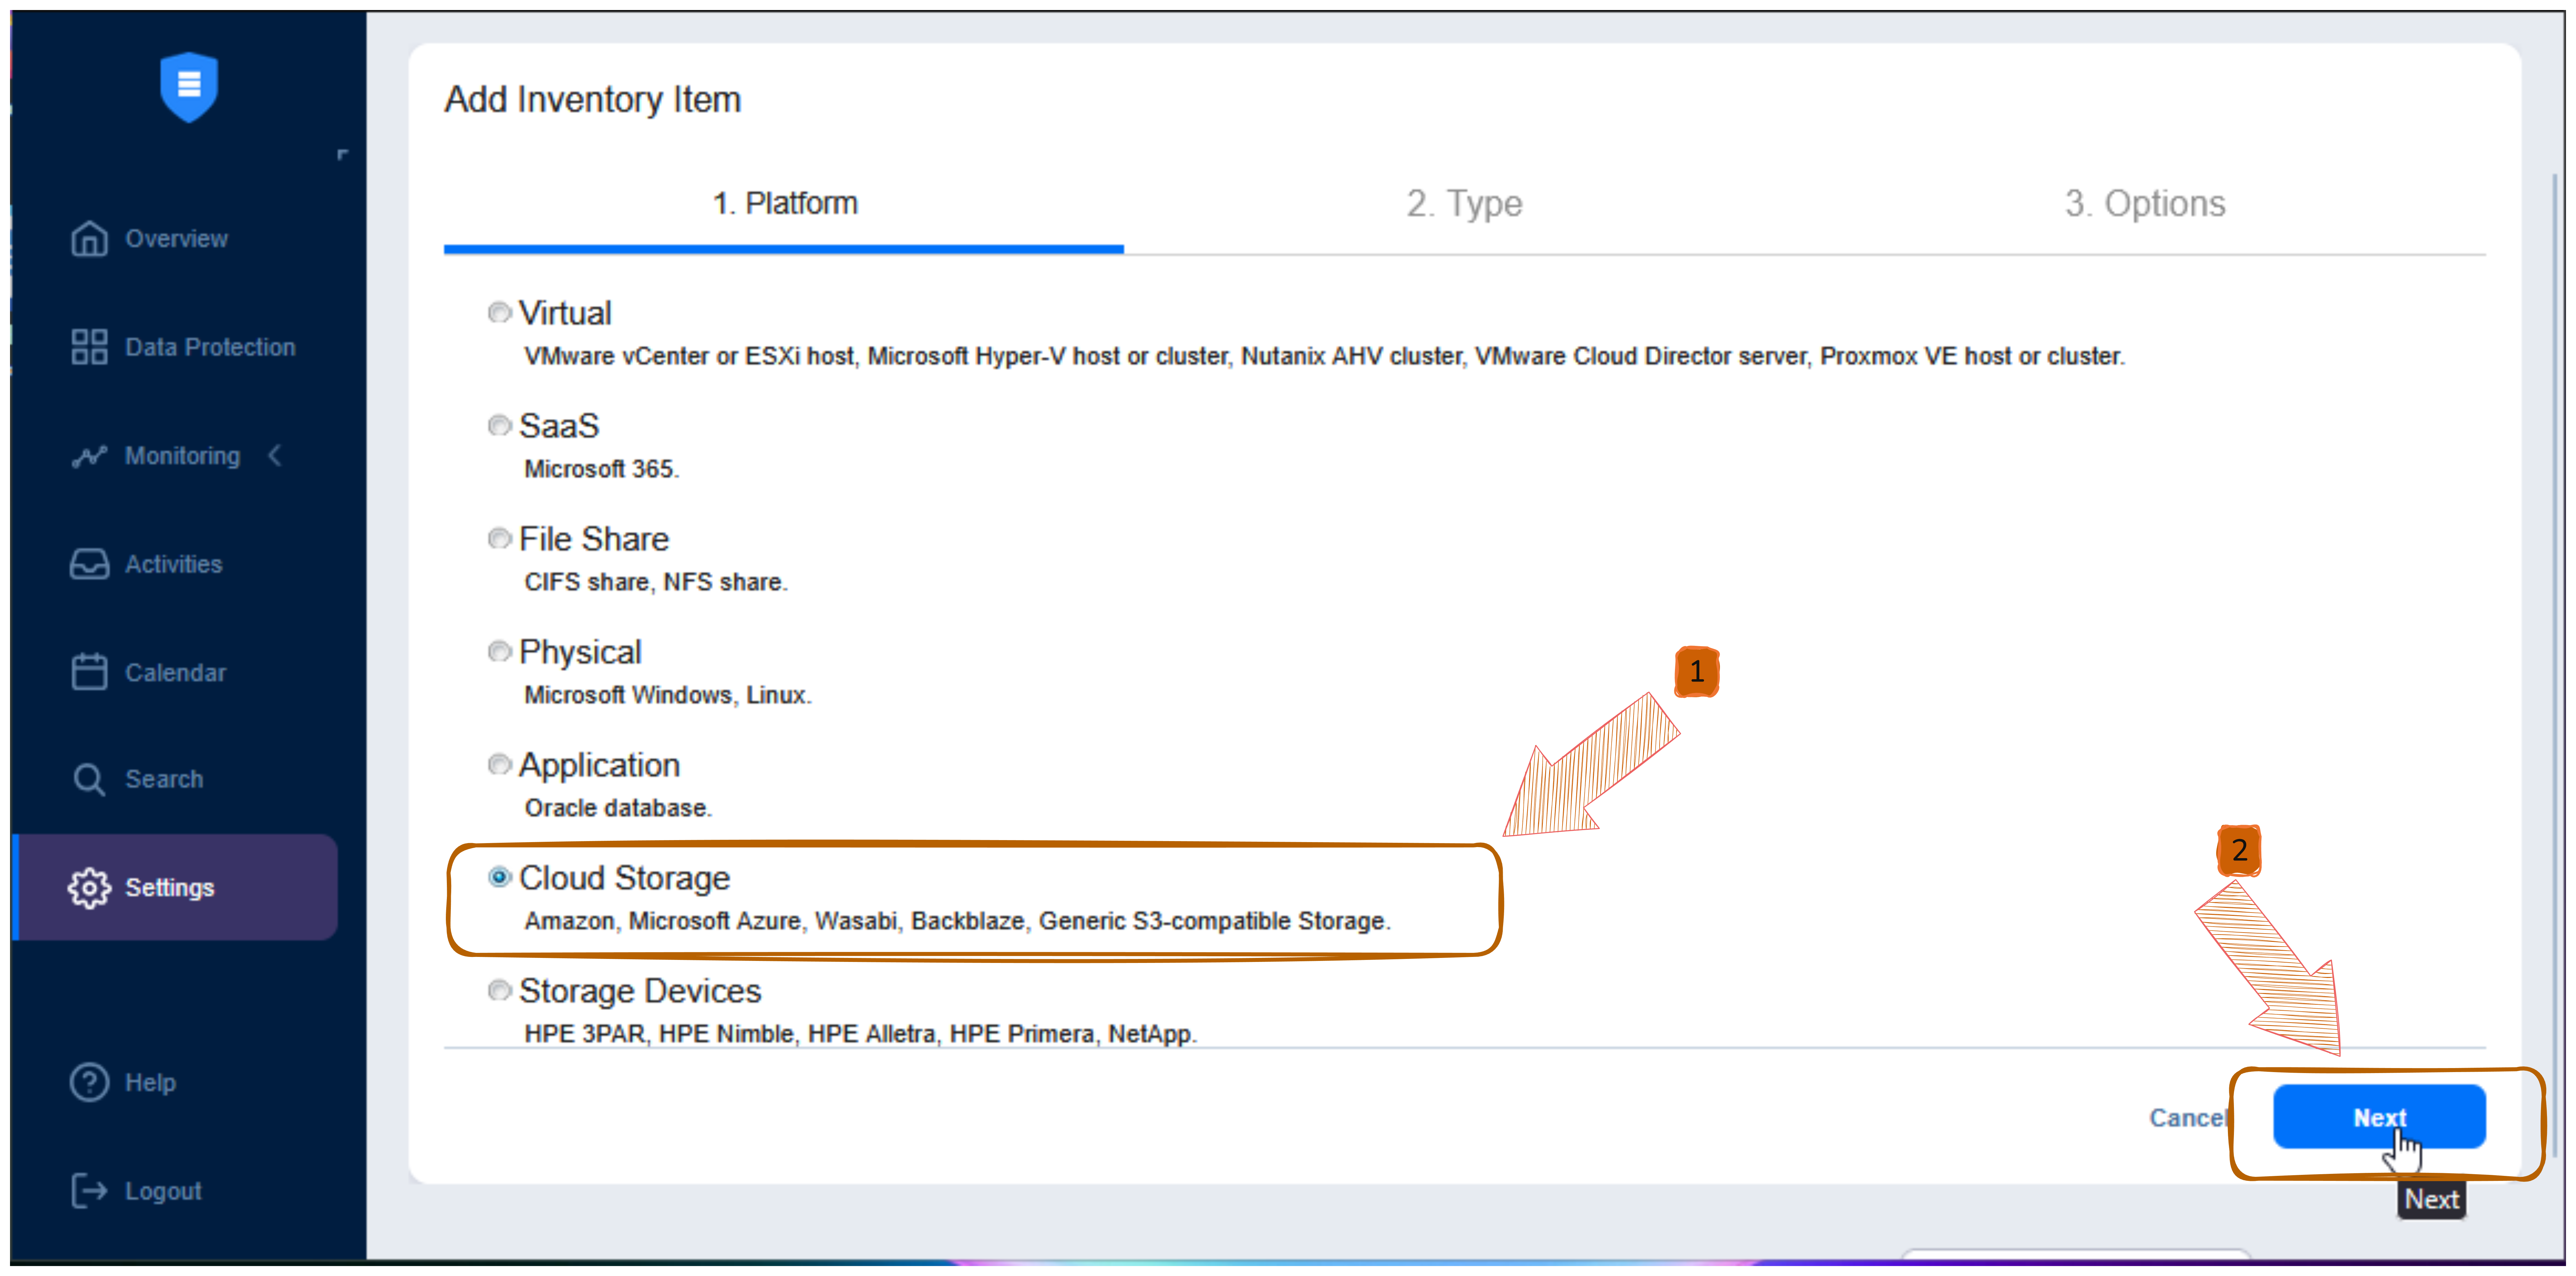 Cloud Storage option selected
Step 3: Select S3-Compatible Storage
- Choose Generic S3-compatible Storage.
- Click Next.
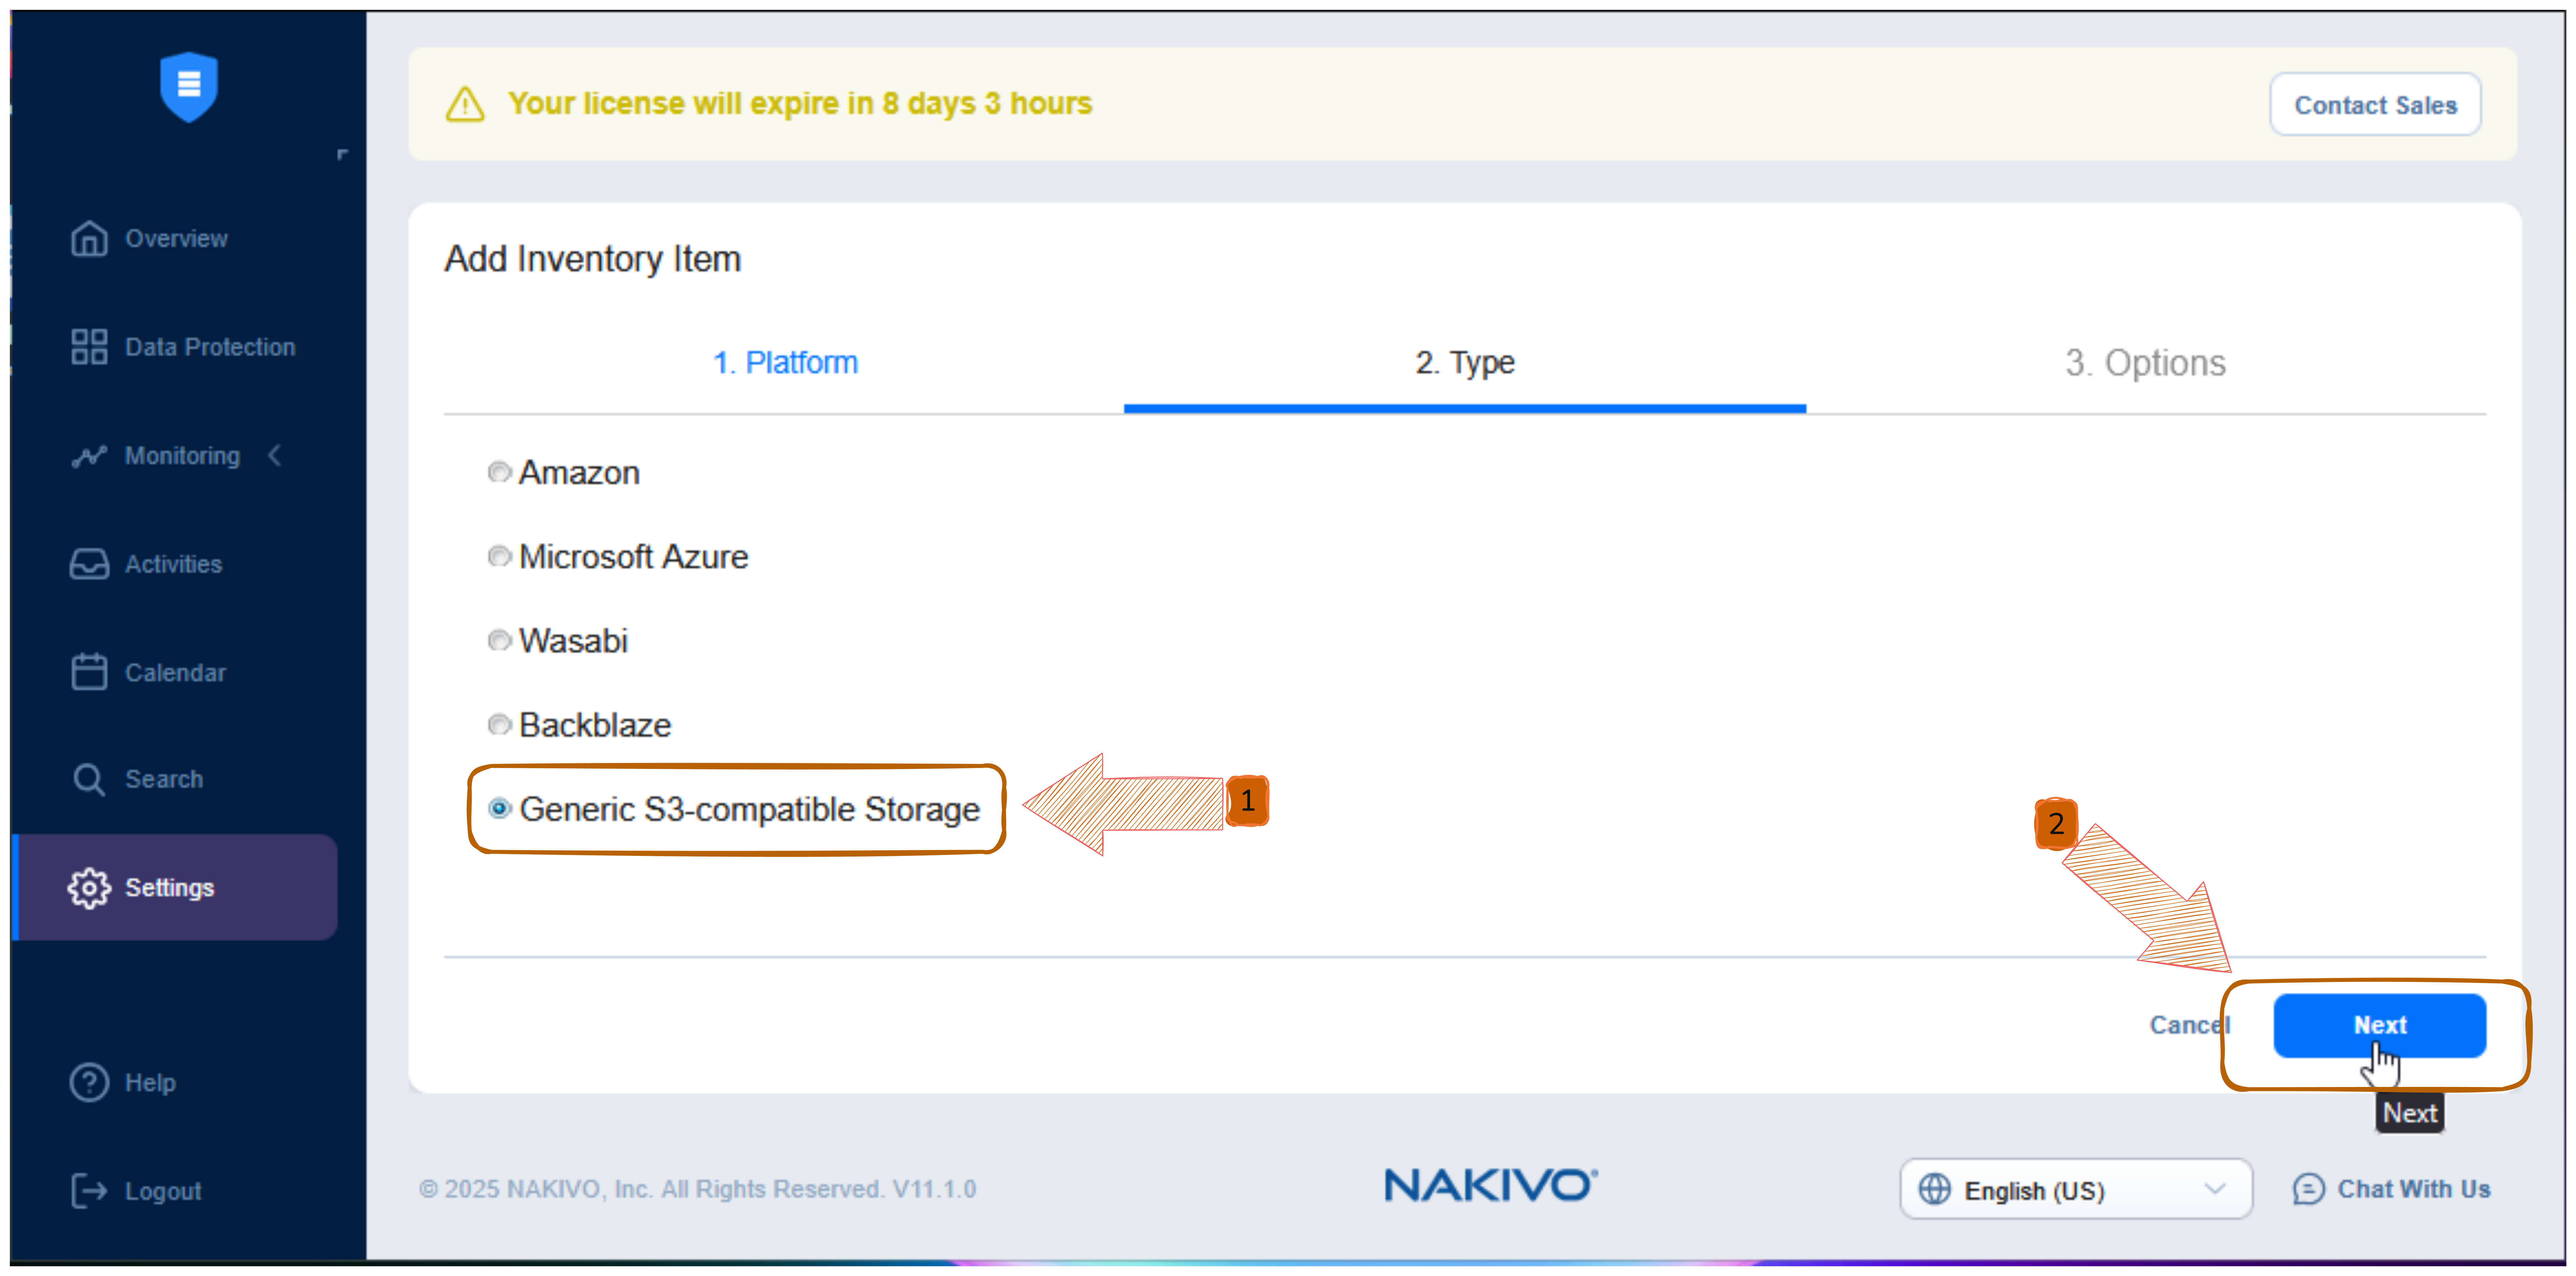 Generic S3-compatible Storage selected
Step 4: Enter GDX-Cloud Connection Details
Fill in the form using the information provided by GDX-Cloud.
Field Explanation
- Display Name
Enter any name you like (example:gdx-cloud). - Service Endpoint
Example:
https://s3.gdx.datnass.com
- Region Code
Leave this field empty. - Access Key ID
Enter your GDX-Cloud access key. - Secret Access Key
Enter your GDX-Cloud secret key.
Click Connect.
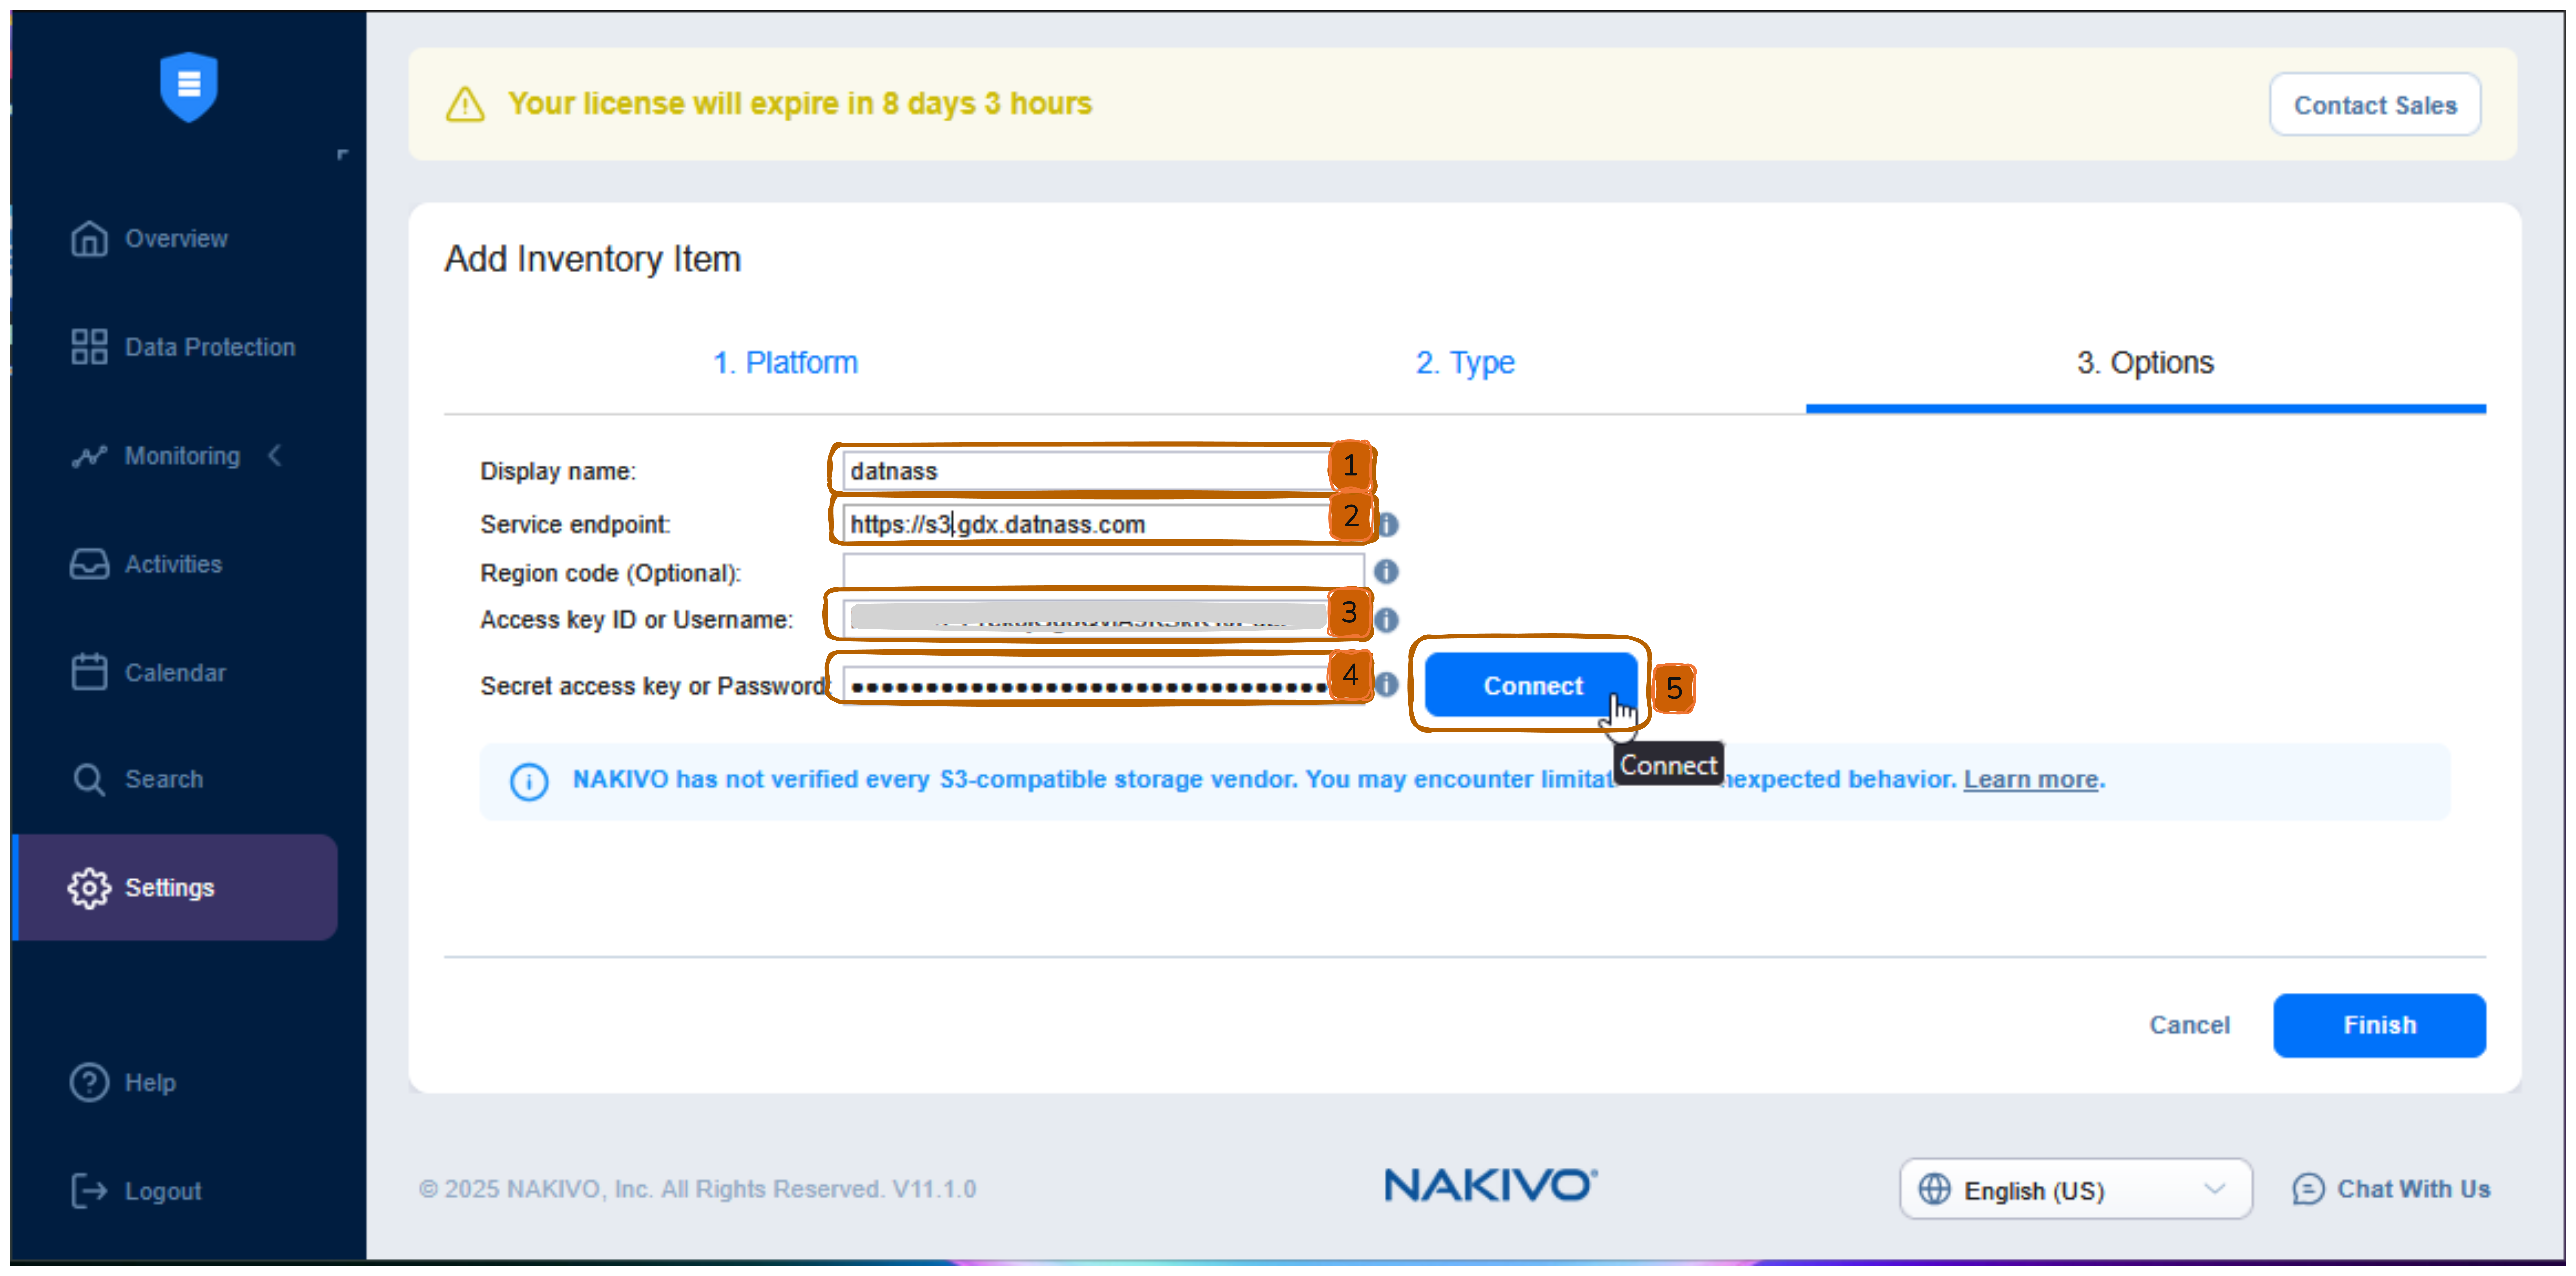 Connection details filled in with Connect button highlighted
Step 5: Accept Security Certificate
- A certificate window will appear.
- Leave Auto accept new certificate enabled.
- Click Accept.
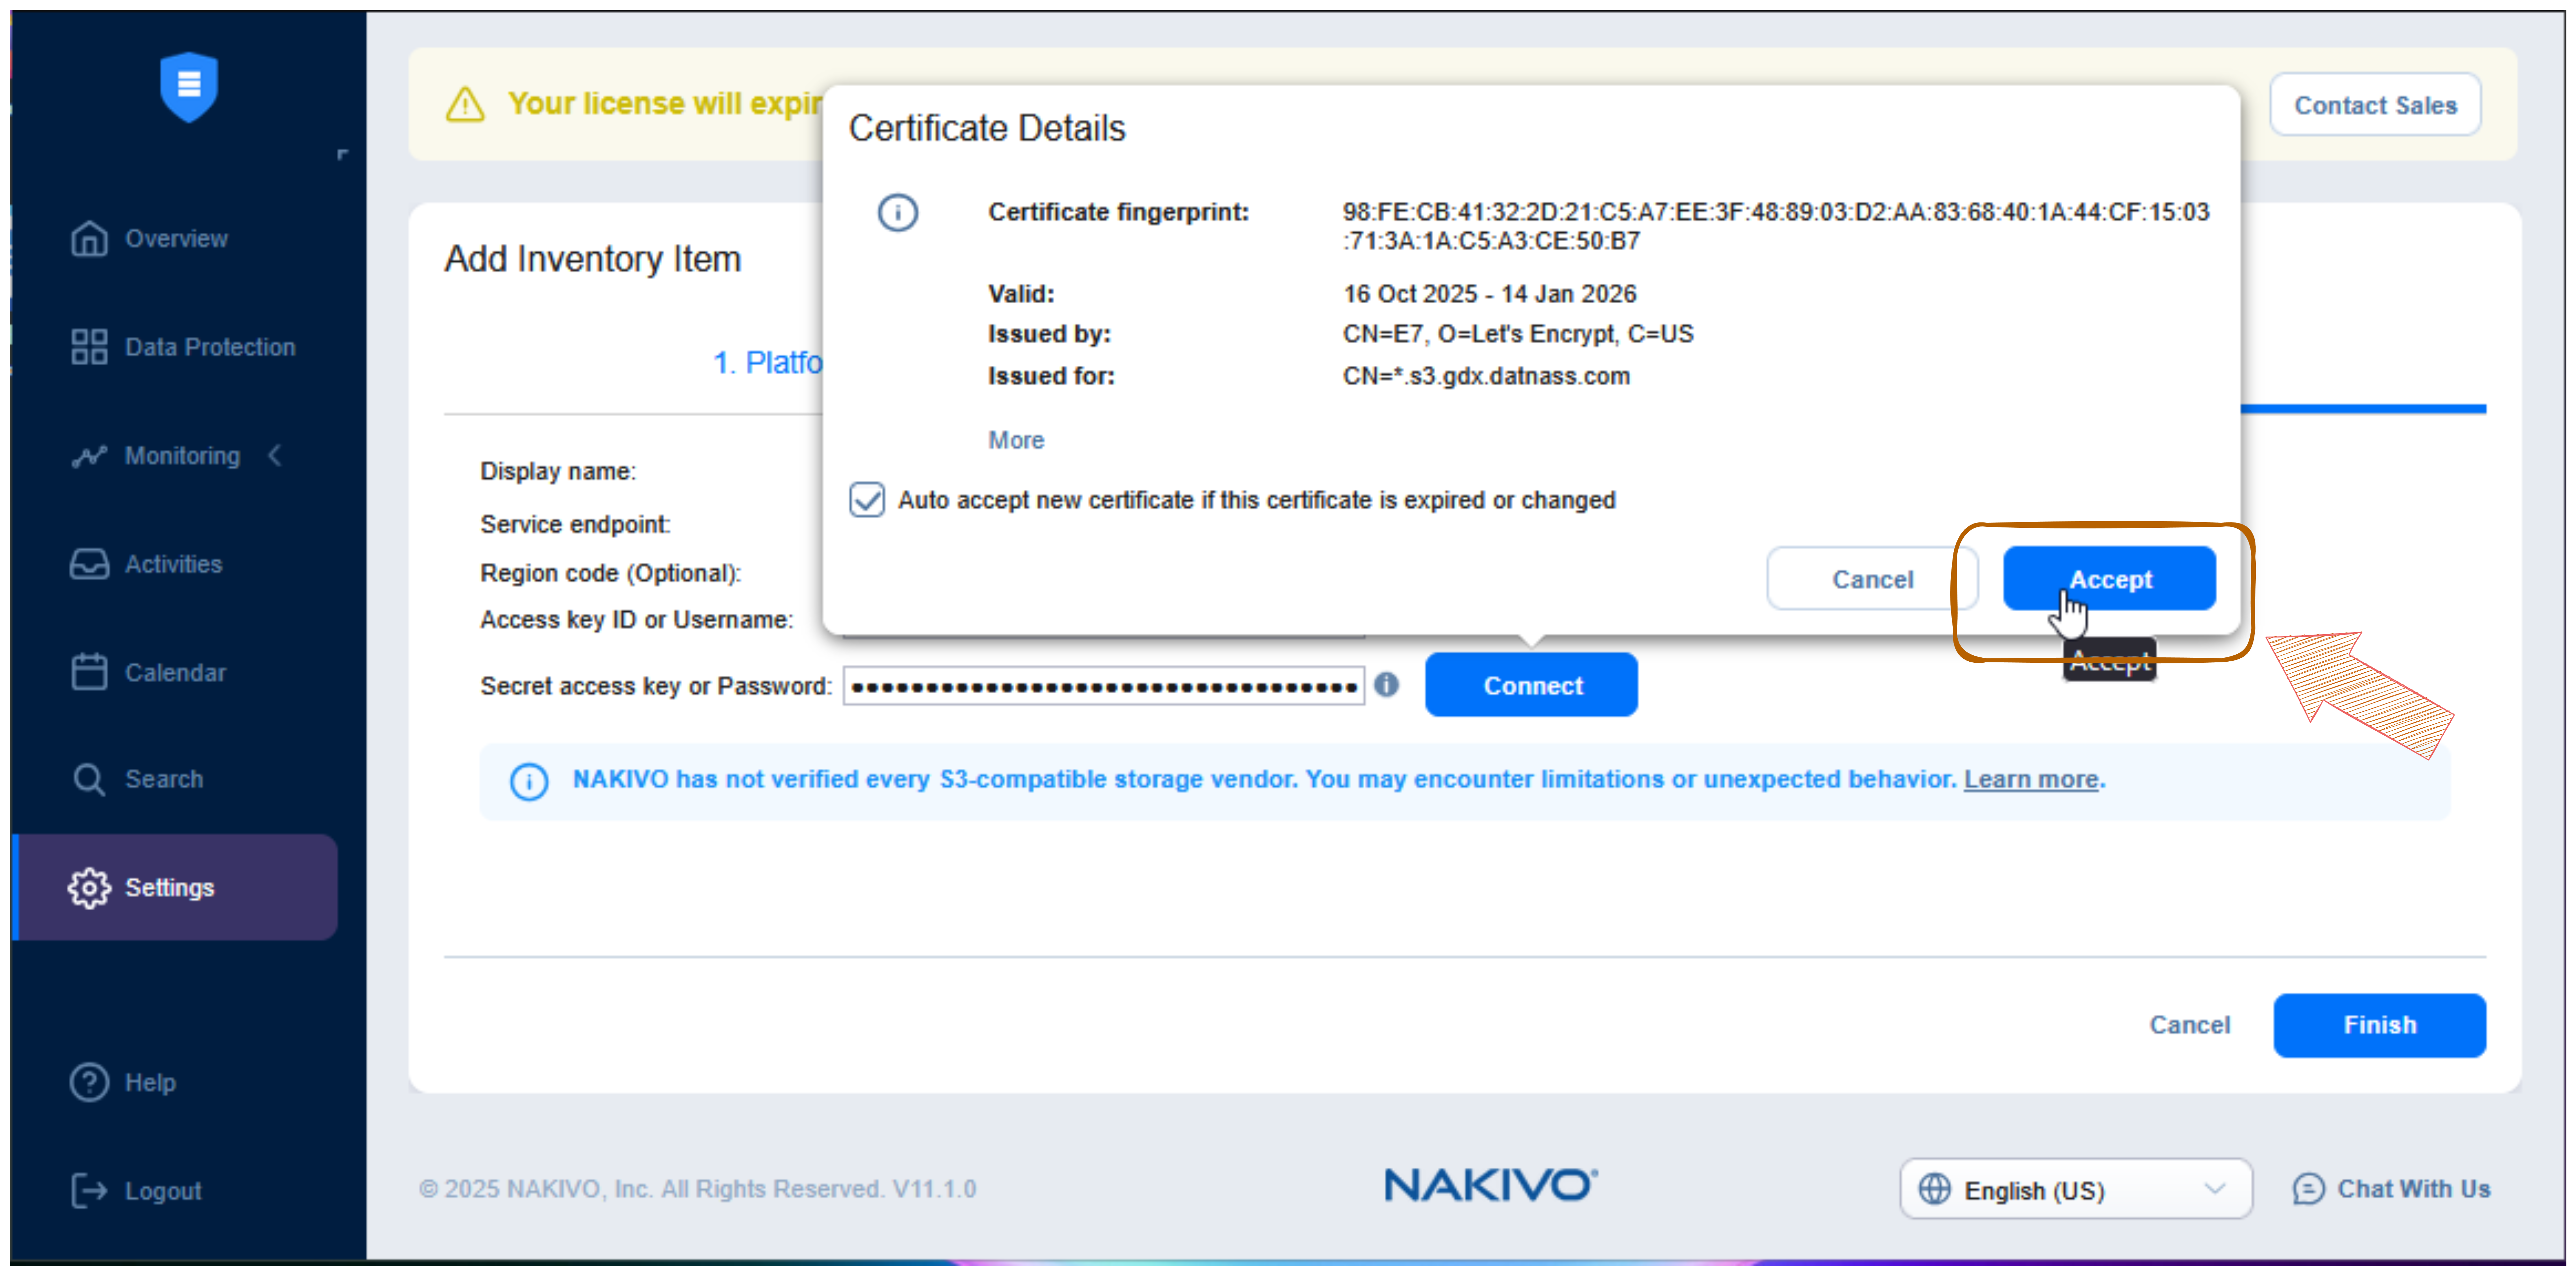 Certificate details popup with Accept button highlighted
Step 6: Finish Cloud Storage Setup
- Confirm you see Certificate accepted.
- Click Finish.
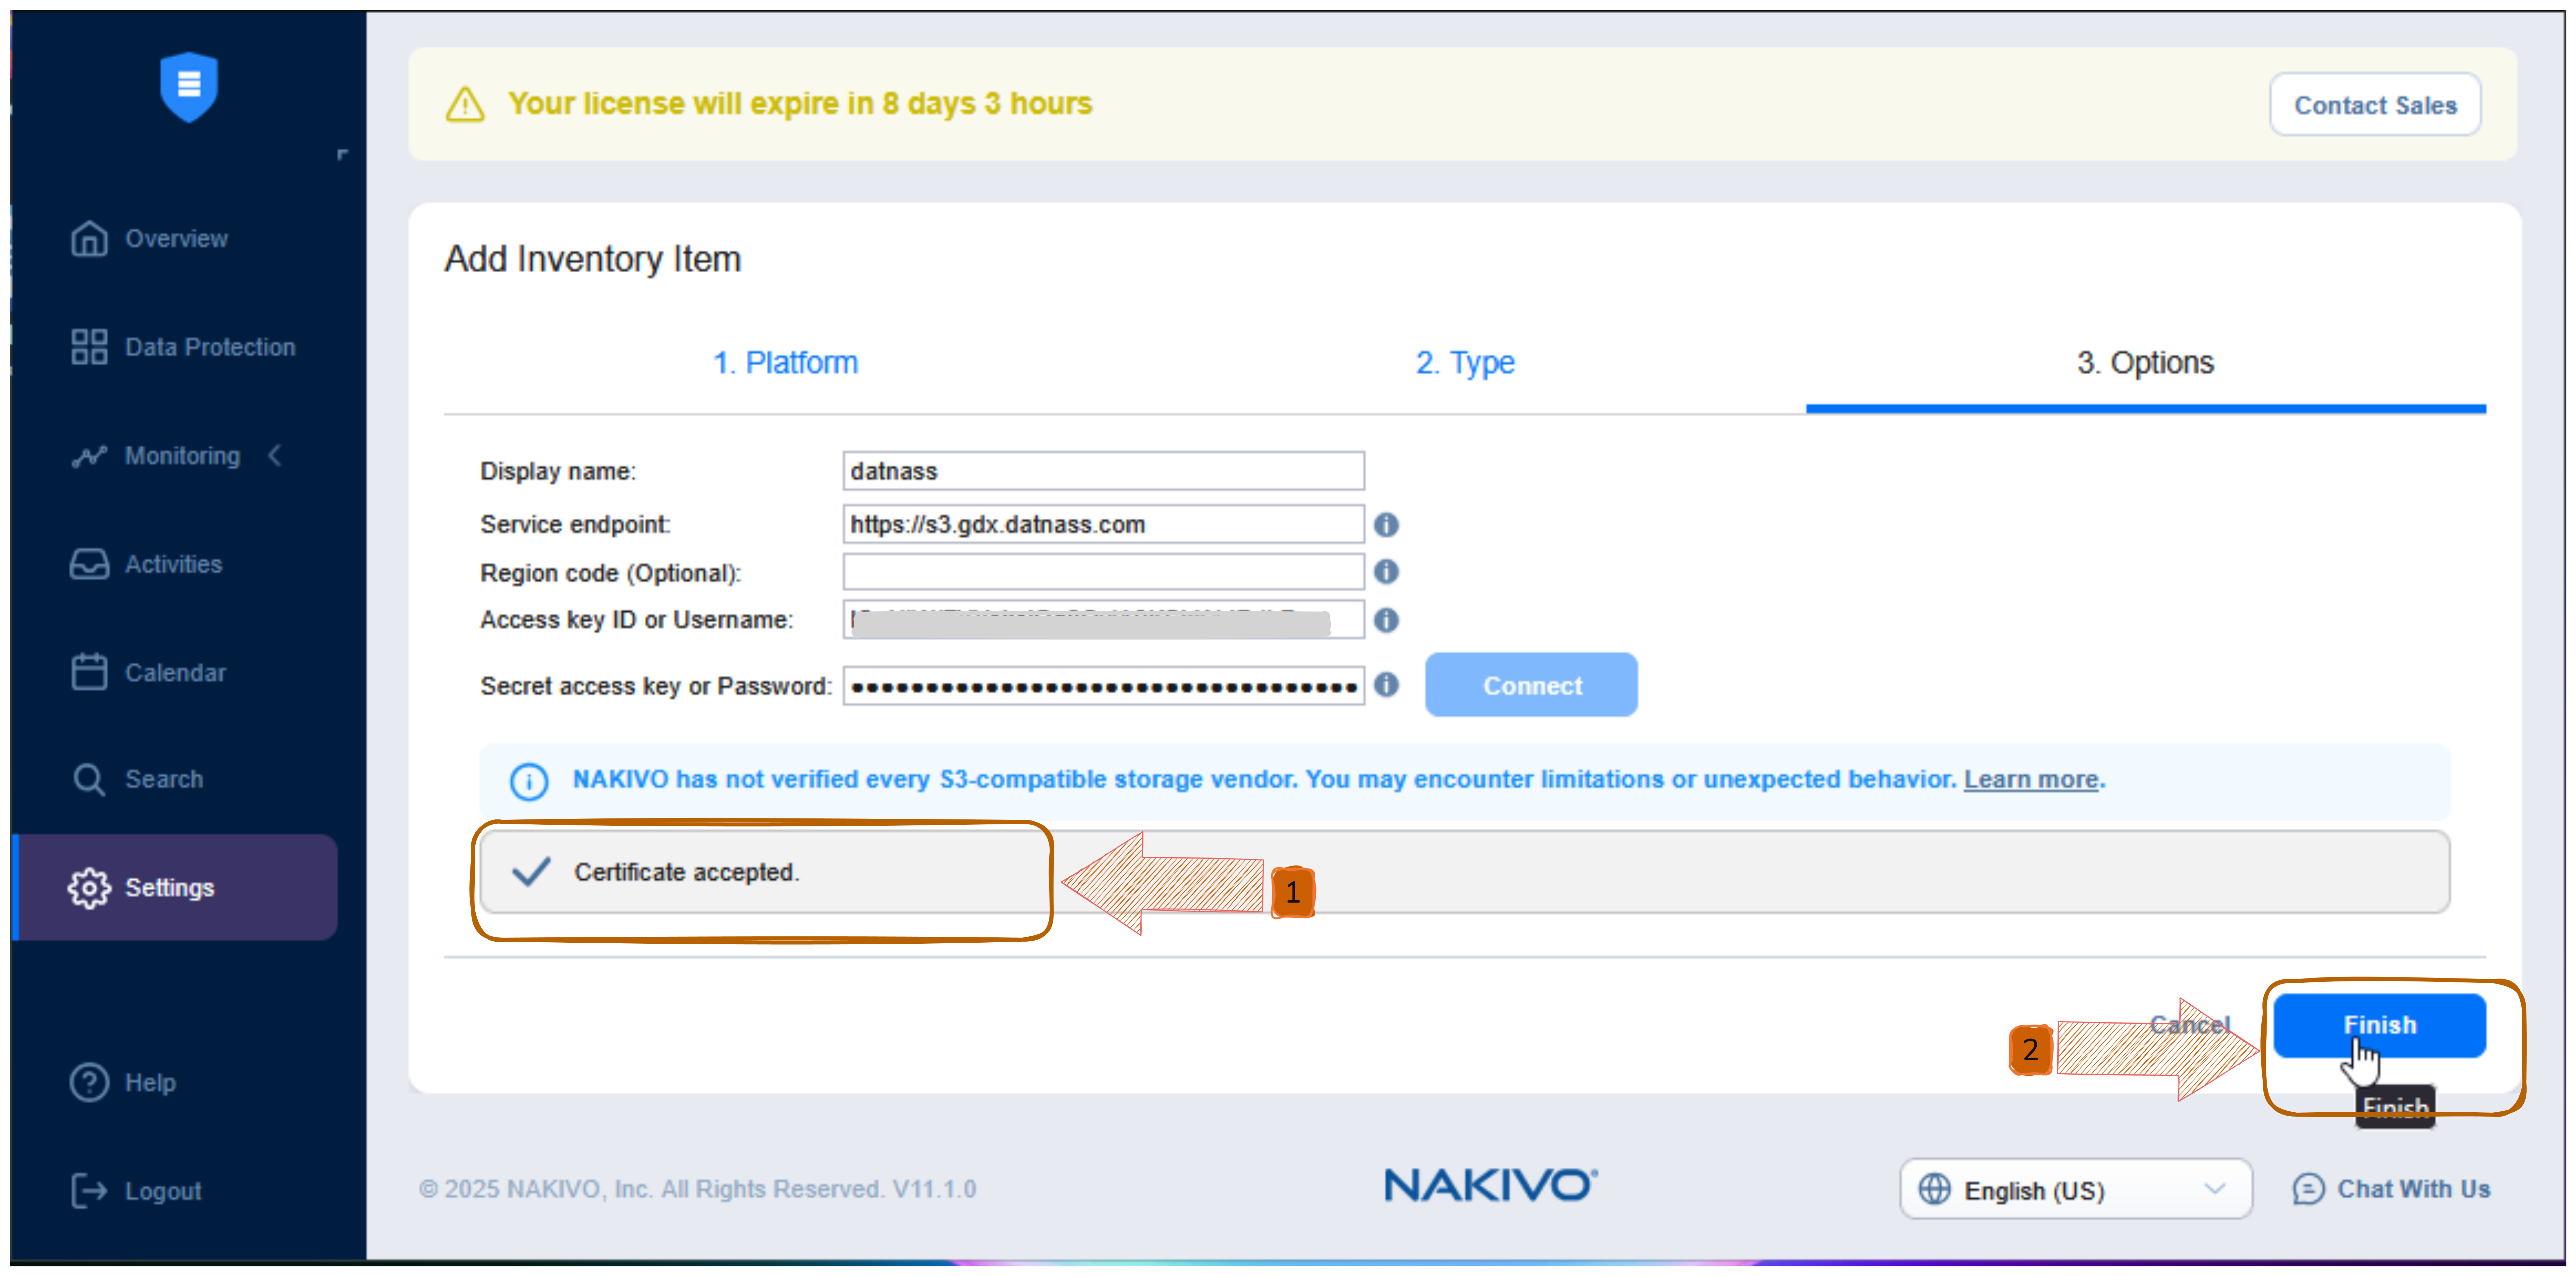 Certificate accepted message with Finish button
✅ Your GDX-Cloud storage is now connected.
Step 7: Verify Inventory Item
- Go to Settings → Inventory.
- Confirm your storage appears in the list.
- Click Next.
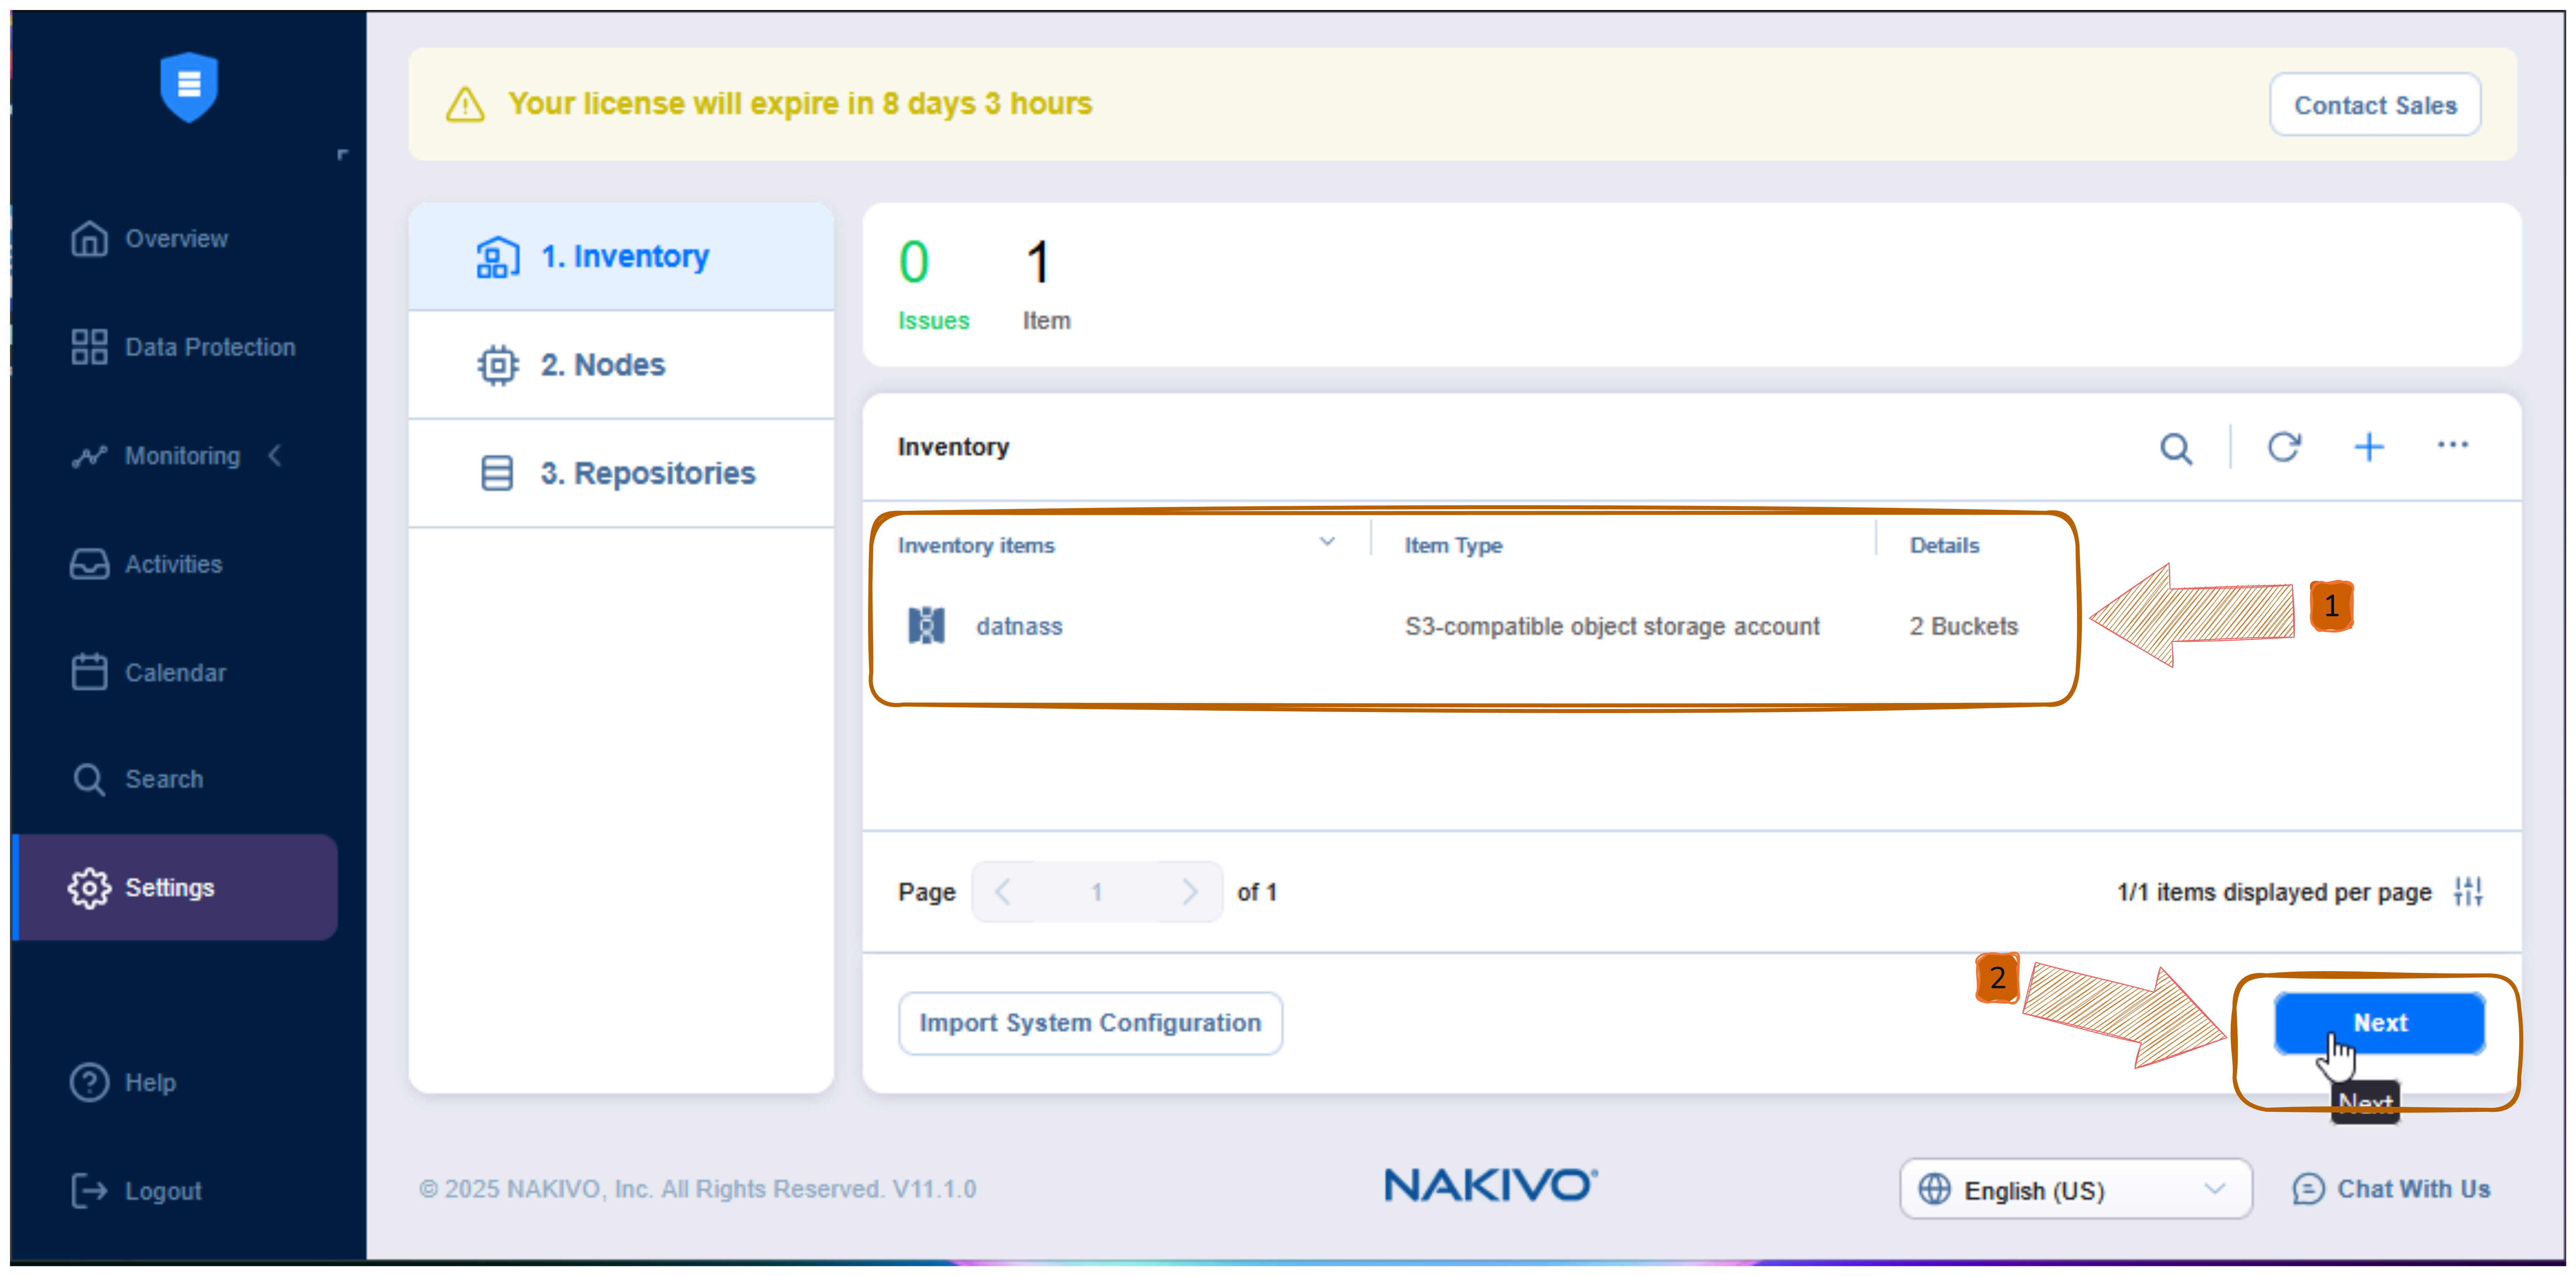 S3-compatible storage listed with bucket count
👉 This confirms the connection was successful.
Step 8: Confirm Transporter
- Open Settings → Nodes.
- Verify Onboard transporter is listed and active.
- Click Next.
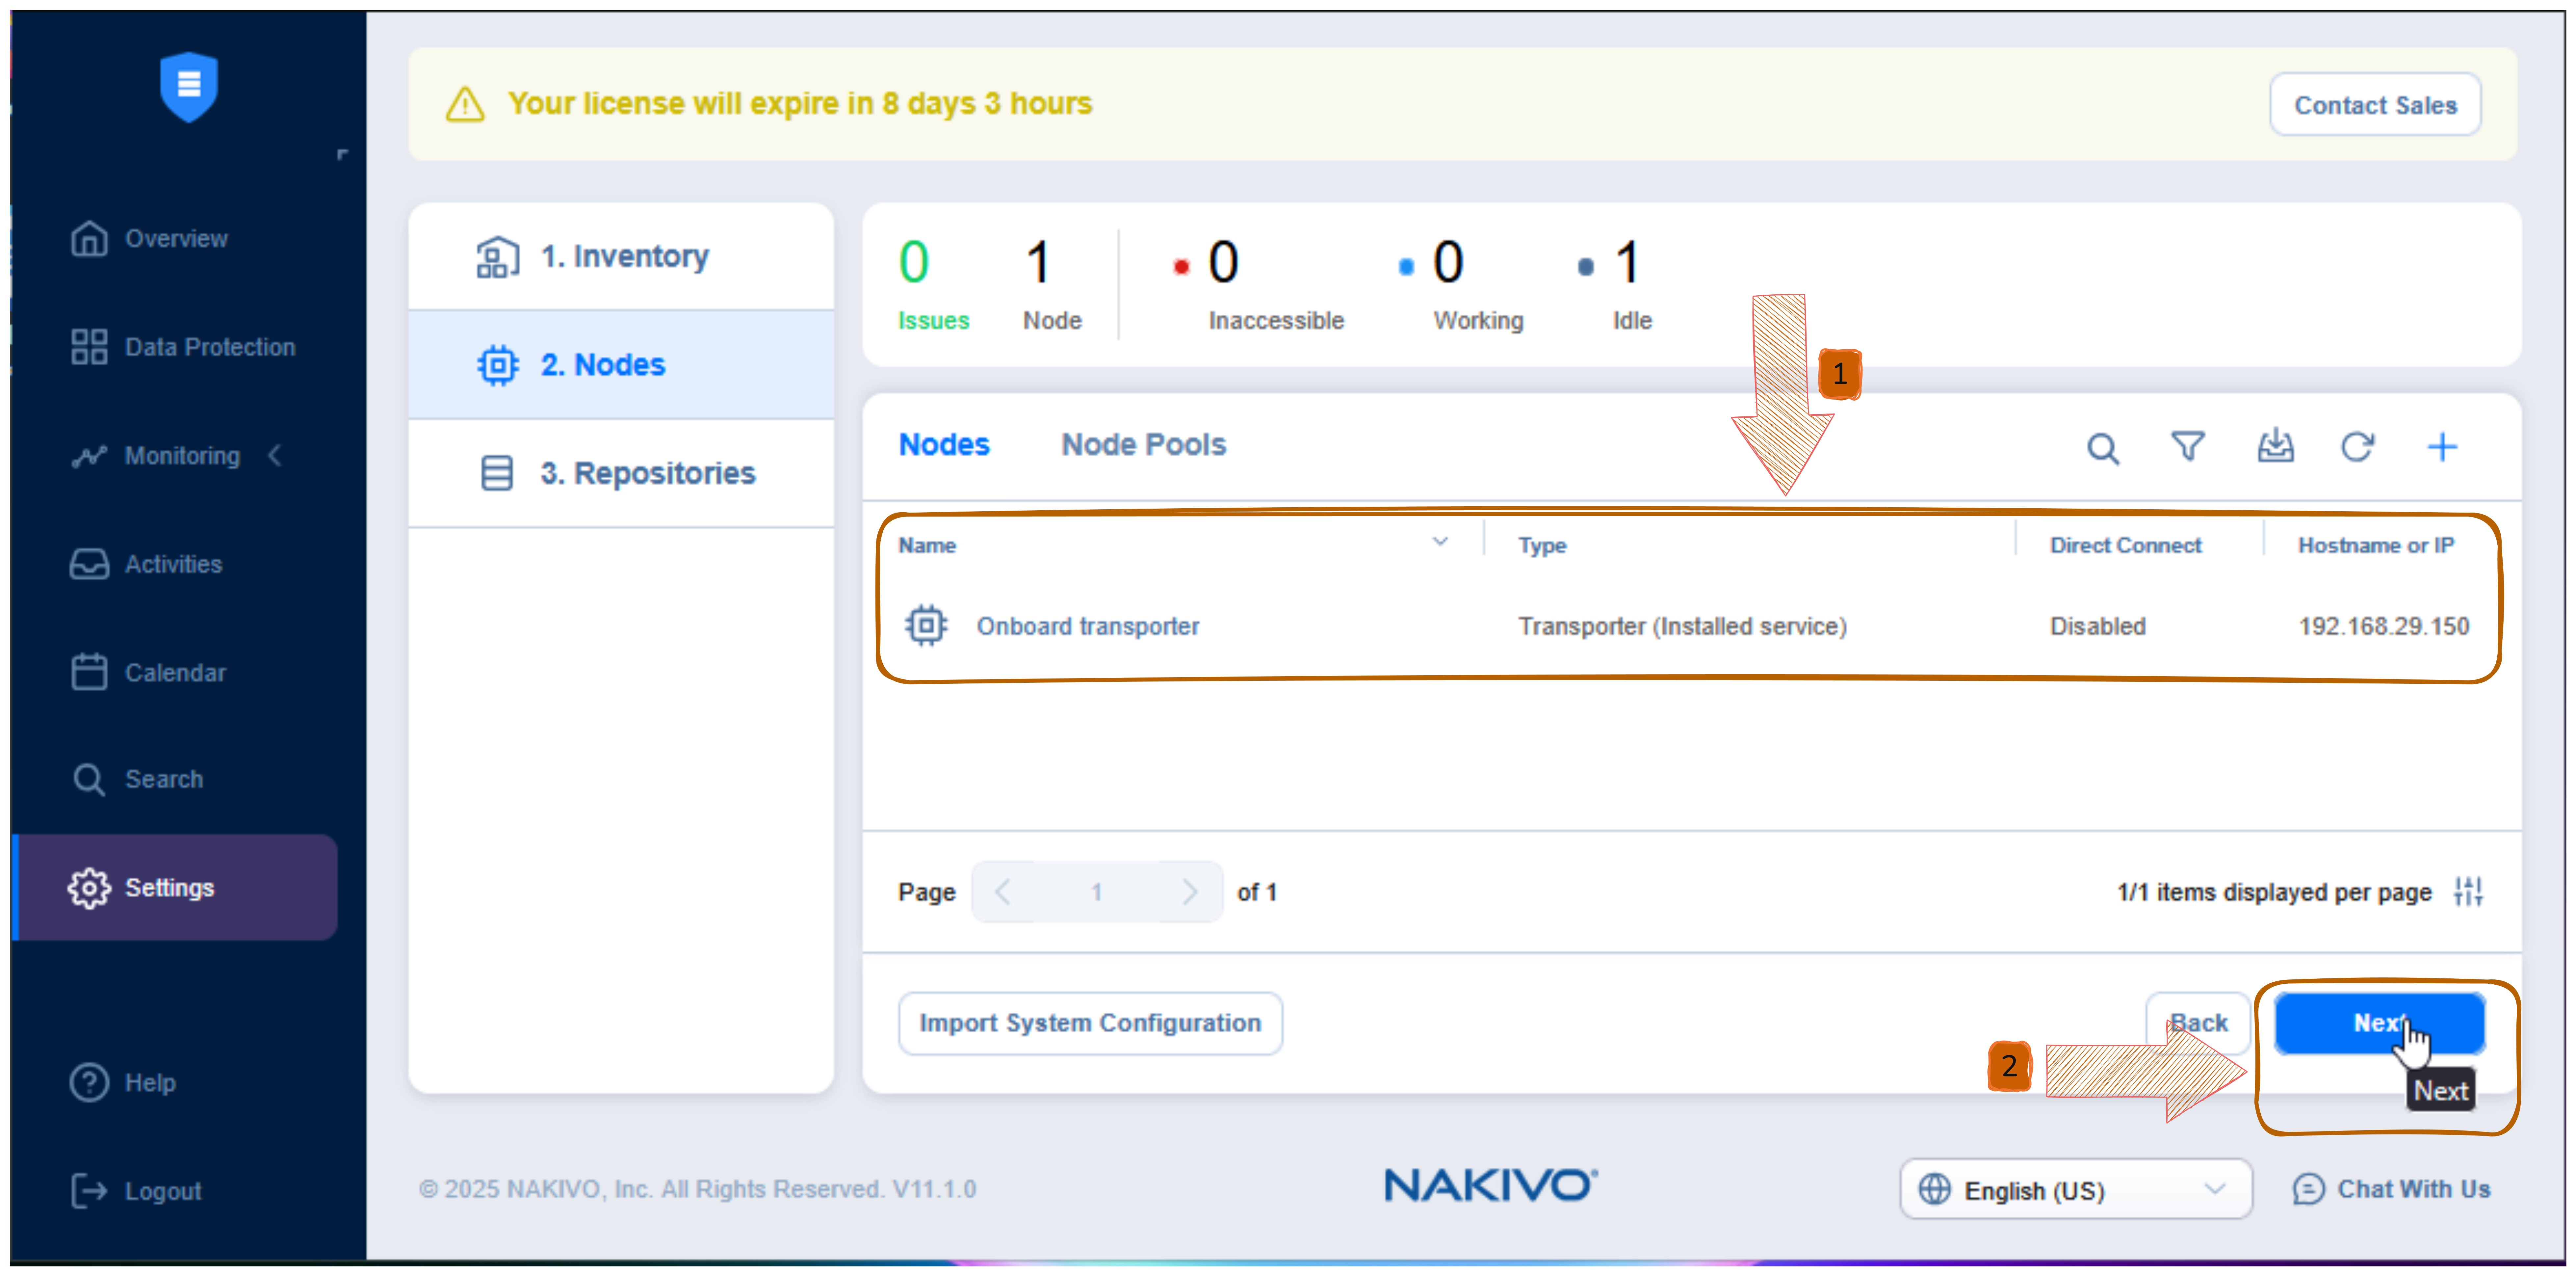 Onboard transporter shown with status
Step 9: Confirm Repository
- Go to Settings → Repositories.
- Ensure the repository status shows Good.
- Click Finish.
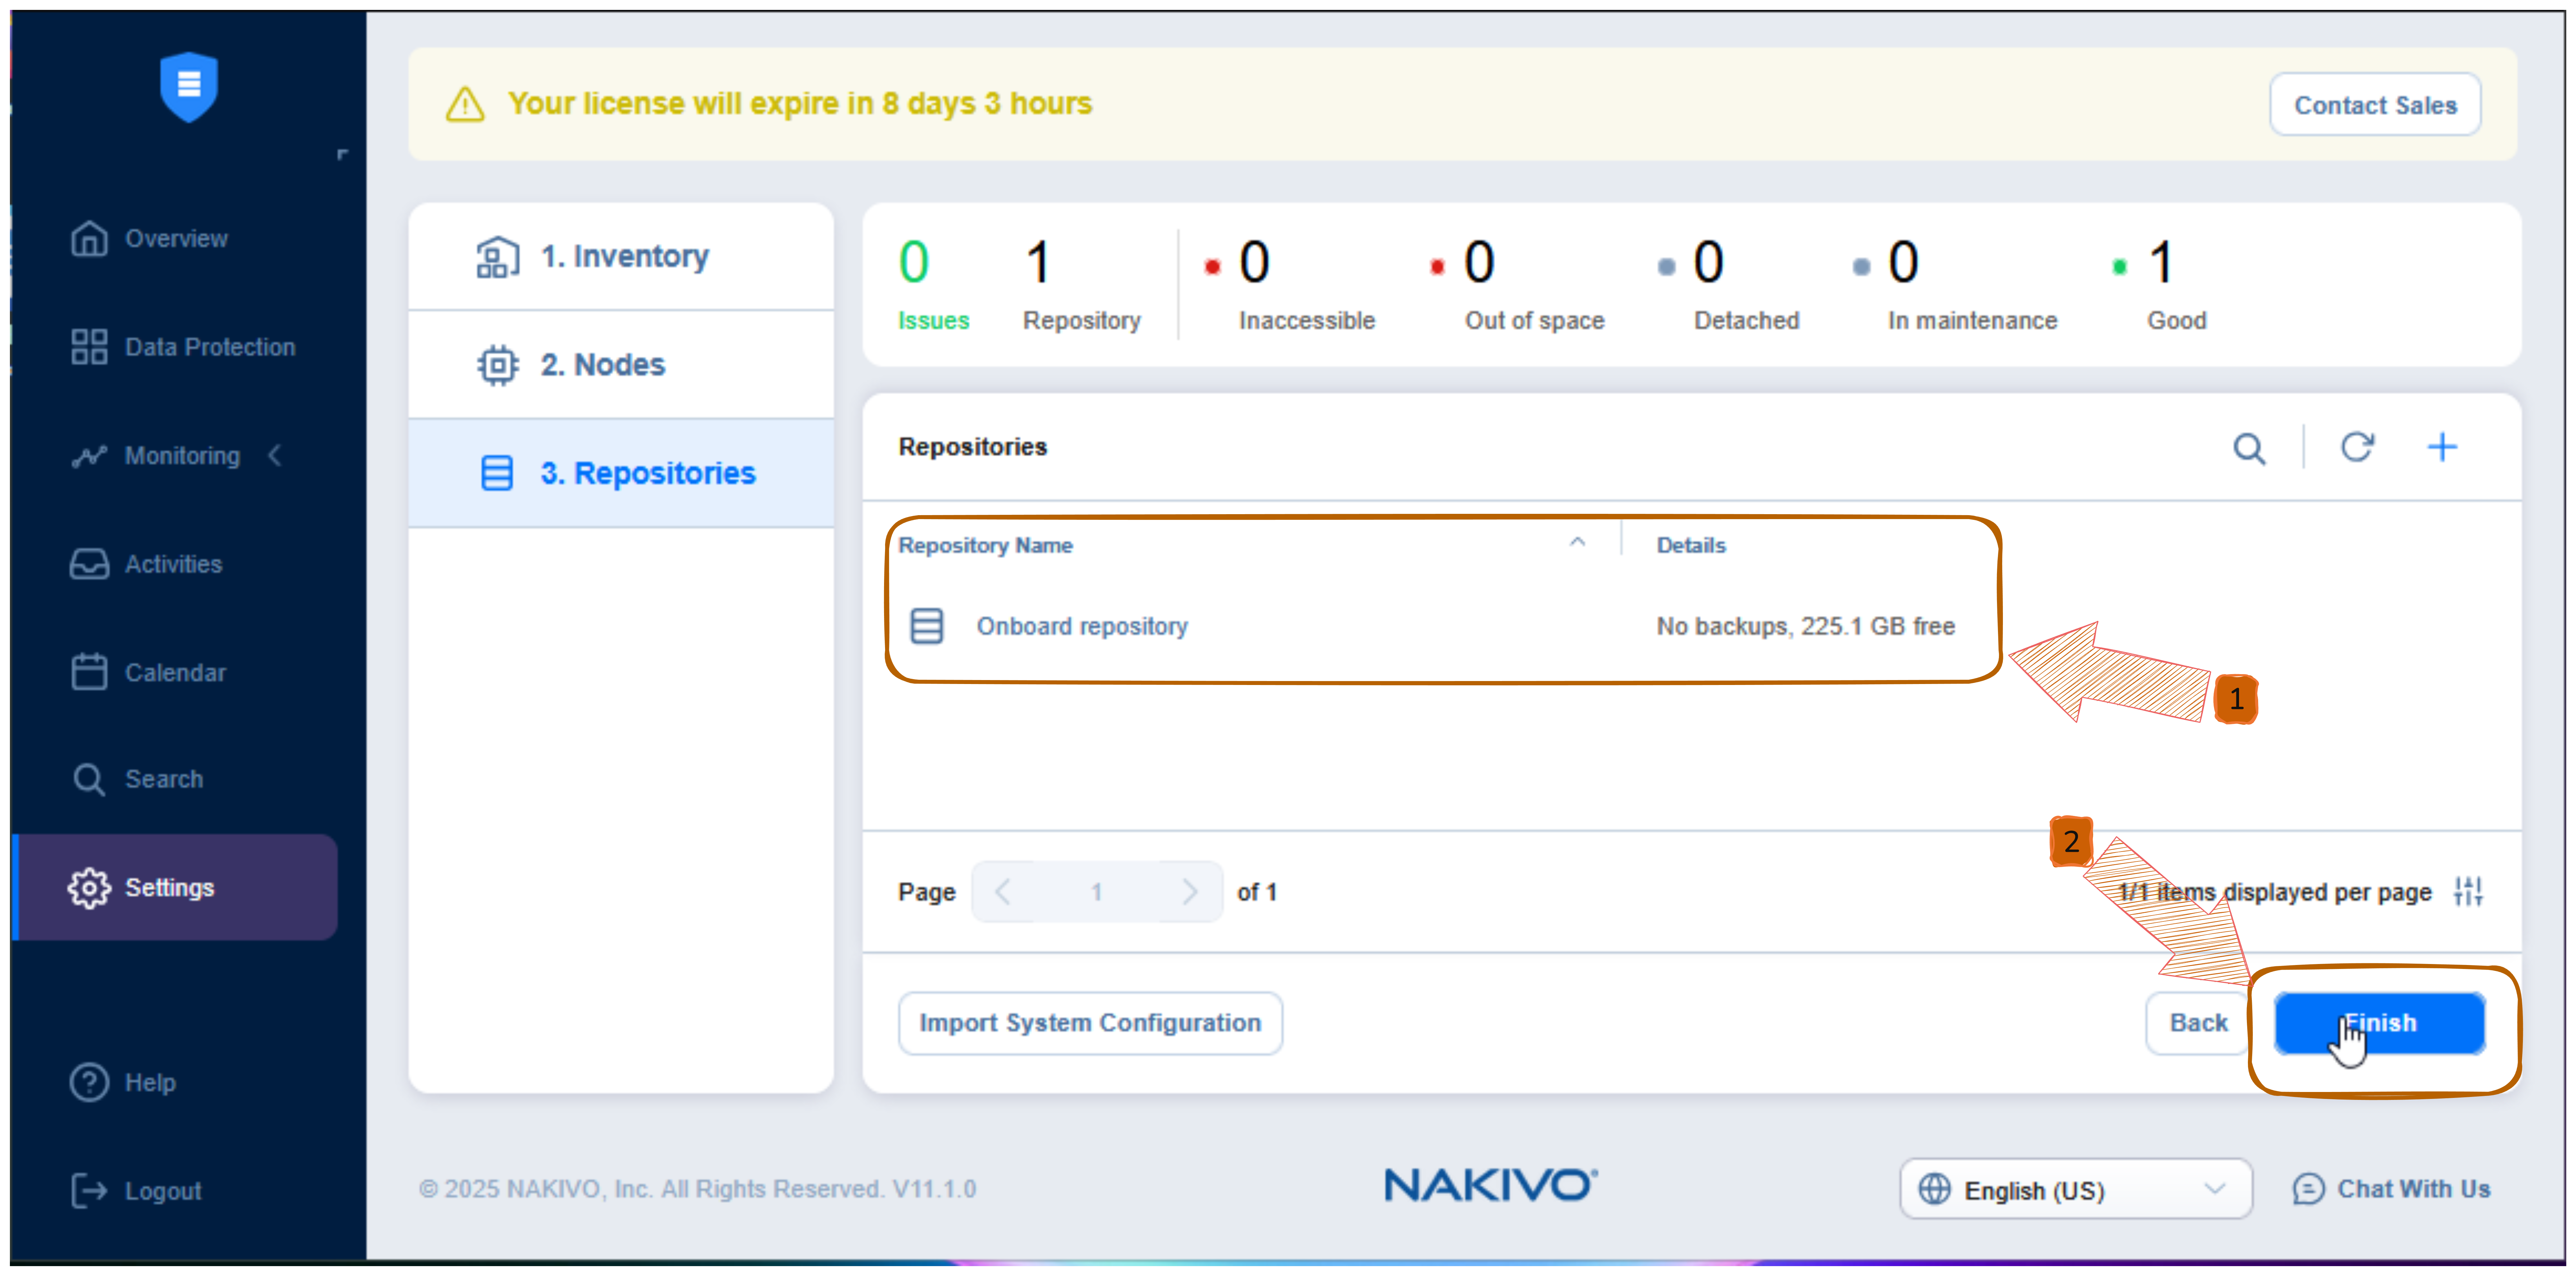 Repository listed with “Good” status
Setup Complete ✅
Your NAKIVO system is now fully connected to GDX-Cloud.
You can now:
- Create backups
- Store data securely in the cloud
- Restore data when needed
- Monitor backup status anytime
Common Questions
Is my data secure?
Yes. All data is transferred using encrypted connections.
Do I need technical knowledge?
No. This setup is designed for all users.
What if I see an error?
Double-check your access key, secret key, and service endpoint.
Support
- NAKIVO Documentation: https://www.nakivo.com/resources/documents/
- GDX Cloud Console: https://console.gdx.datnass.com
Your NAKIVO backup infrastructure is now configured to securely backup to GDX Cloud S3 storage.