Connect Nextcloud with GDX-Cloud (S3-Compatible Storage)
This guide explains how to connect Nextcloud with GDX-Cloud using Amazon S3–compatible external storage.
After setup, your GDX-Cloud bucket appears as a folder inside Nextcloud.
What This Setup Allows You To Do
- Access cloud storage directly from Nextcloud
- Upload, download, and manage files
- Share files securely
- Use GDX-Cloud without local storage limits
Requirements (Before You Start)
You need:
- Nextcloud admin account
- GDX-Cloud Access Key
- GDX-Cloud Secret Key
- GDX-Cloud Bucket name
- GDX-Cloud S3 endpoint (example:
s3.gdx.datnass.com)
Step 1: Log In to Nextcloud
- Open your Nextcloud URL
- Enter username
- Enter password
- Click Log in
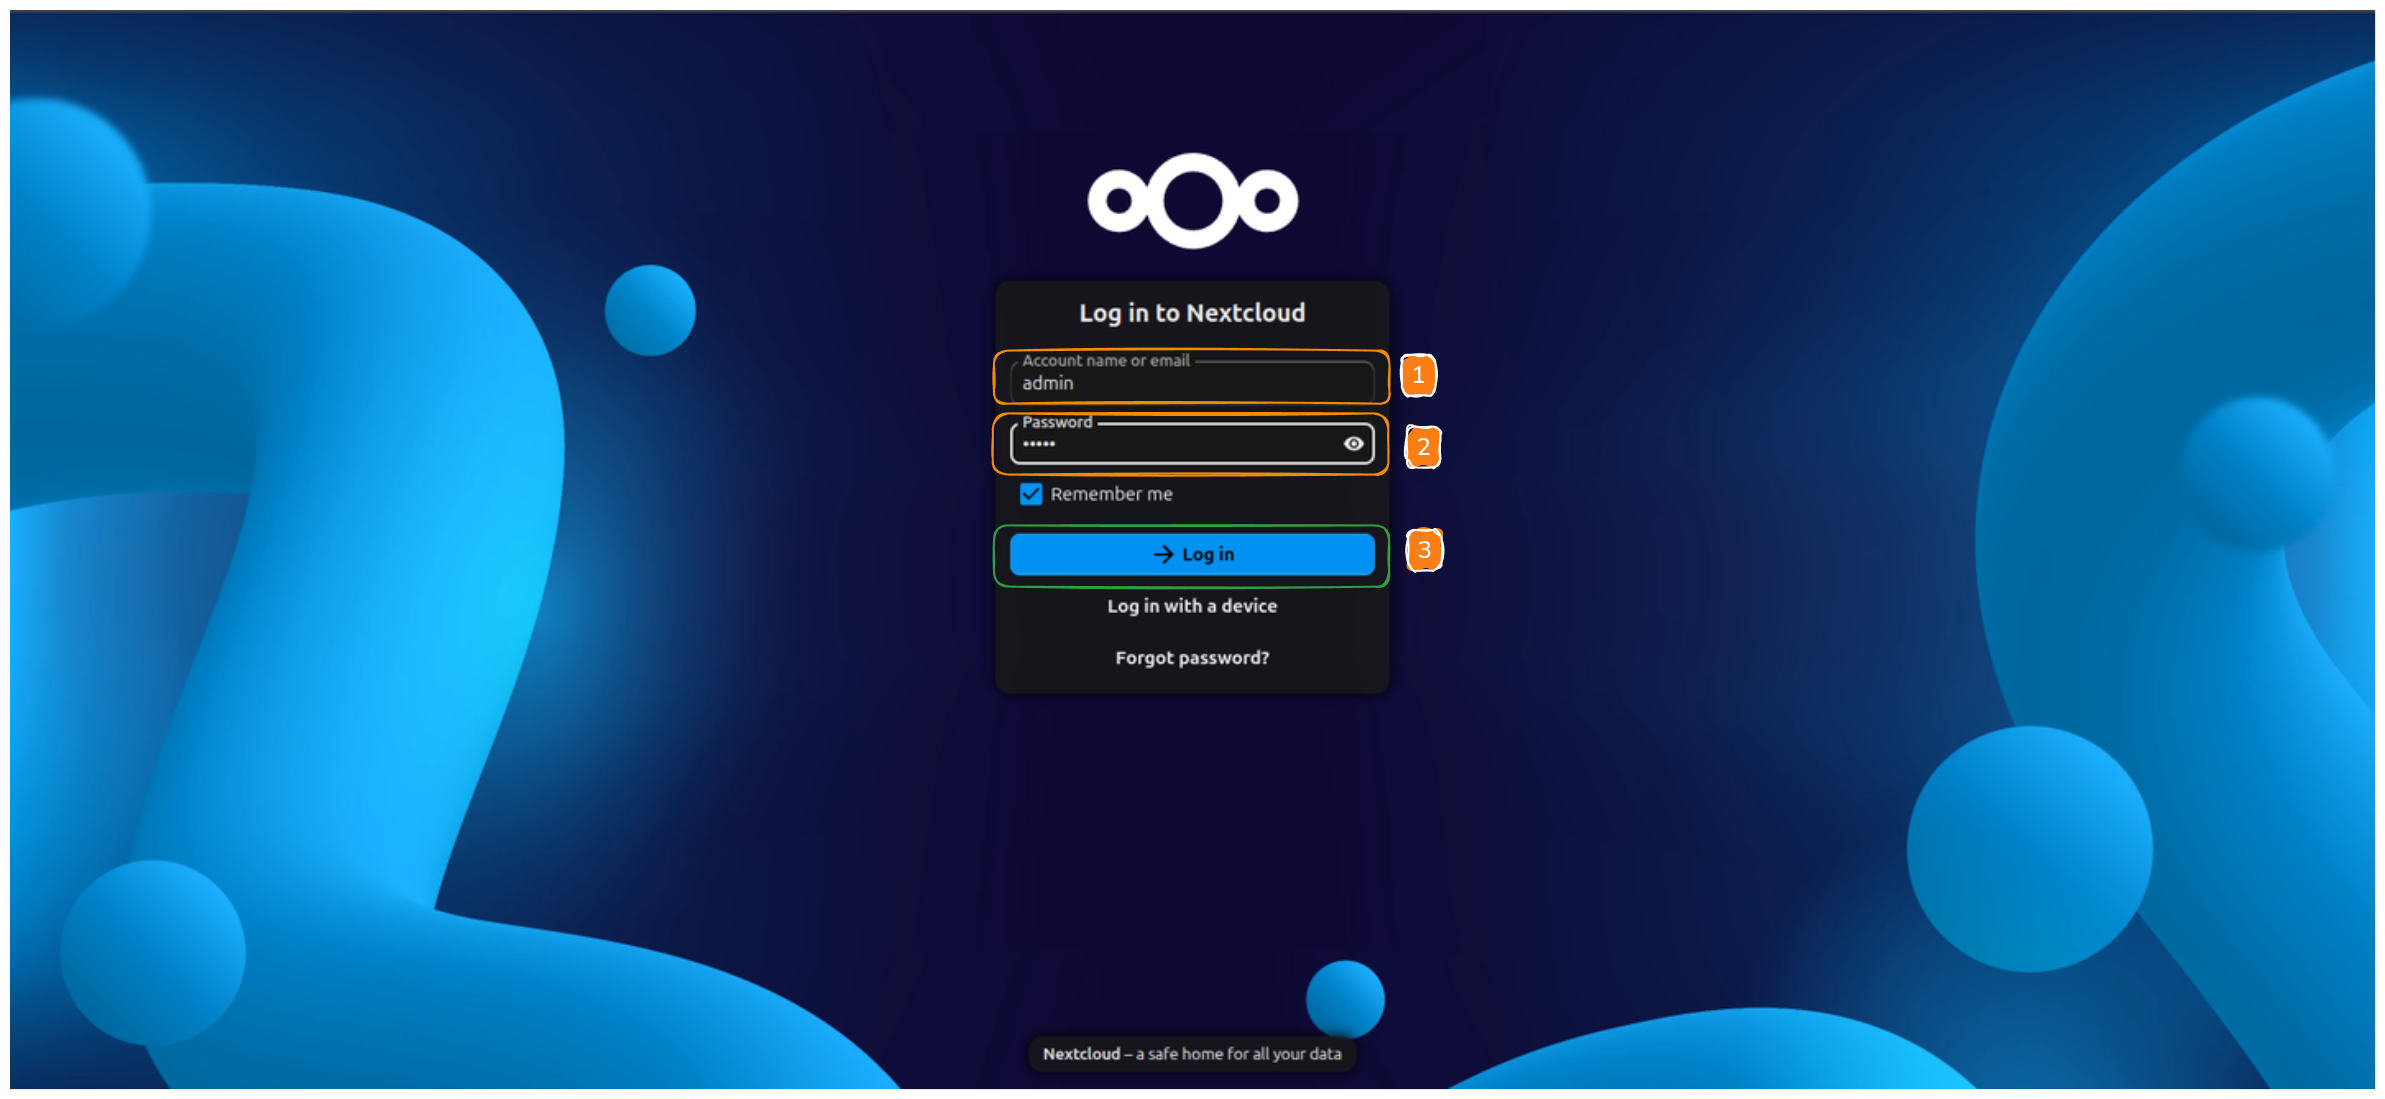
Login Issues
If login fails, verify credentials or contact your administrator.Step 2: Enable External Storage Support App
- Click your profile icon (top-right)
- Select Apps
- Open Disabled apps
- Find External storage support
- Click Enable
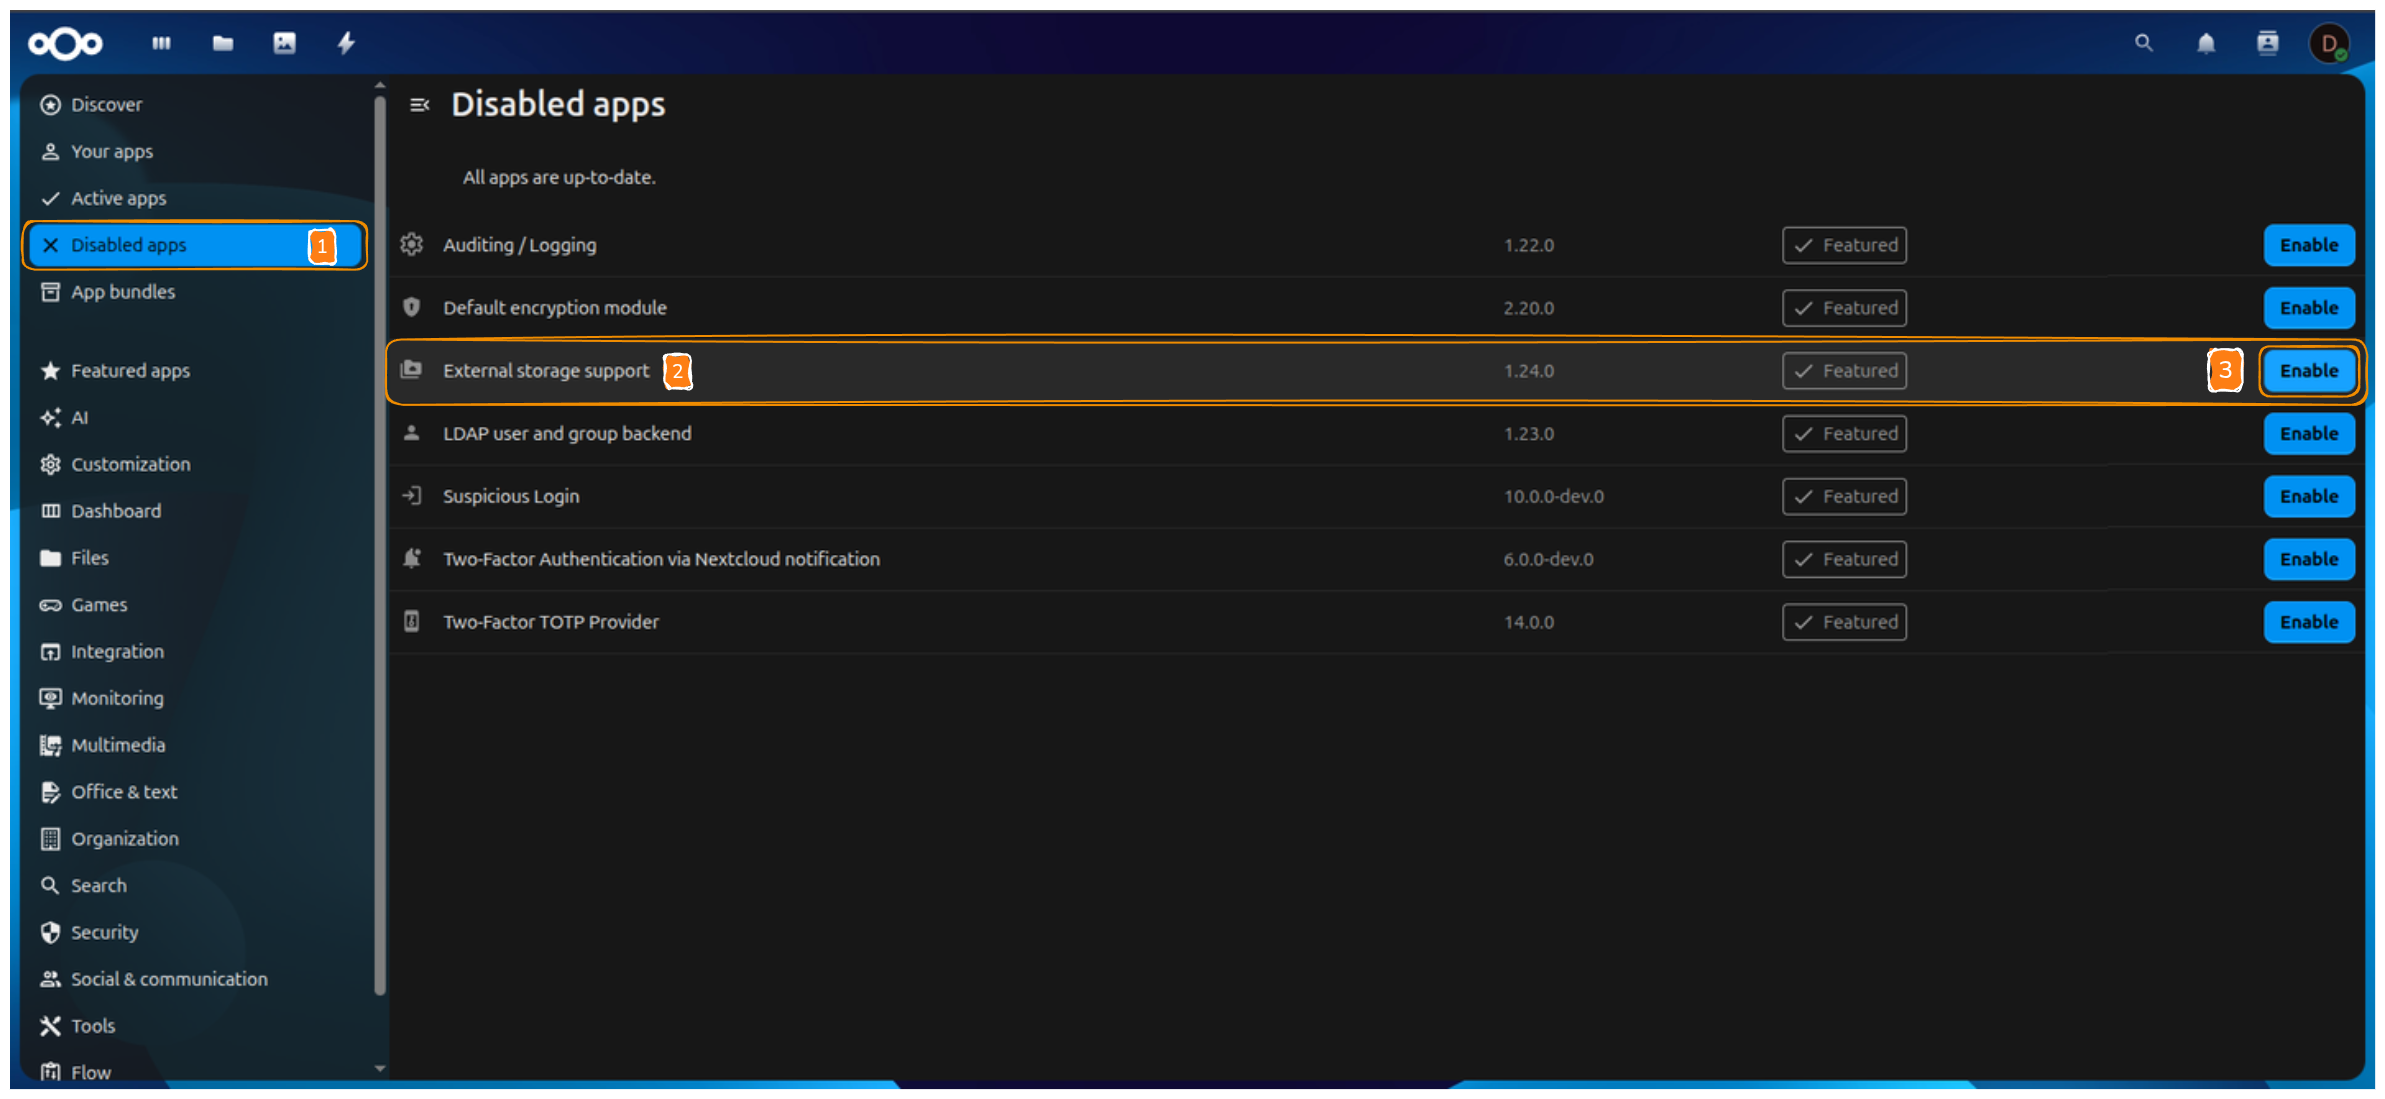
External Storage App Required
This app is mandatory for connecting GDX-Cloud.Step 3: Open External Storage Settings
- Click your profile icon
- Select Administration settings
- From the left menu, click External storage
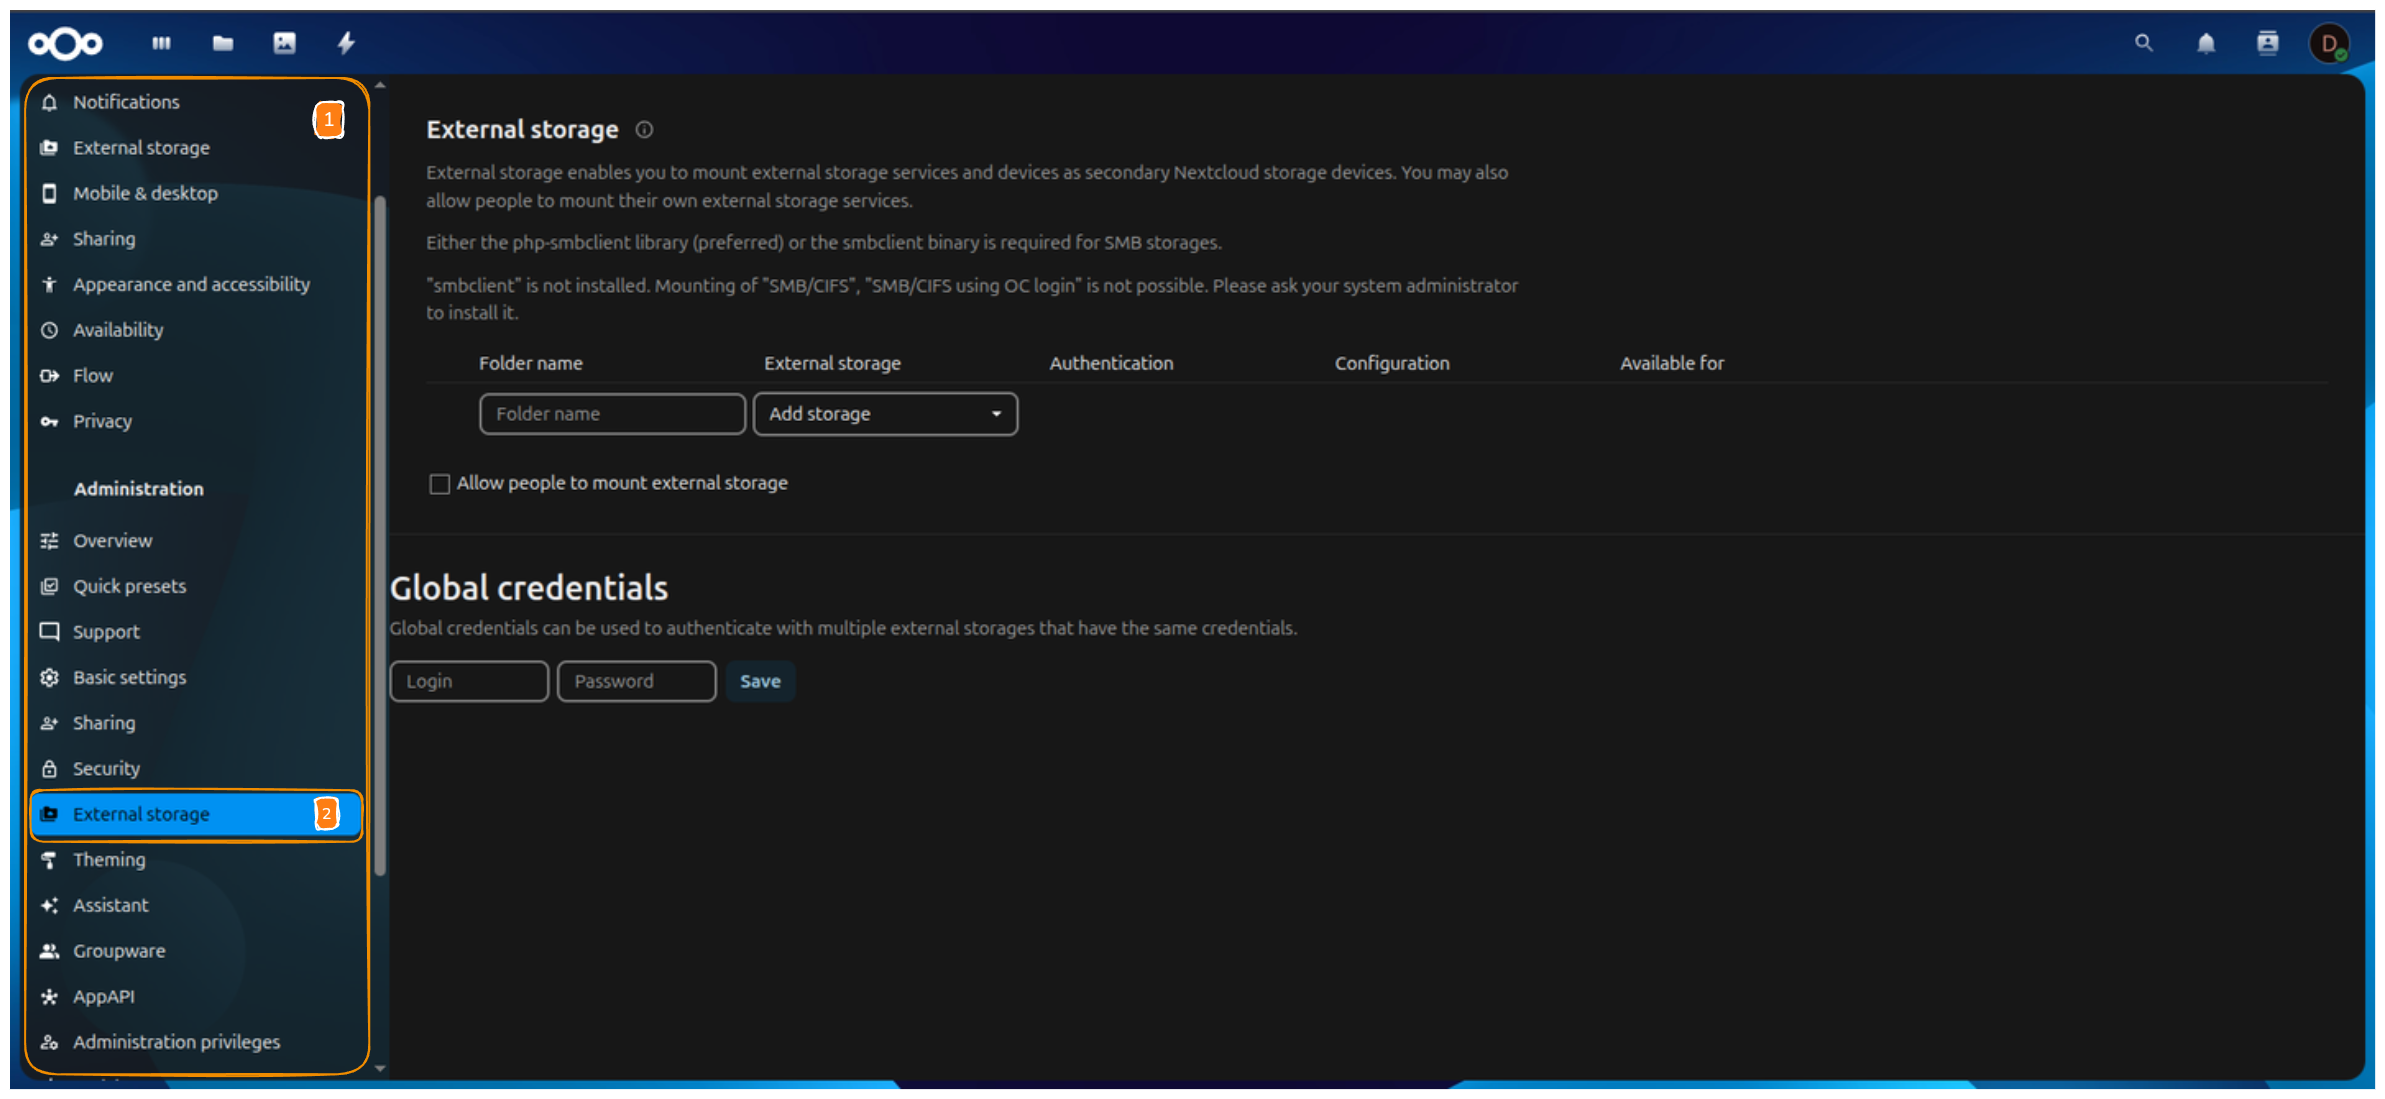
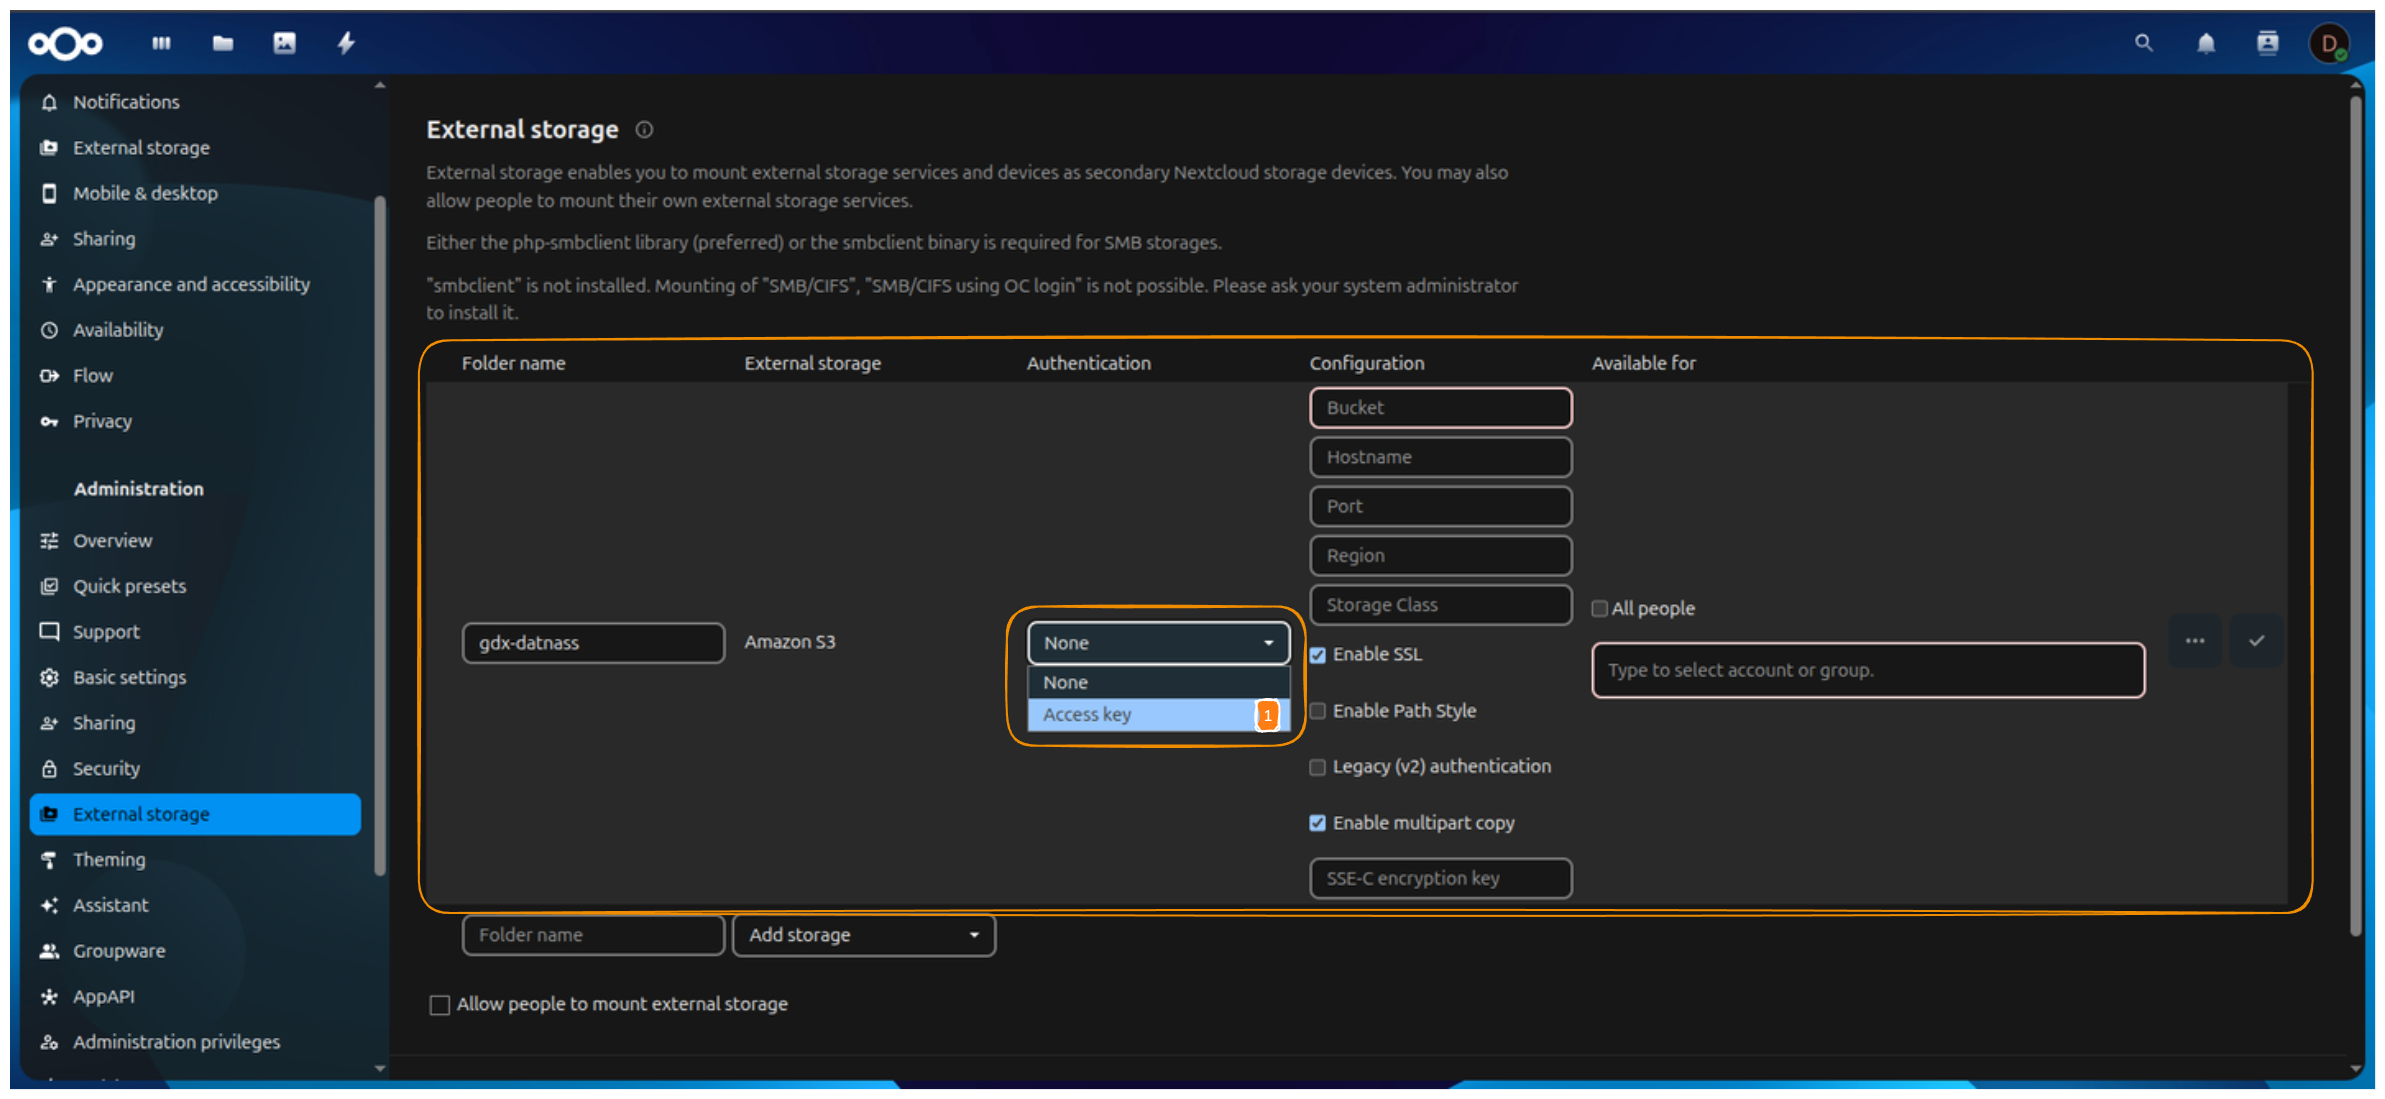
Step 4: Access External Storage Settings
- In Folder name, enter:
gdx-datnass - Click Add storage
- Select Amazon S3
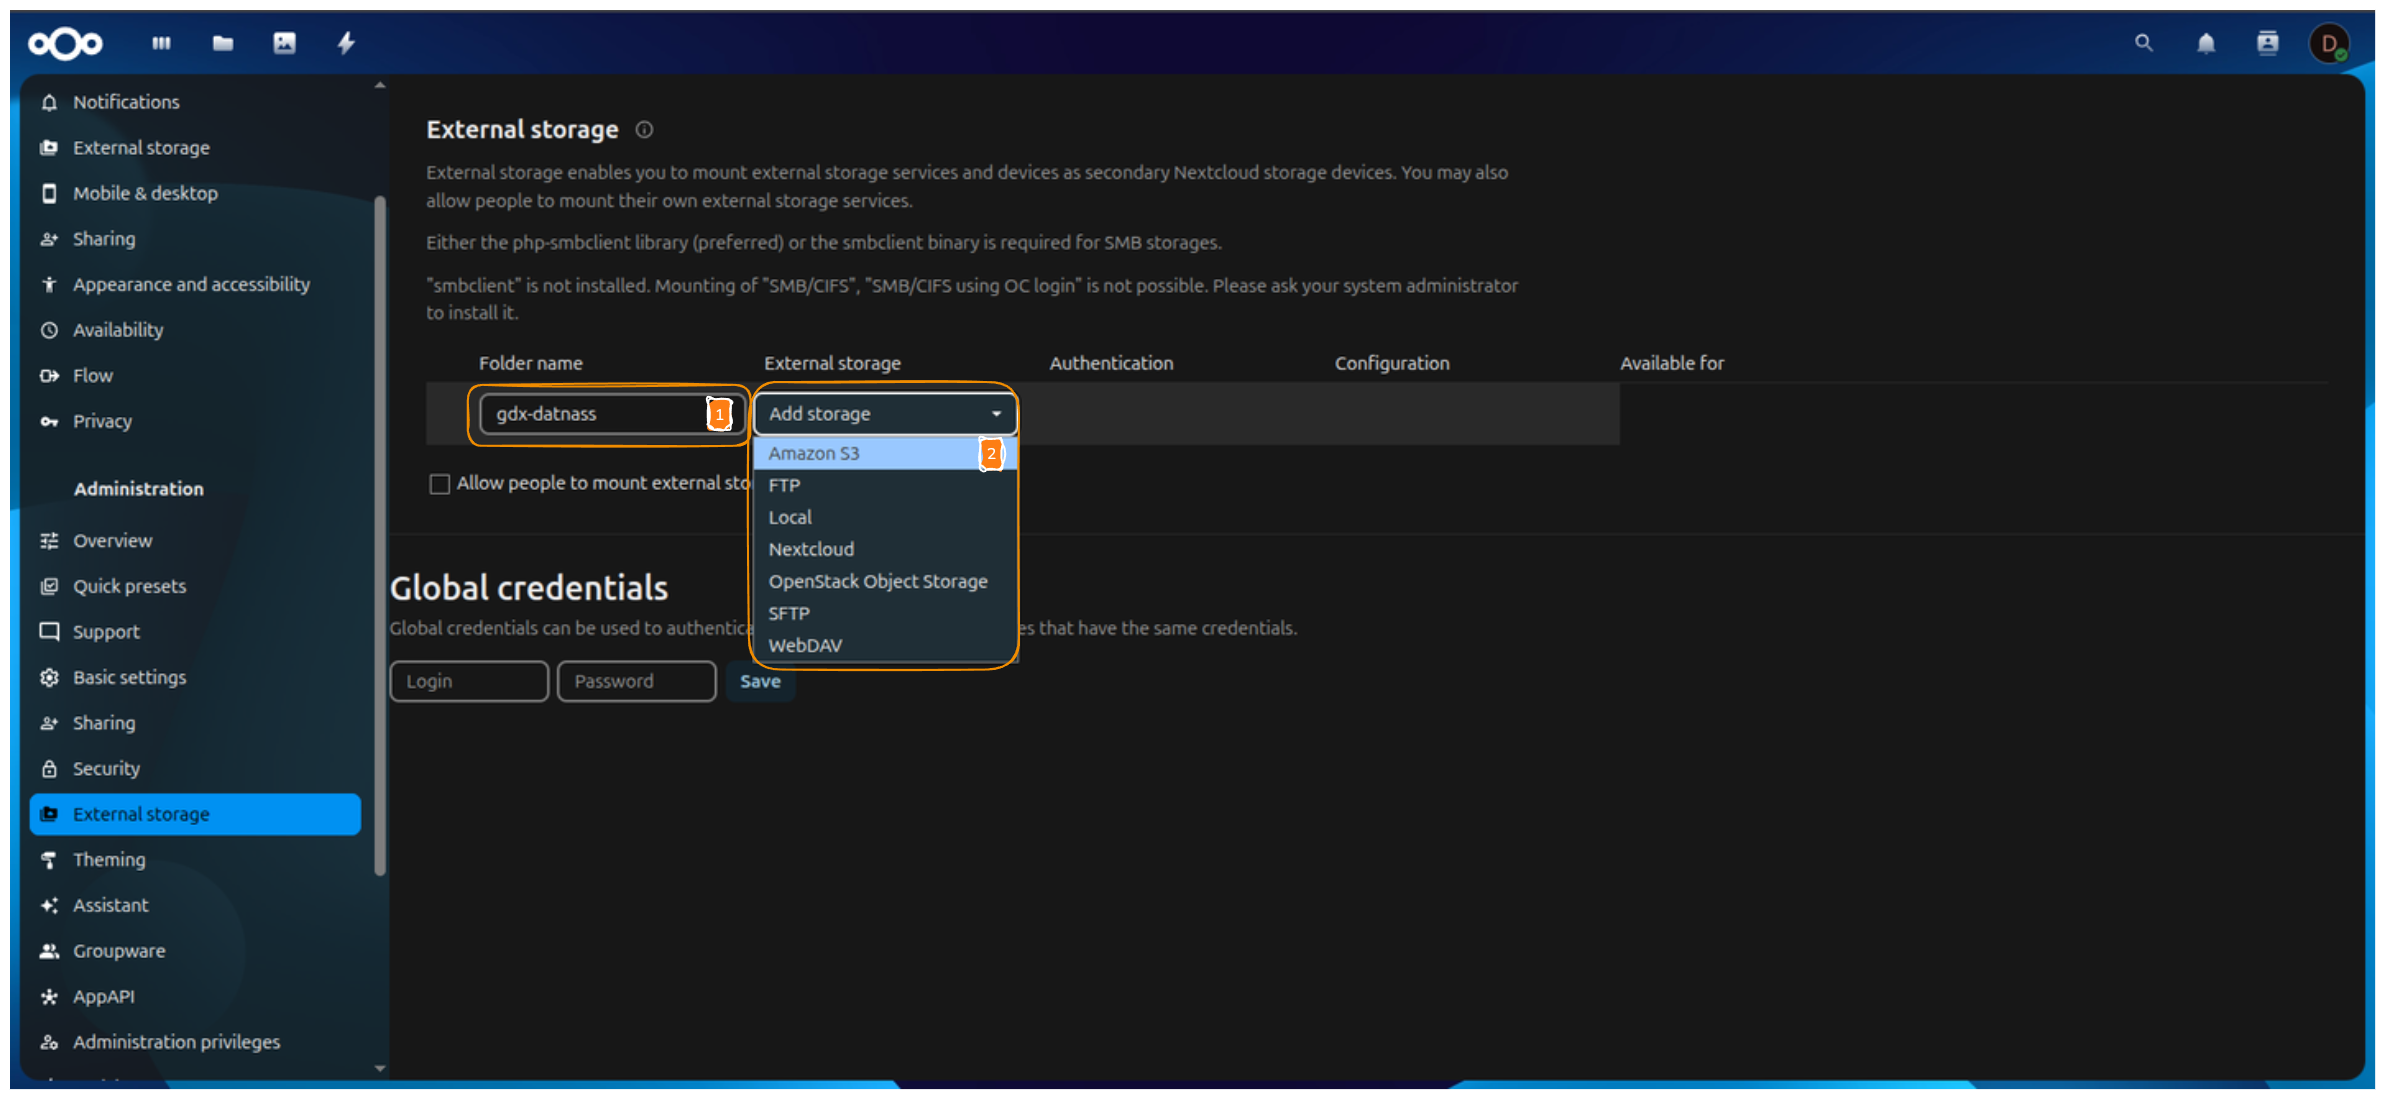
S3-Compatible Storage
GDX-Cloud is S3-compatible, so Amazon S3 is correct.Step 5: Select Authentication Method
- Under Authentication, select:
Access Key
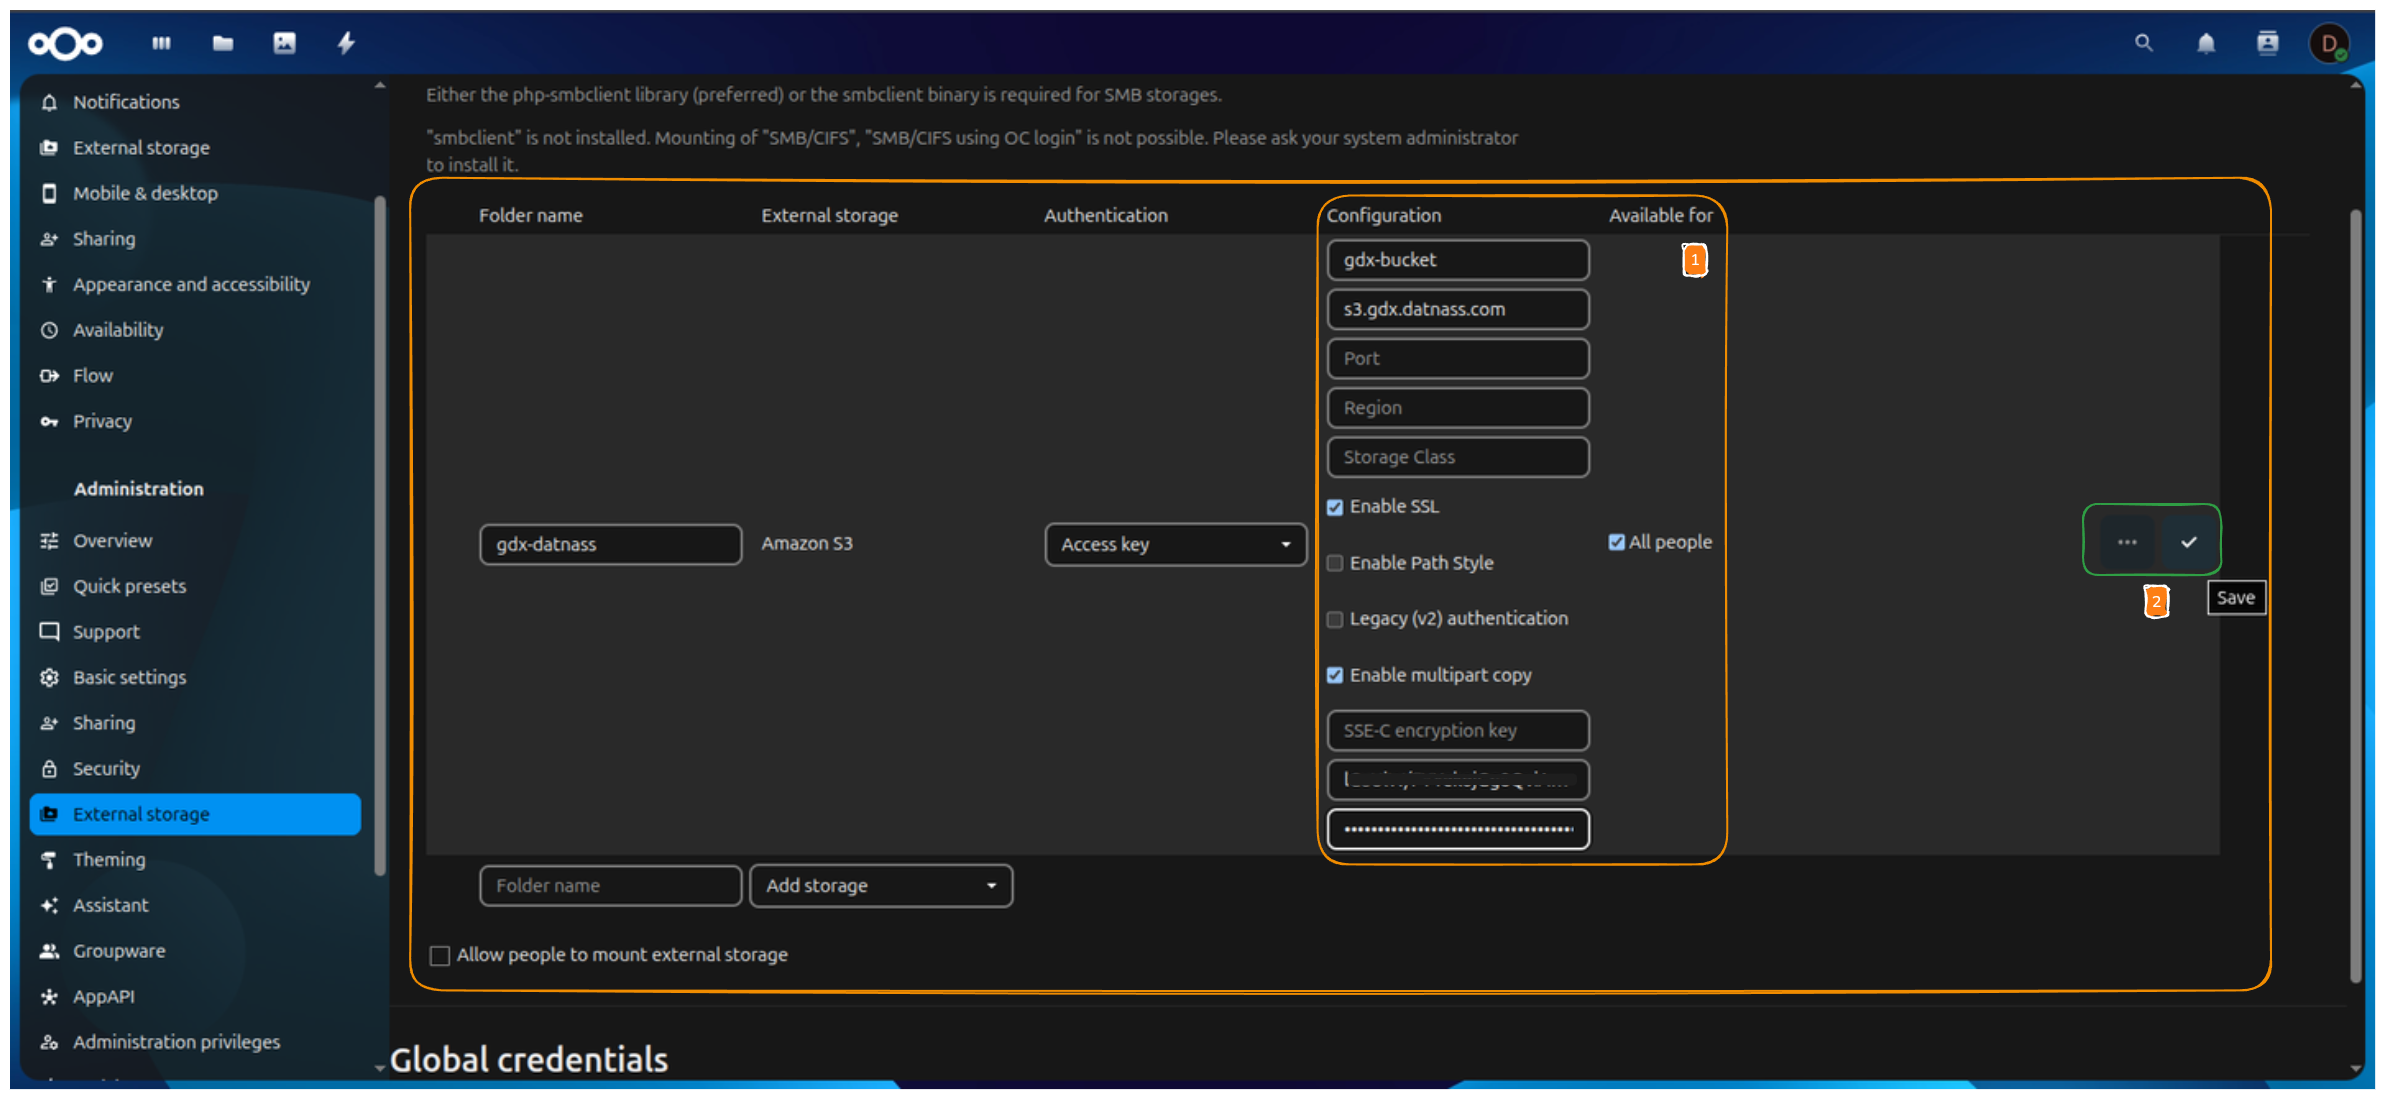
Step 6: Enter GDX-Cloud Configuration Details
Fill the fields exactly as shown:
| Field | Value |
|---|---|
| Bucket | your GDX-Cloud bucket name |
| Hostname | Your endpoint |
| Port | Leave empty |
| Region | Leave empty |
| Storage Class | Leave empty |
| Access key | enter your access key from your gdx console |
| Secret key | enter your secret key from your gdx console |
| Enable these options: |
- ✅ Enable SSL
- ✅ Enable multipart copy
Do NOT enable:
- ❌ Legacy (v2) authentication
Verify Configuration Details
Wrong hostname or bucket name will cause connection failure.Step 7: Save and Validate Connection
- Click Save (✔️)
- Wait a few seconds
If successful, you will see:
- ✅ Green checkmark
- Message: Click to recheck the configuration
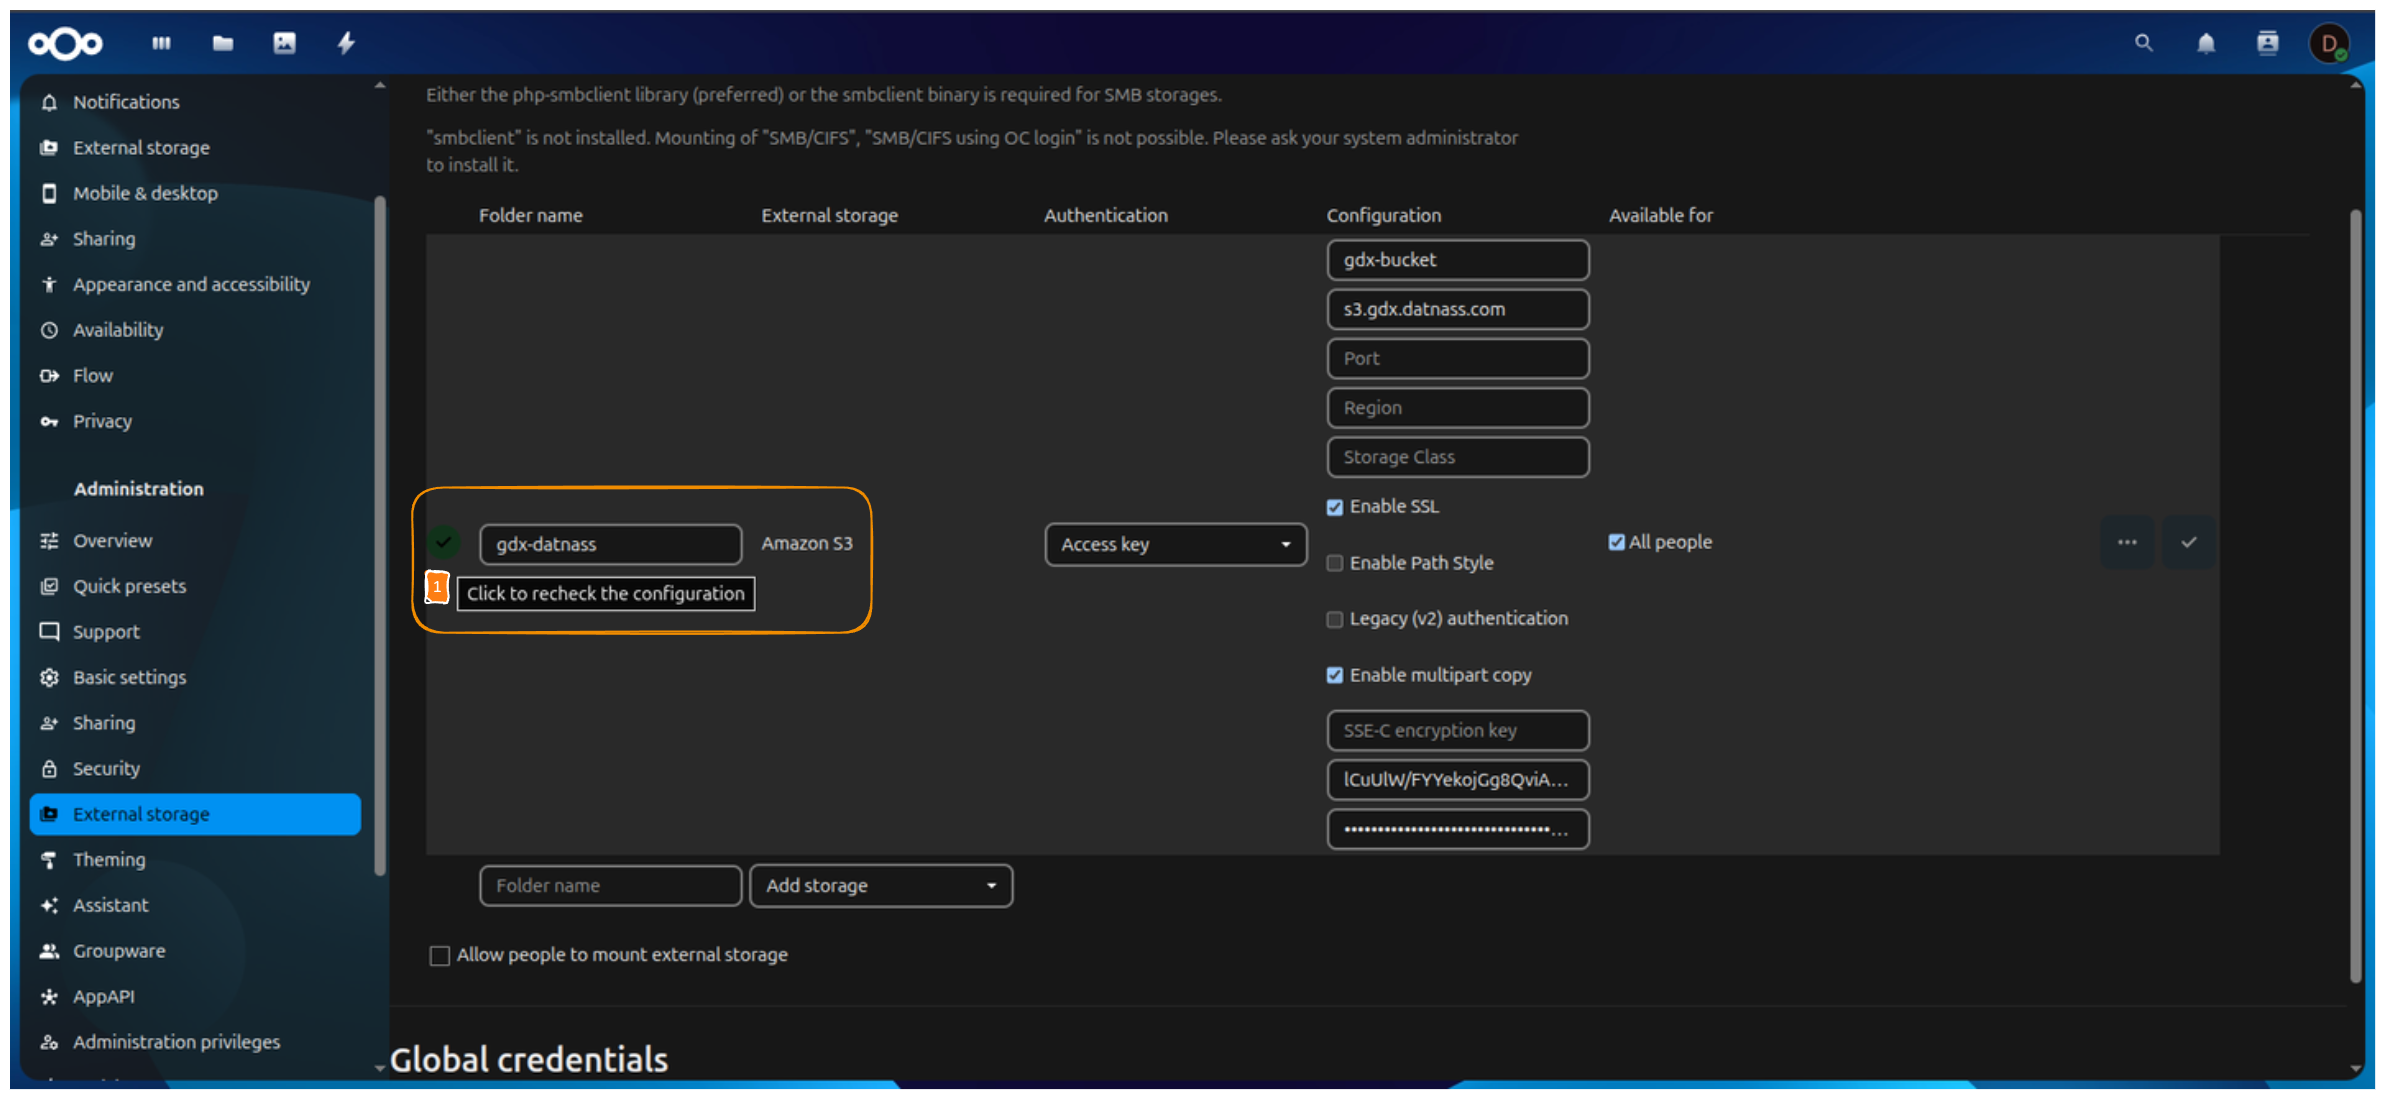
Credentials Validation
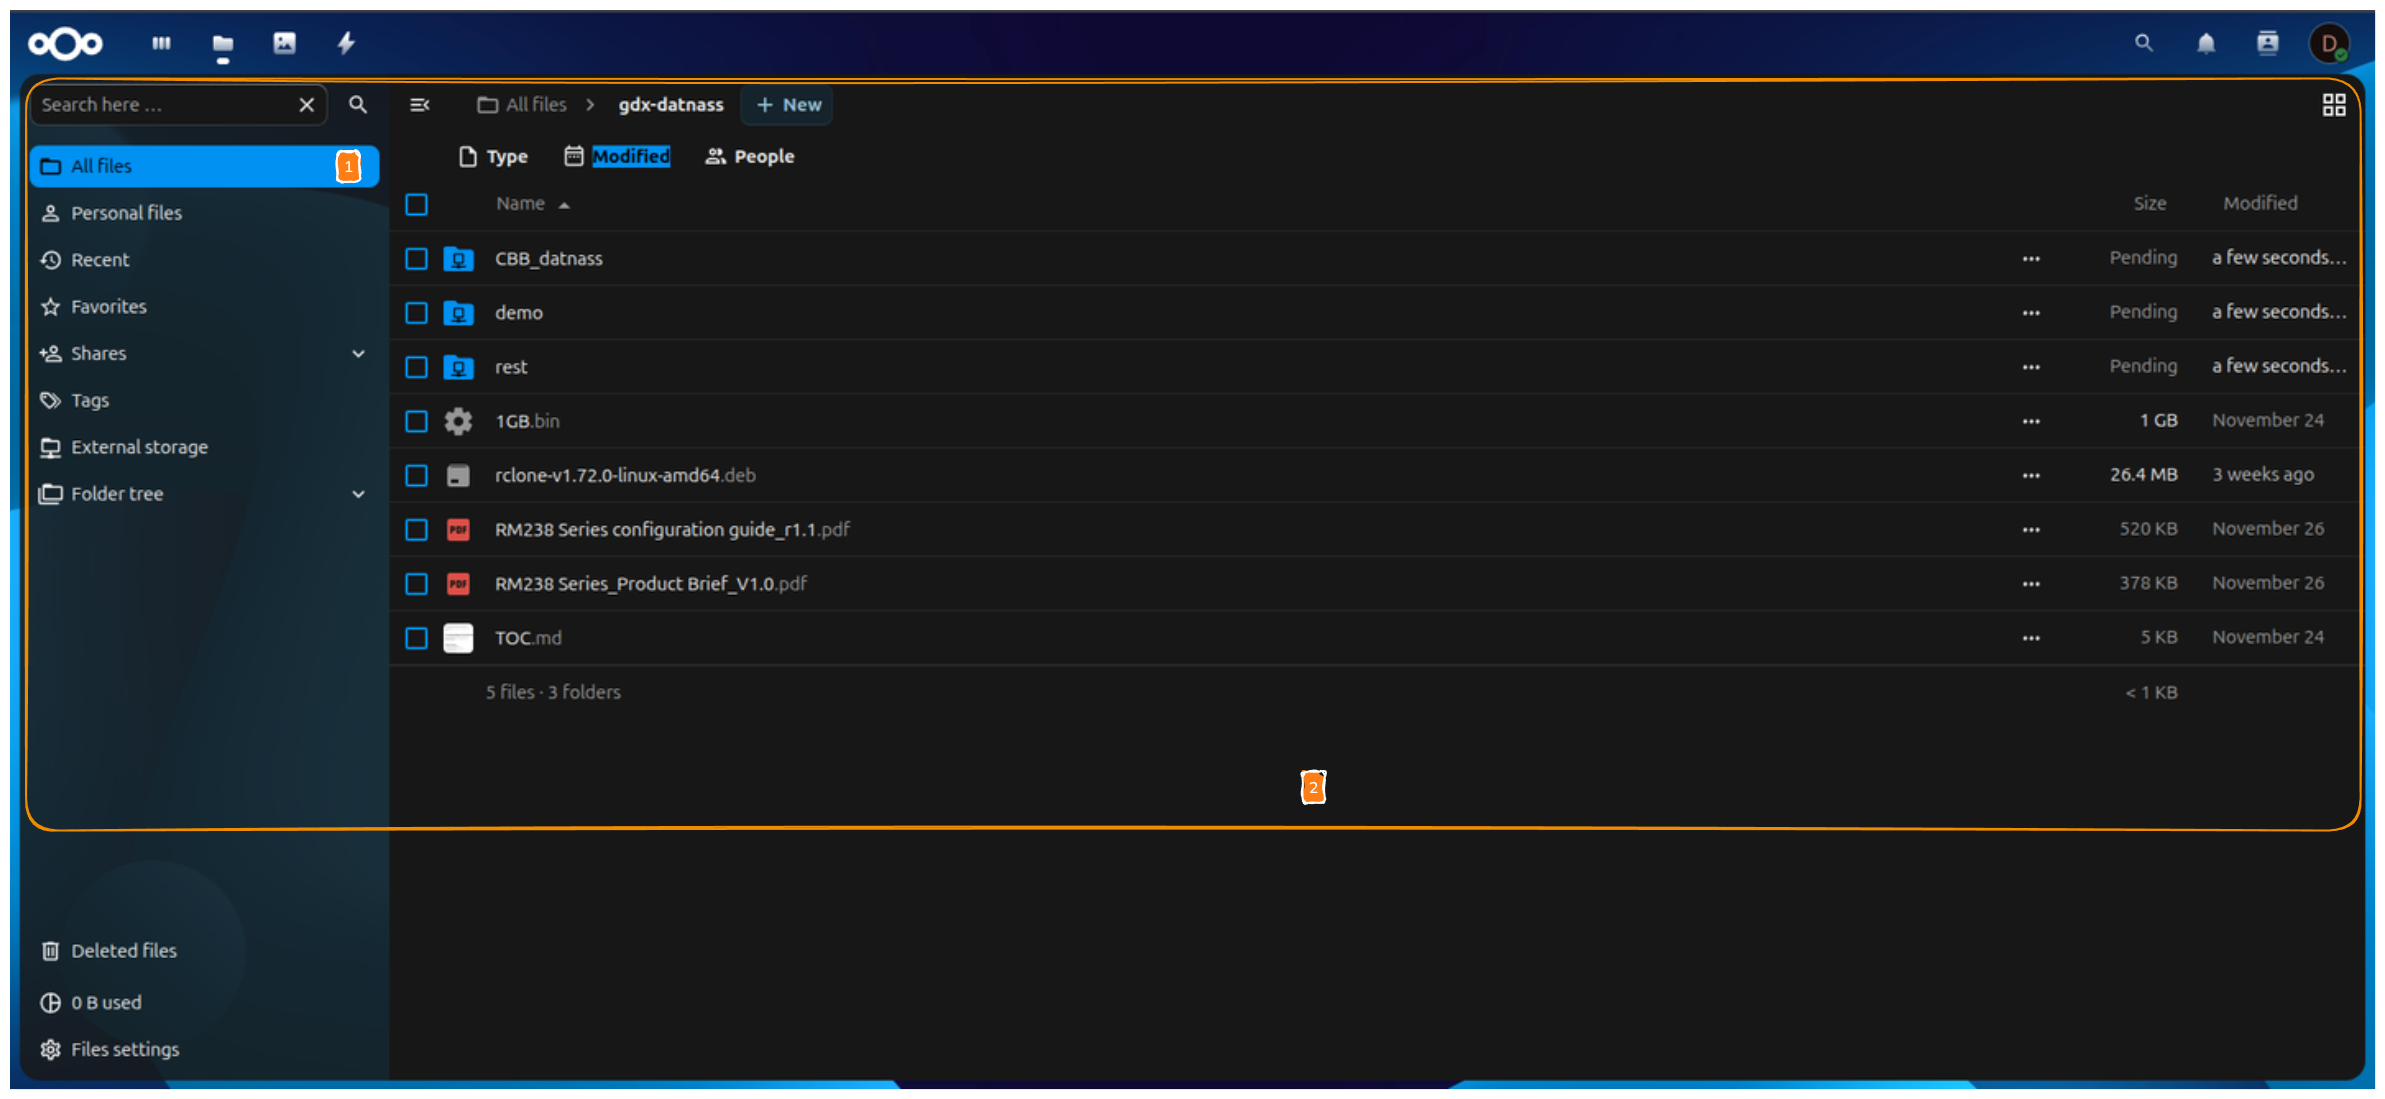
Incorrect credentials will prevent mounting the storage.Step 8: Verify Storage Appears in Files
- Open Files
- Click External storage
- Open gdx-datnass folder
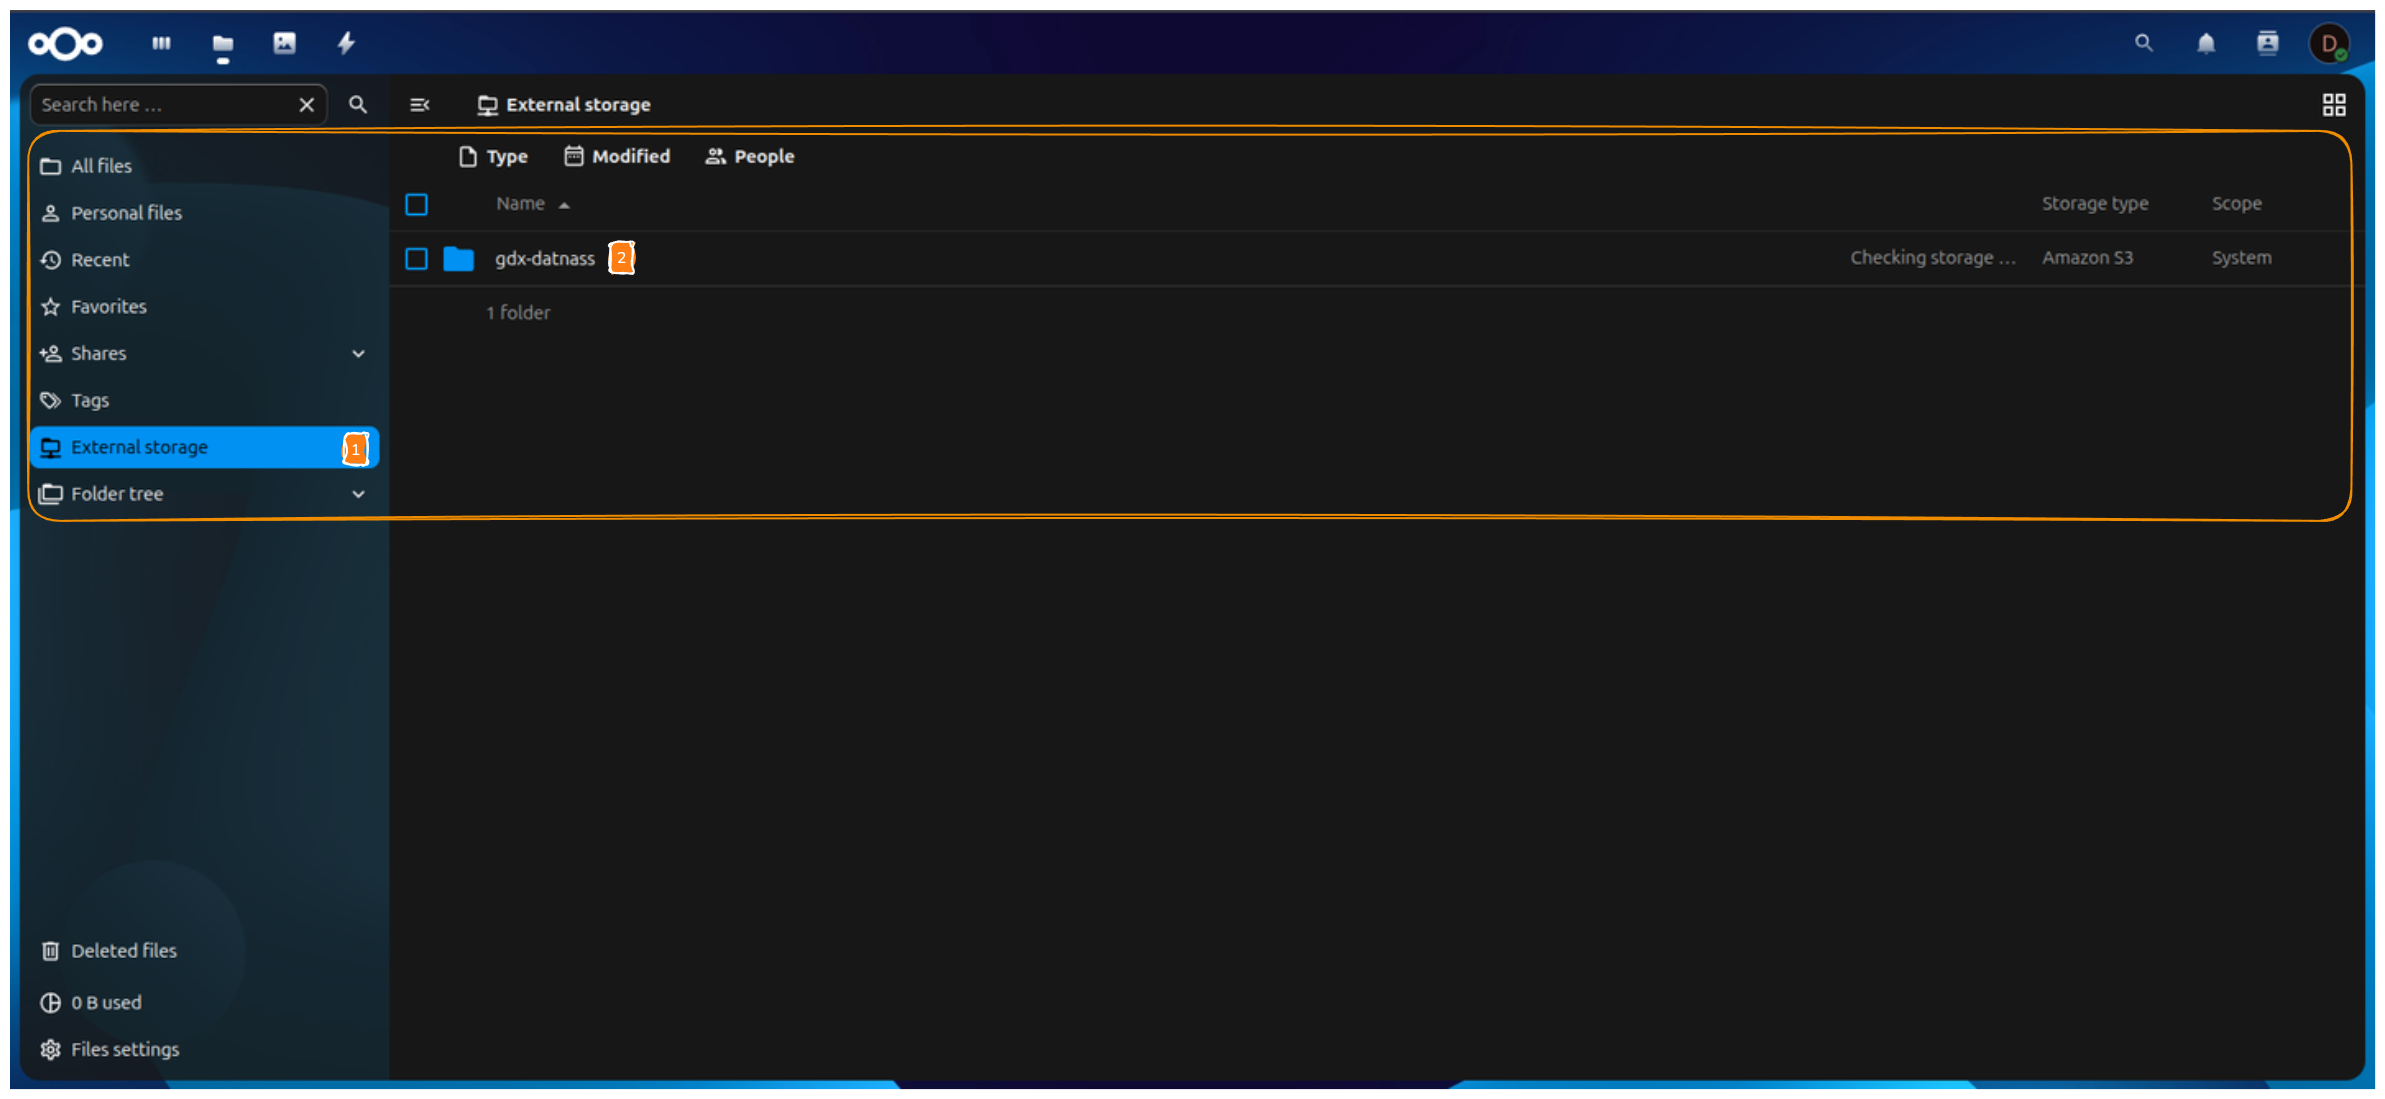
Cloud Storage Files
Files shown here are stored directly in GDX-Cloud.Step 9: Final Confirmation (Your Last Screenshot)
✔️ Storage shows green checkmark
✔️ Folder opens successfully
✔️ Files and folders are visible
✔️ Upload/download works
🎉 Setup is fully complete
Common Issues & Fixes
❌ Red status icon
- Check access key
- Verify bucket name
- Ensure SSL is enabled
❌ Folder not visible
- Refresh page
- Ensure External storage app is enabled
❌ Authentication popup repeats
- Re-enter credentials
- Check permissions
Support
- Nextcloud Documentation: https://docs.nextcloud.com/
- GDX Cloud Console: https://console.gdx.datnass.com